¶ FAQs
¶ Q1: What materials can TOOCAA L2 cut and engrave?
| Model | Mole | 2W IR | 10W | 20W | 40W |
|---|---|---|---|---|---|
| Supported Materials | Engraving | All kinds of metal, leather, opaque plastic, dark-colored non-transparent acrylic, stone, glass (with laser engraver marking paper), ceramic (with laser engraver marking paper), and circuit board | Basswood, tung, pine, plywood, beech, walnut, bamboo, MDF, lacquered metal, tinplate, stainless steel, anodised aluminium, dark-coloured glass, slate, ceramics, jade, marbble, shale, leather, fabrics, canvas, corrugated cardboard, cardboard, plastics, dark-coloured acrylic (except blue) | Basswood, tung, pine, plywood, beech, walnut, bamboo, MDF, lacquered metal, tinplate, stainless steel, anodised aluminium, dark-coloured glass, slate, ceramics, jade, marbble, shale, leather, fabrics, canvas, corrugated cardboard, cardboard, plastics, dark-coloured acrylic (except blue) | Basswood, tung, pine, plywood, beech, walnut, bamboo, MDF, lacquered metal, tinplate, stainless steel, anodised aluminium, dark-coloured glass, slate, ceramics, jade, marbble, shale, leather, fabrics, canvas, corrugated cardboard, cardboard, plastics, dark-coloured acrylic (except blue) |
| Supported Materials | Cutting | / | Basswood, tung, pine, plywood, beech, walnut, bamboo, MDF, leather, fabriccanvas, corrugated paper, cardboard, plastic, dark acrylic (except blue) | Basswood, tung, pine, plywood, beech, walnut, bamboo, MDF, leather, fabriccanvas, corrugated paper, cardboard, plastic, dark acrylic (except blue) | Basswood, tung, pine, plywood, beech, walnut, bamboo, MDF, leather, fabriccanvas, corrugated paper, cardboard, plastic, dark acrylic (except blue) |
¶ Q2: How do I determine the settings for cutting or engraving a material?
You can view the cutting and engraving parameter settings for common materials in the TOOCAA L2 online documentation. The online documentation URL is:
https://www.toocaa.com/pages/material-settings-for-toocaa-machines
¶ Q3: What is the maximum working range of TOOCAA L2?
TOOCAA L2 maximum working range: 415mm * 395mm.
¶ Q4: What is the maximum thickness of wood that TOOCAA L2 can cut?
The maximum thickness of basswood that can be cut by 10W laser module, 20W laser module and 40W laser module is 6mm, 10mm and 15mm respectively.
¶ Q5: Where can I buy cost-effective cutting and engraving materials, such as wood boards, acrylic, etc.?
TOOCAA L2 selects the most cost-effective cutting and engraving materials from global suppliers. You can log in to the TOOCAA official website store to purchase. The official website store address is: https://www.toocaa.com/collections/materials。
¶ Q6: Why can't the tool lock arm be pressed to the bottom?
The tool lock arm does not need to be pressed to the bottom, it only needs to be pressed enough to fix the laser module.
¶ Q7: After the machine is connected to the computer, Lightburn cannot recognize the machine. What should I do?
¶ Initial examination
-
Please check that your machine is powered on.
-
Please make sure that the USB cable is connected stably.
-
Close other control software that may communicate with the machine.
-
Please make sure that you have selected the correct device in Lightburn and that the controller type and connection method are correct.
¶ If Lightburn still does not recognize the machine
¶ Check the USB cable
- Please make sure you are using a USB data cable, not a USB charging cable, and make sure the USB cable you are using has the data transfer function.
- Computer USB ports can occasionally malfunction. If your computer has multiple USB ports, try plugging the USB cable into a different USB port to test.
- If you are using a Windows computer and find that you can connect via a USB cable but the connection fails after a while, check your computer's power management settings.
 Tips:
Tips:
- Open Control Panel
- Click "Hardware and Sound"
- Click Power Options
- Under "Preferred Plans", click Change plan settings for the active power plan.
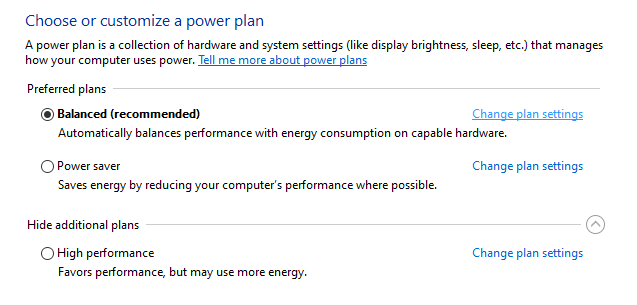
- Click Change advanced power settings
- Open USB Settings
- Open the USB Selective Suspend setting and select Disabled from the drop-down window.
- Click “Apply”, and then click “OK” to close the window.
¶ Check Drivers
If you have problems connecting to your machine, you may need to install or update the drivers.
Requires CH340 driver. The latest version is available from the WCH website for Windows, Mac, and Linux.
WCH website: https://www.wch-ic.com/downloads/CH341SER_EXE.html
If the above does not resolve the issue, please visit the Lightburn troubleshooting guide: https://docs.lightburnsoftware.com/Troubleshooting/ConnectionTroubleshooting.html.
Or contact our technical support at support@toocaa.com.
¶ Q8: The laser module cannot be effectively fixed / the laser module is easy to slip
Solution steps:
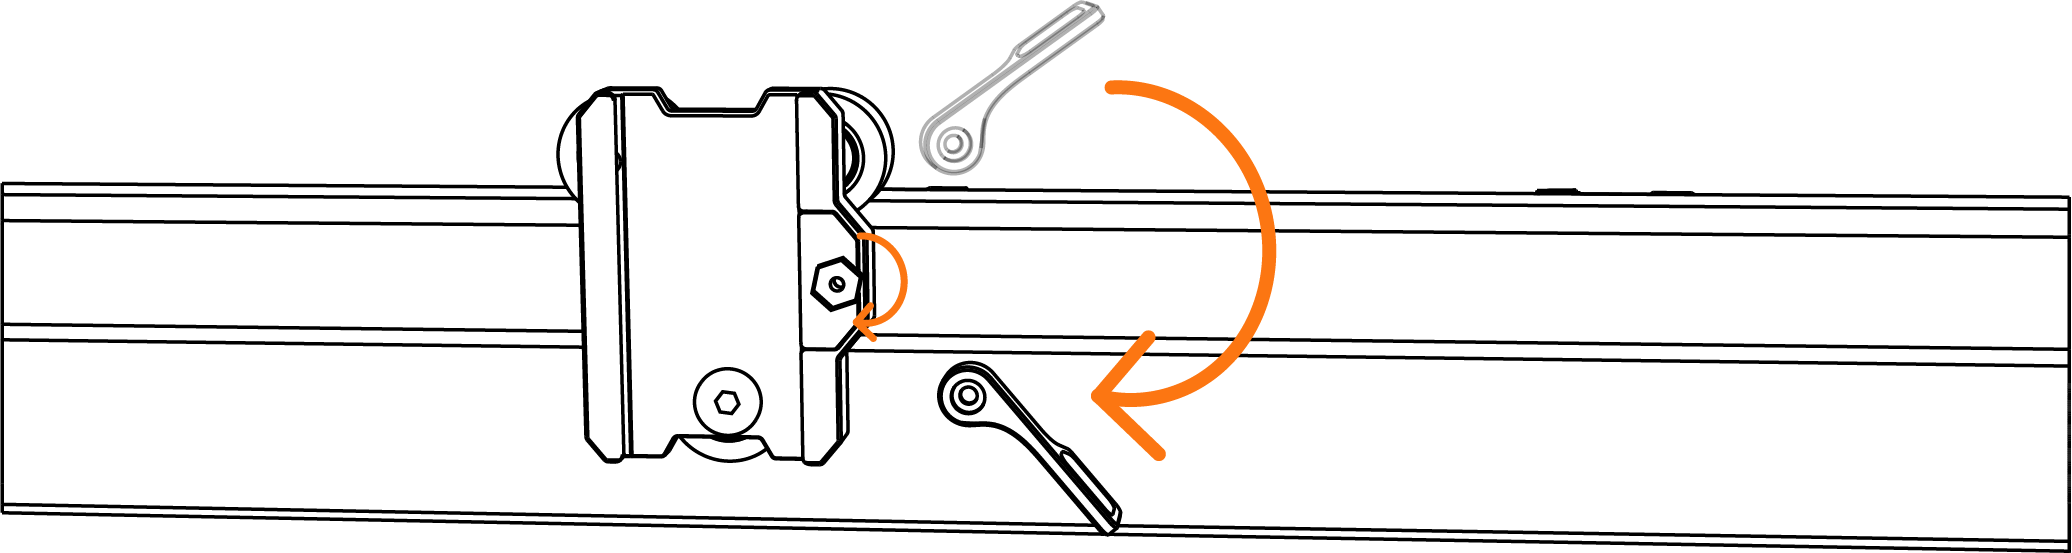
1.Take out the laser module.
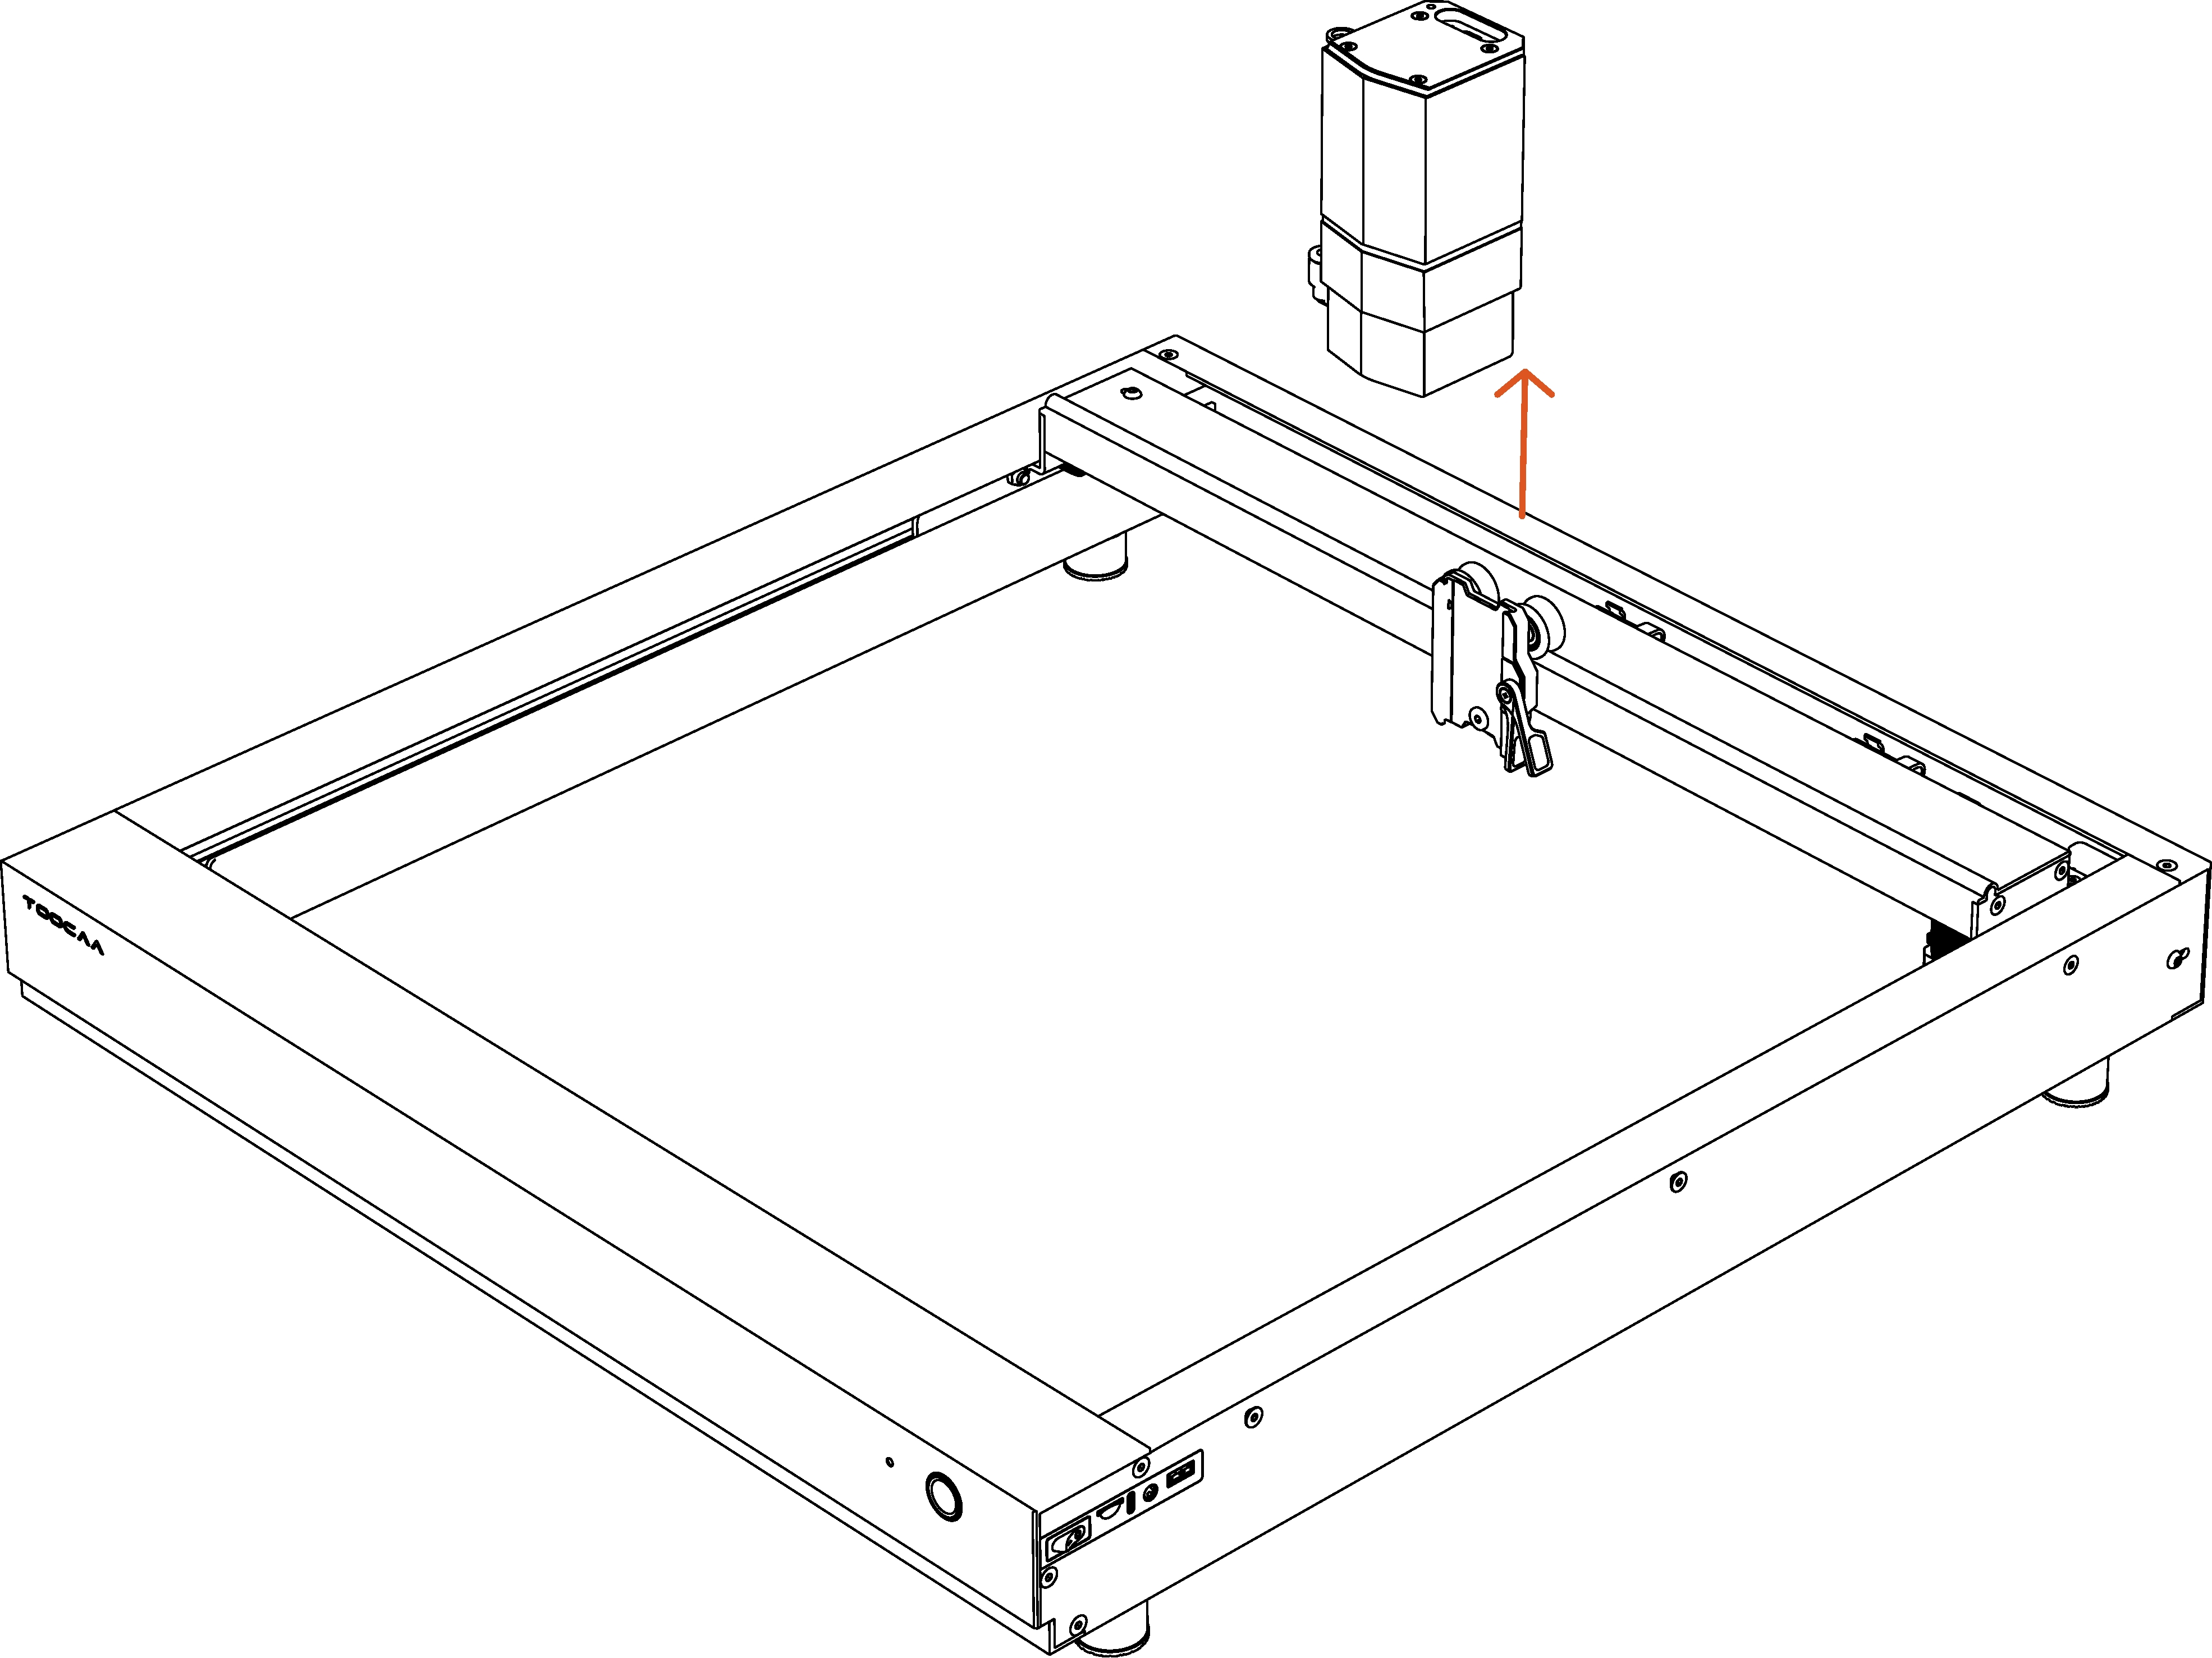
2.Remove the outer screw and the tool lock arm.
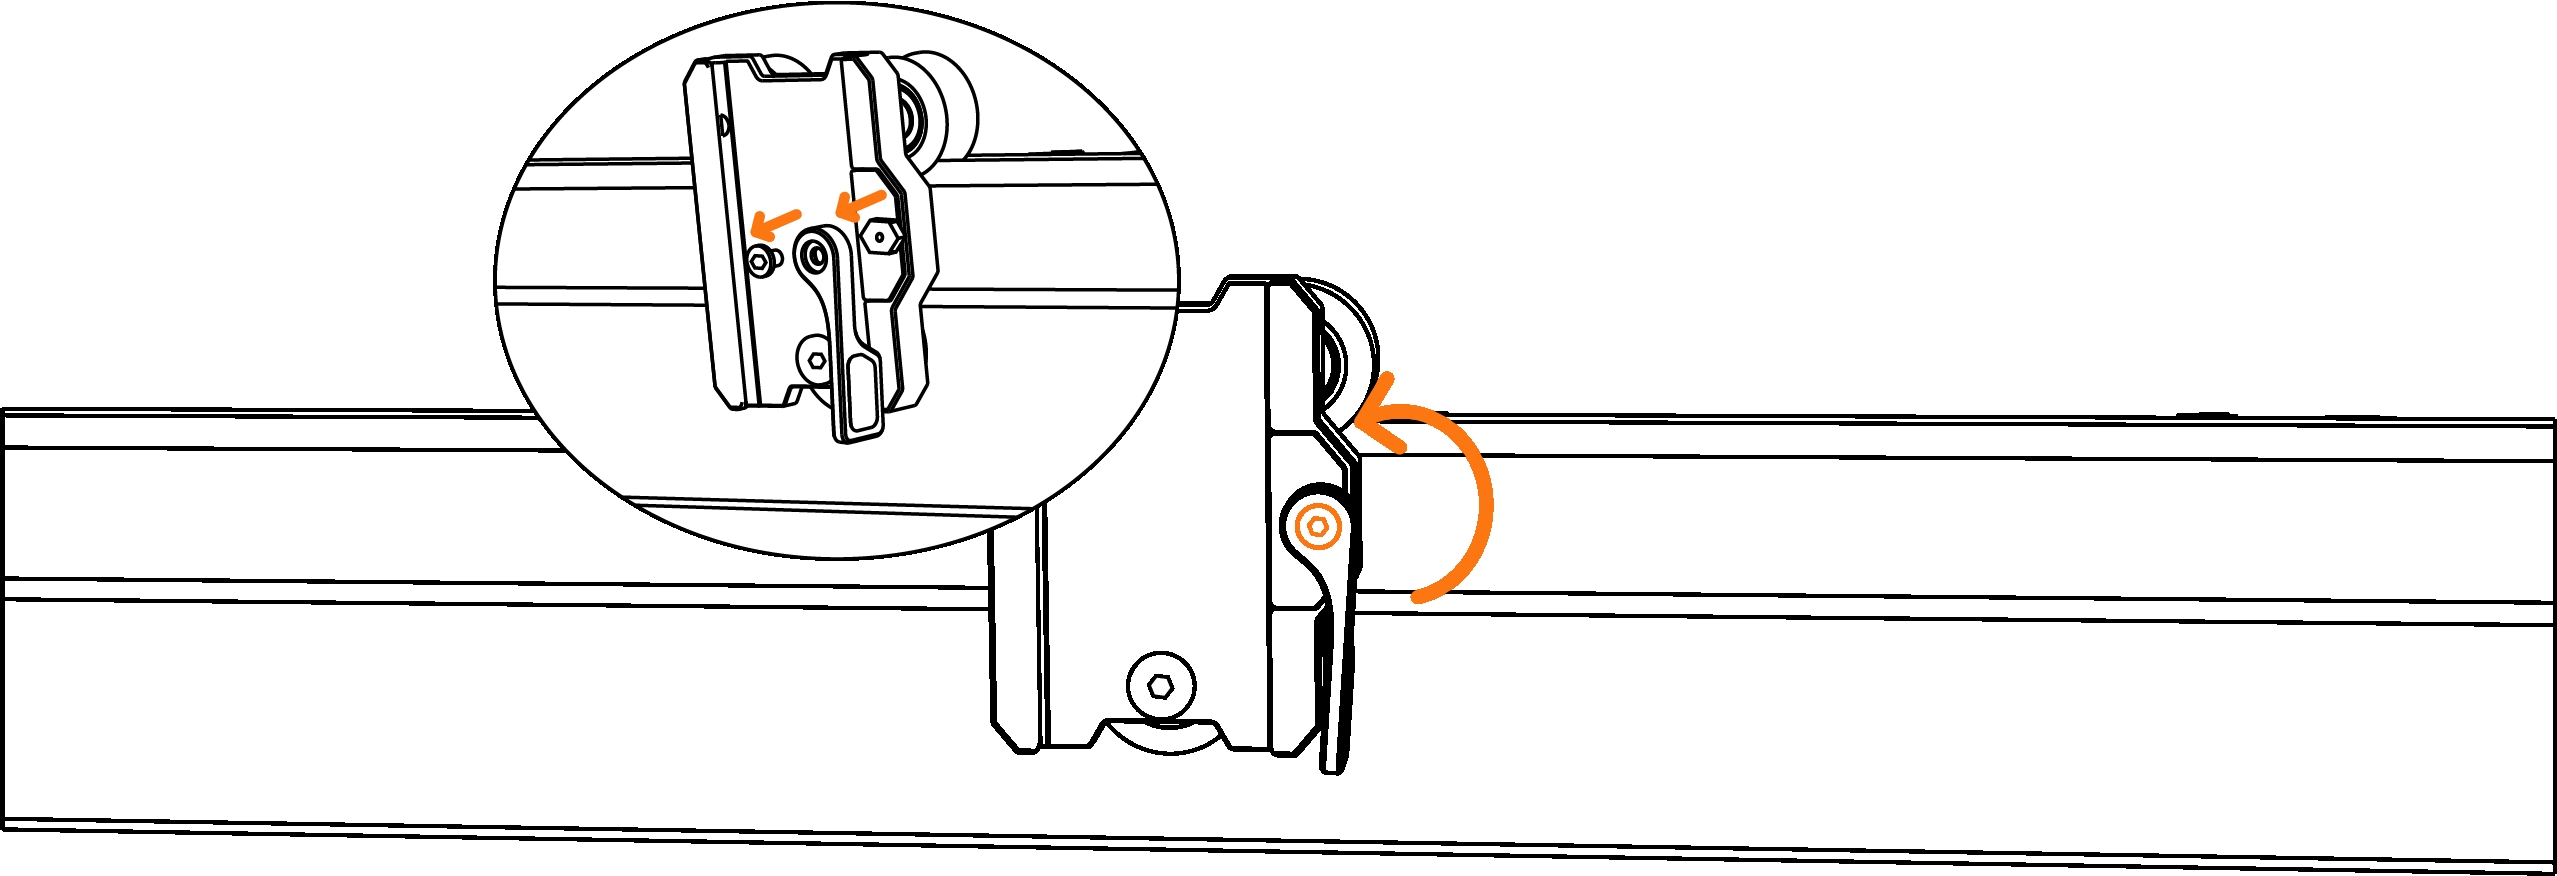
3.Adjust the tightness of the screw inside the tool carriage.
TIPS:Clockwise adjustment is for tightening, and counterclockwise adjustment is for loosening. Please adjust according to the actual situation.

¶ Q9: Description of Alarm
When the user triggers an alarm condition on the TOOCAA L2, the laser output is automatically switched off.
| Warning Sound Identify | Hidden Meaning |
|---|---|
| 1 short beep | Trigger limit switches |
| 2 short beeps | Opening the shield during laser processing |
| 3 short beeps | USB lock not detected |
| 4 short beeps | No laser module connected |
| 5 short beeps | High temperature warning |
| Long 1 beep, short 1 beep | Machine tilt detected |
| Long 1 beep, short 2 beeps | Power supply mismatch |
| Long 1 beep, short 3 beeps | TF card abnormality during laser processing |
| Long 1 beep, short 4 beeps | Flame detected in working area |
¶ Q10: Description of Indicator Light
| Indicator Color | Indicator Light Meaning |
|---|---|
| Solid Yellow | Initialize |
| Cyan Breathing | Frame Running |
| Cyan Breathing | Start Carving |
| Cyan Flashing | Pause Carving |
| Cyan Breathing | Continue Carving |
| Solid Yellow | Force Termination |
| Solid Yellow | Carving Completed |
| Red Flashing | Test Mode |
| Solid Yellow | Initialize |
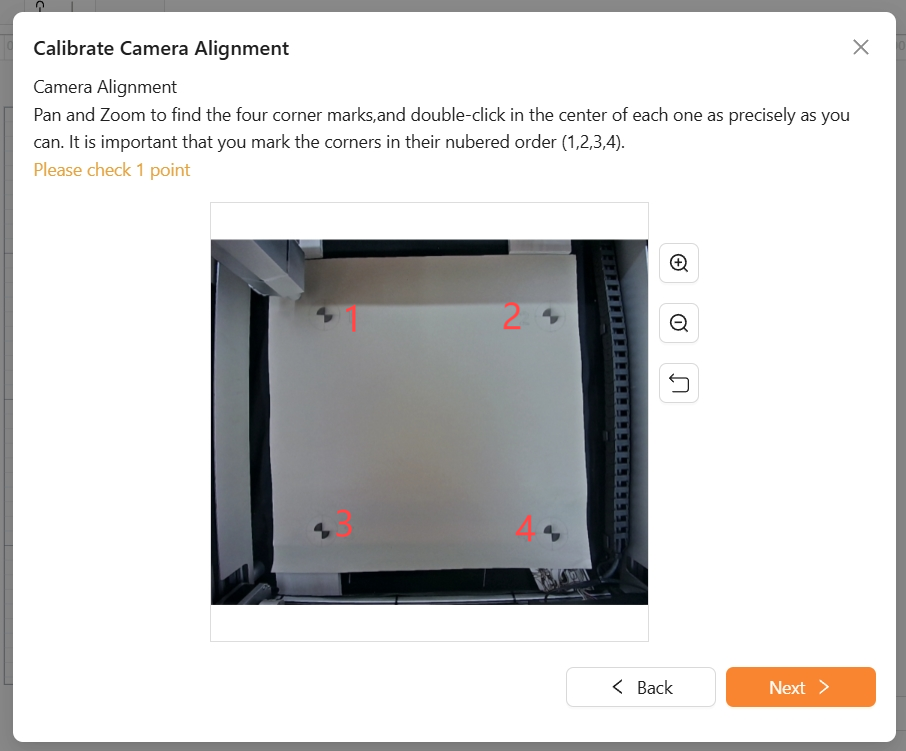
¶ Q11:TOOCAA L2 smart camera displays an error in the TOOCAA Studio
Please be sure to mark and confirm the 4 marking points on the test image in the numerical order shown.
Note:
1. Make sure the mouse is accurately at the center of the circle of the marking point.
2. You can use the mouse to move and zoom in and out of the test image, so as to accurately click the center of the circle of the four positions.
3. Click order: upper left corner→upper right corner→lower left corner→lower right corner. After the 4 positions are accurately.
marked in turn, click Finish. Then click Next.

sidebar_position: 4
sidebar_label: TOOCAA Studio Firmware Version Update Tutorial
¶ Q12:TOOCAA L2 & TOOCAA Studio Firmware Version Update Tutorial
¶ Firmware version update
To achieve the best cutting and engraving level for the L2 laser cutting machine, please ensure that the machine firmware is the latest version. If the current firmware version is not the latest, please read the following graphic instructions and complete the firmware upgrade to the newest version.
Note:A firmware version number that is too low may impact the effects of cutting and engraving. Please update it in time!
¶ TOOCAA Studio's Official Website
TOOCAA Studio official website: https://toocaastudio.com/
¶ Important Things to Know Before Updating
- Ensure the TOOCAA L2 laser cutting machine is connected to the computer via a USB cable and the serial port is selected correctly.
- Ensure the power and Wi-Fi connection between the TOOCAA L2 laser cutting machine and the computer is stable during the firmware update process.
- Do not use or move the TOOCAA L2 laser cutting machine and computer during the firmware version update.
¶ Firmware upgrade graphic tutorial
Connect the TOOCAA L2 laser cutting machine to the computer with a USB cable. After starting the TOOCAA L2 laser cutting machine, use any browser to open TOOCAA Studio and click [Connect device].
Select the TOOCAA L2 Serial Port that appears in the pop-up window and click [Connect].
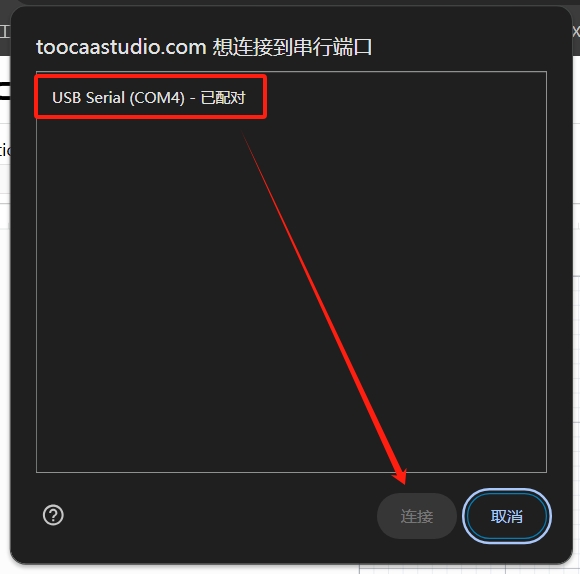
TOOCAA L2 serial port verification method :Unplug the USB cable and reconnect it. The new serial port that appears in the pop-up window is the TOOCAA L2 serial port.
Note:Please make sure that the serial port is the TOOCAA L2 serial port. If it is connected to other device serial ports, the firmware cannot be upgraded.
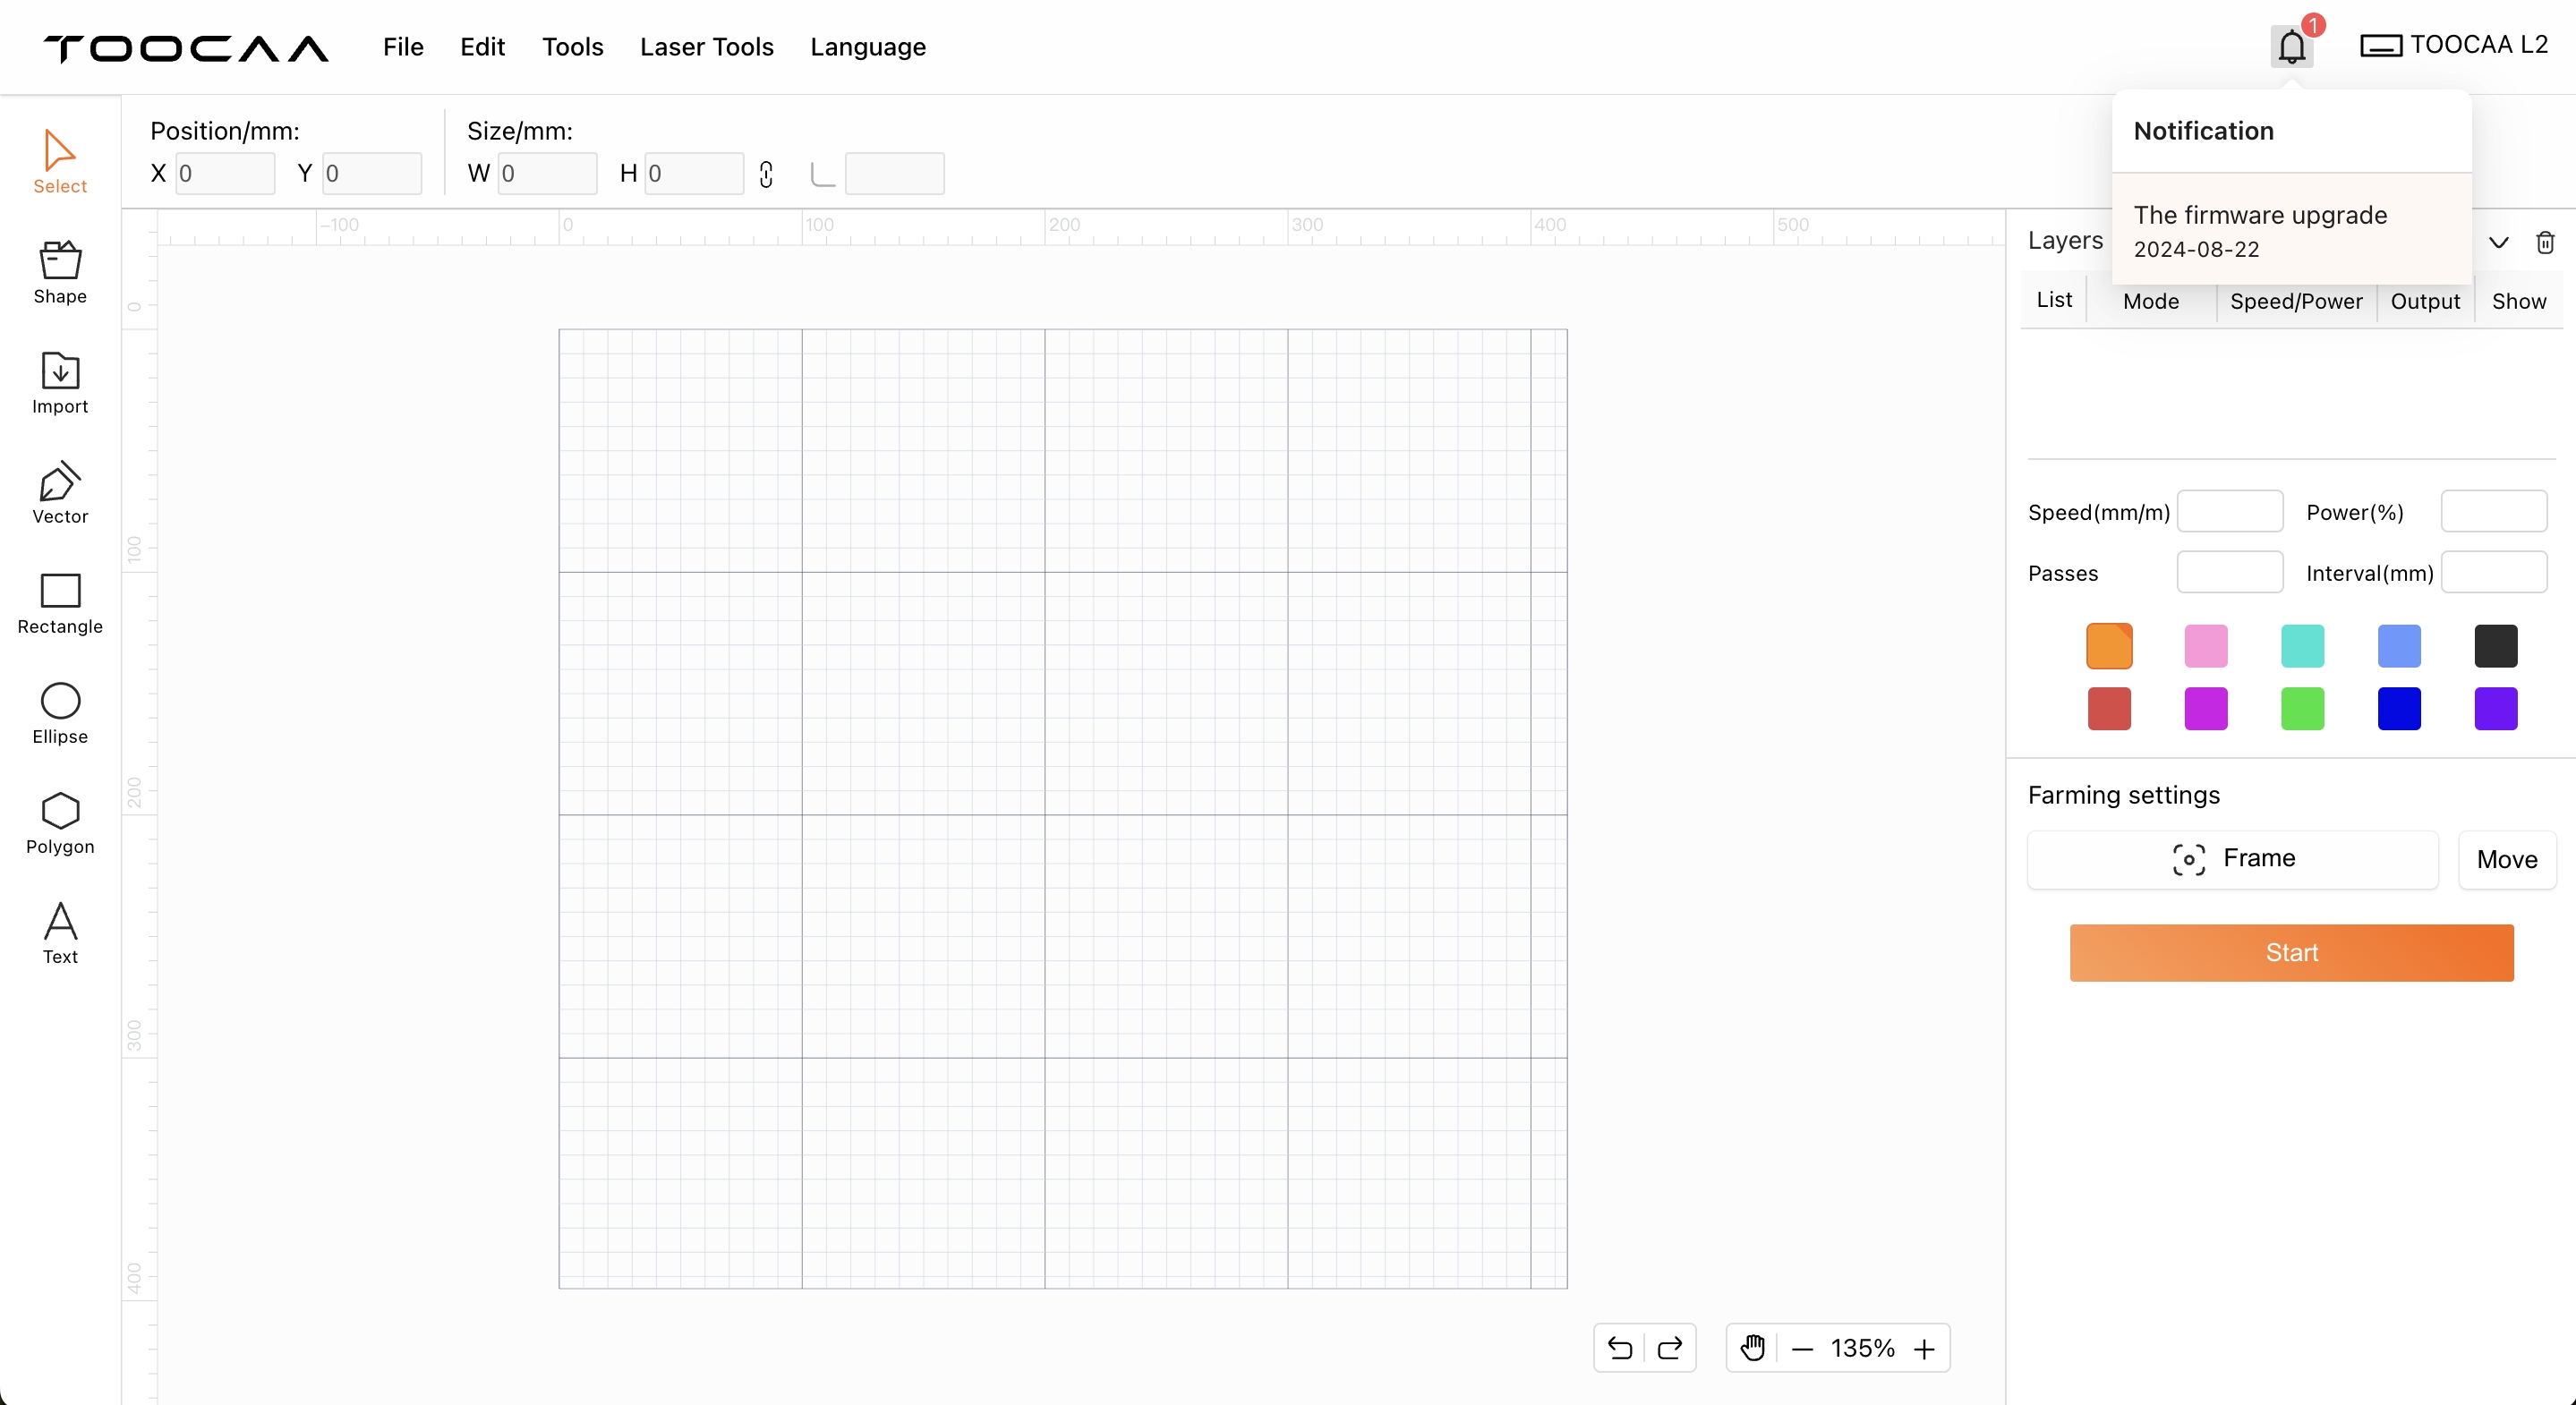
After confirming in the upper right corner that the connected device model is TOOCAA L2, click [The firmware upgrade].
After reading the version update content, click [Upgrade].
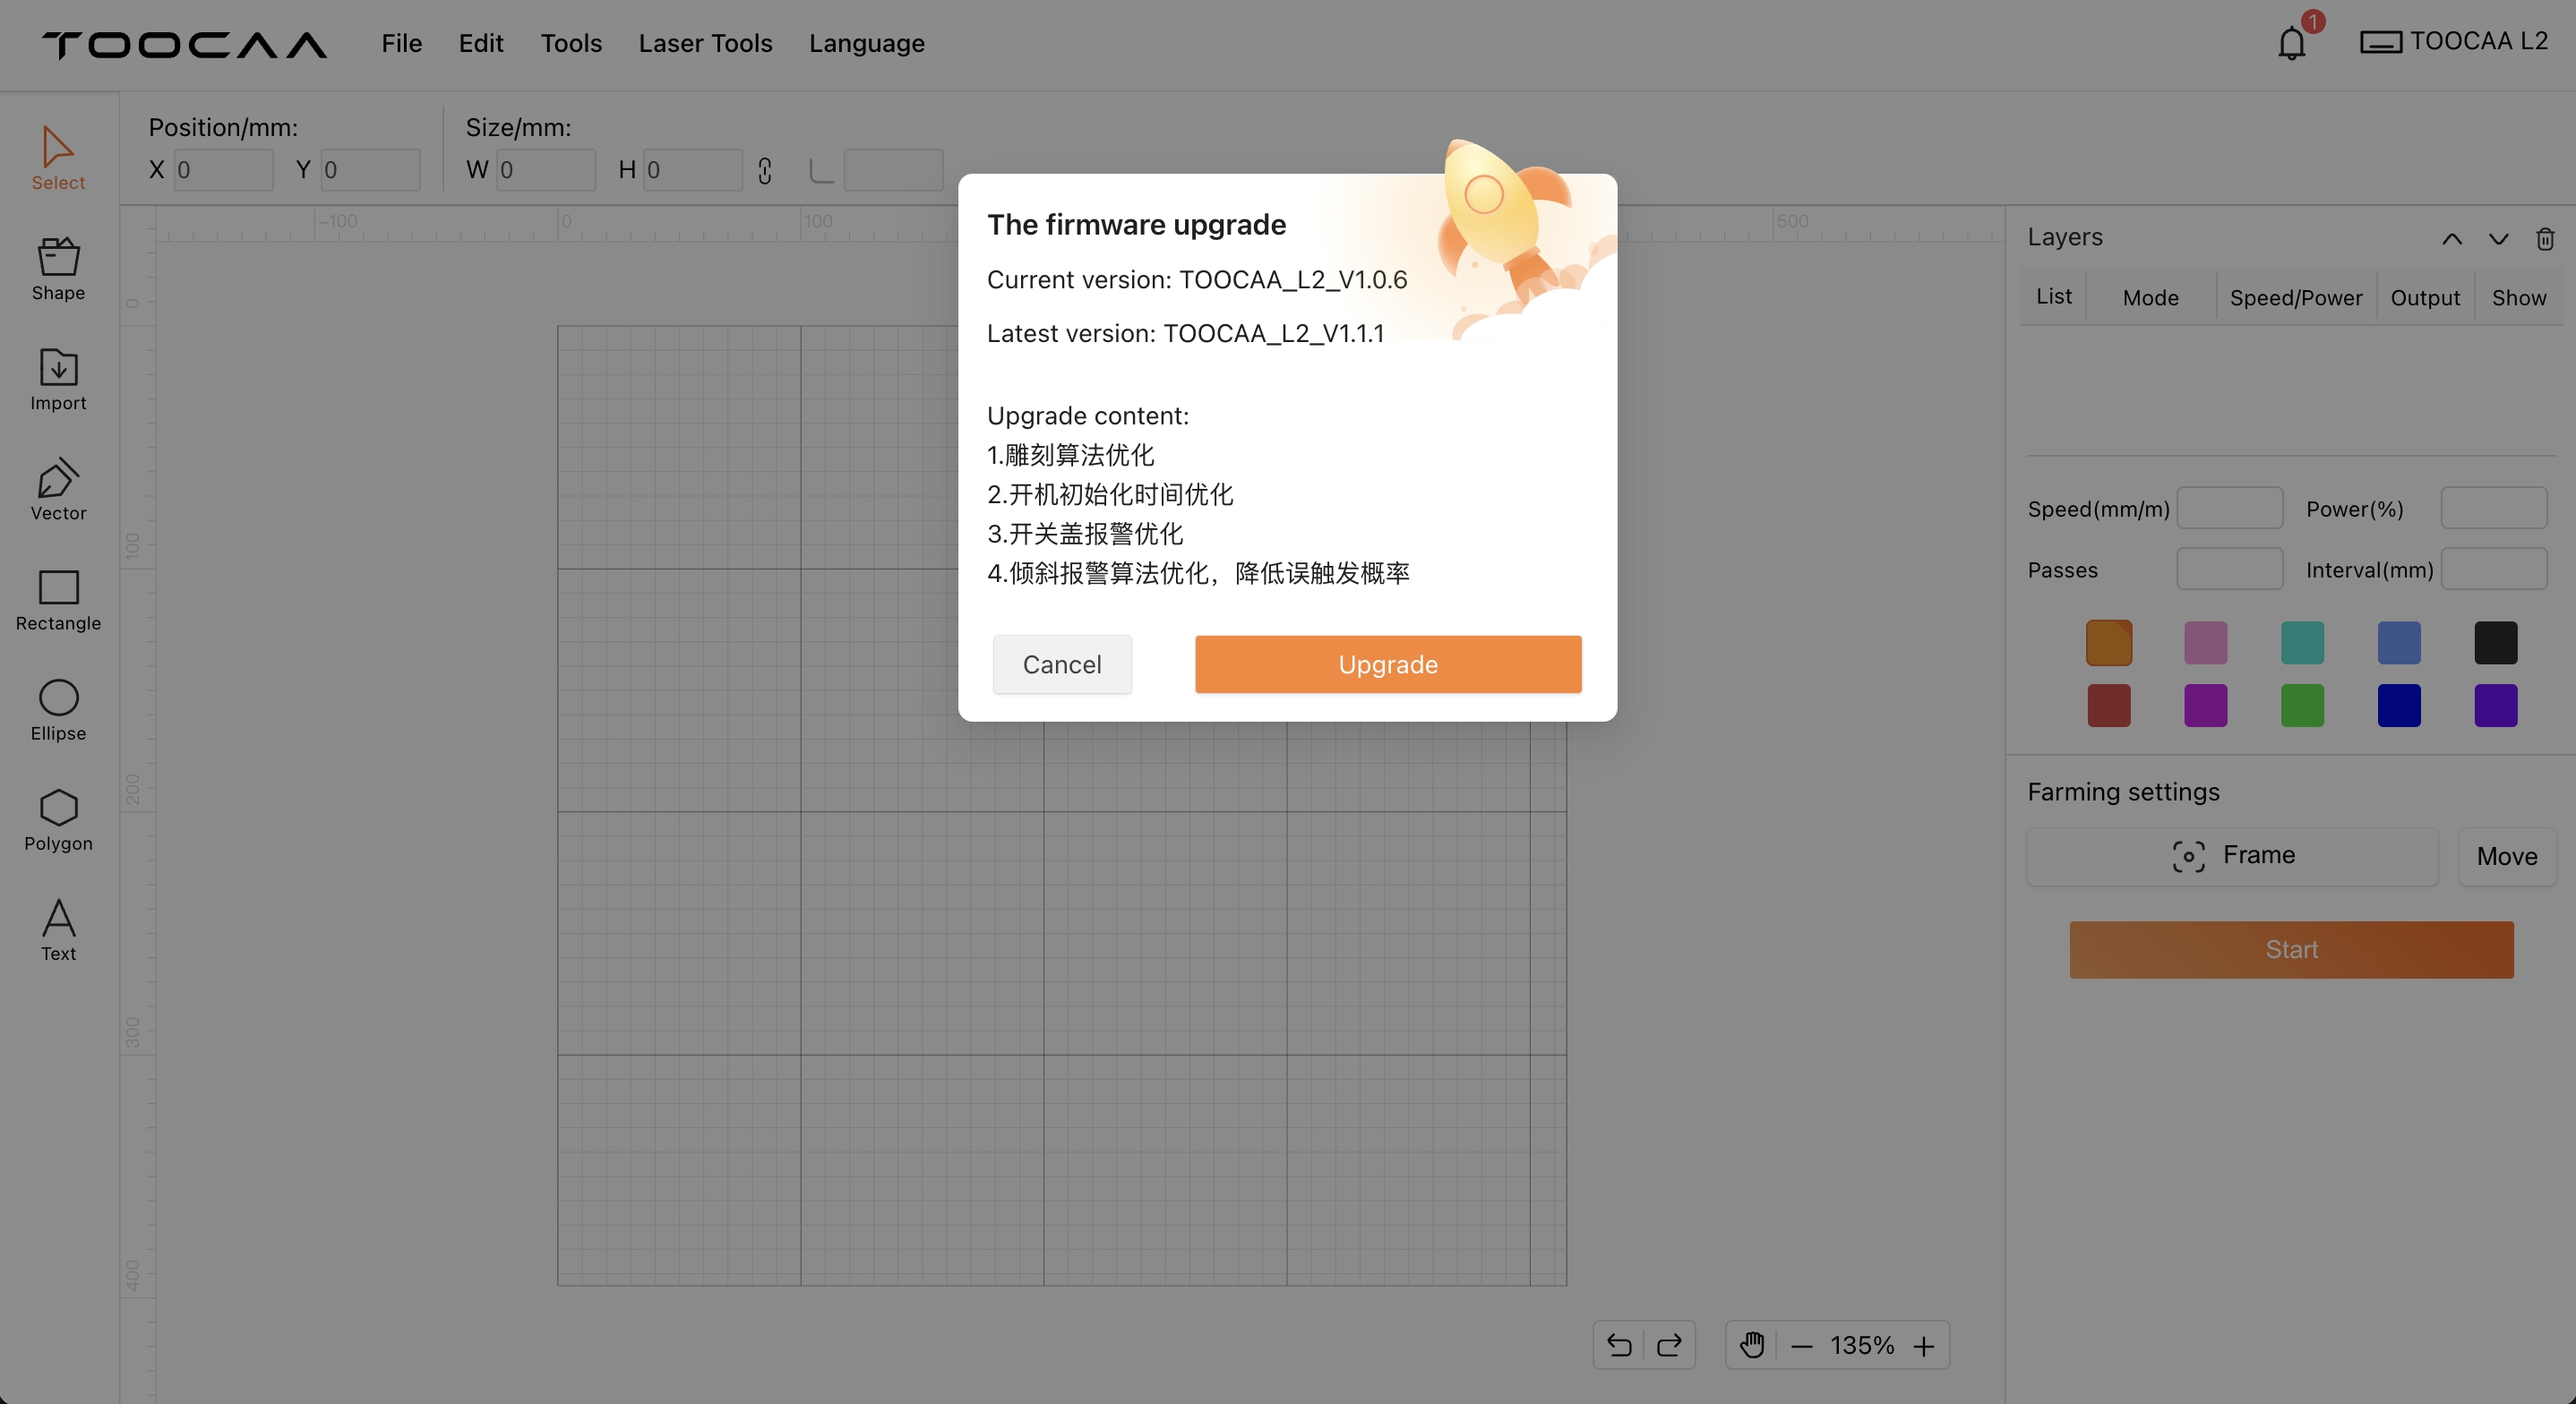
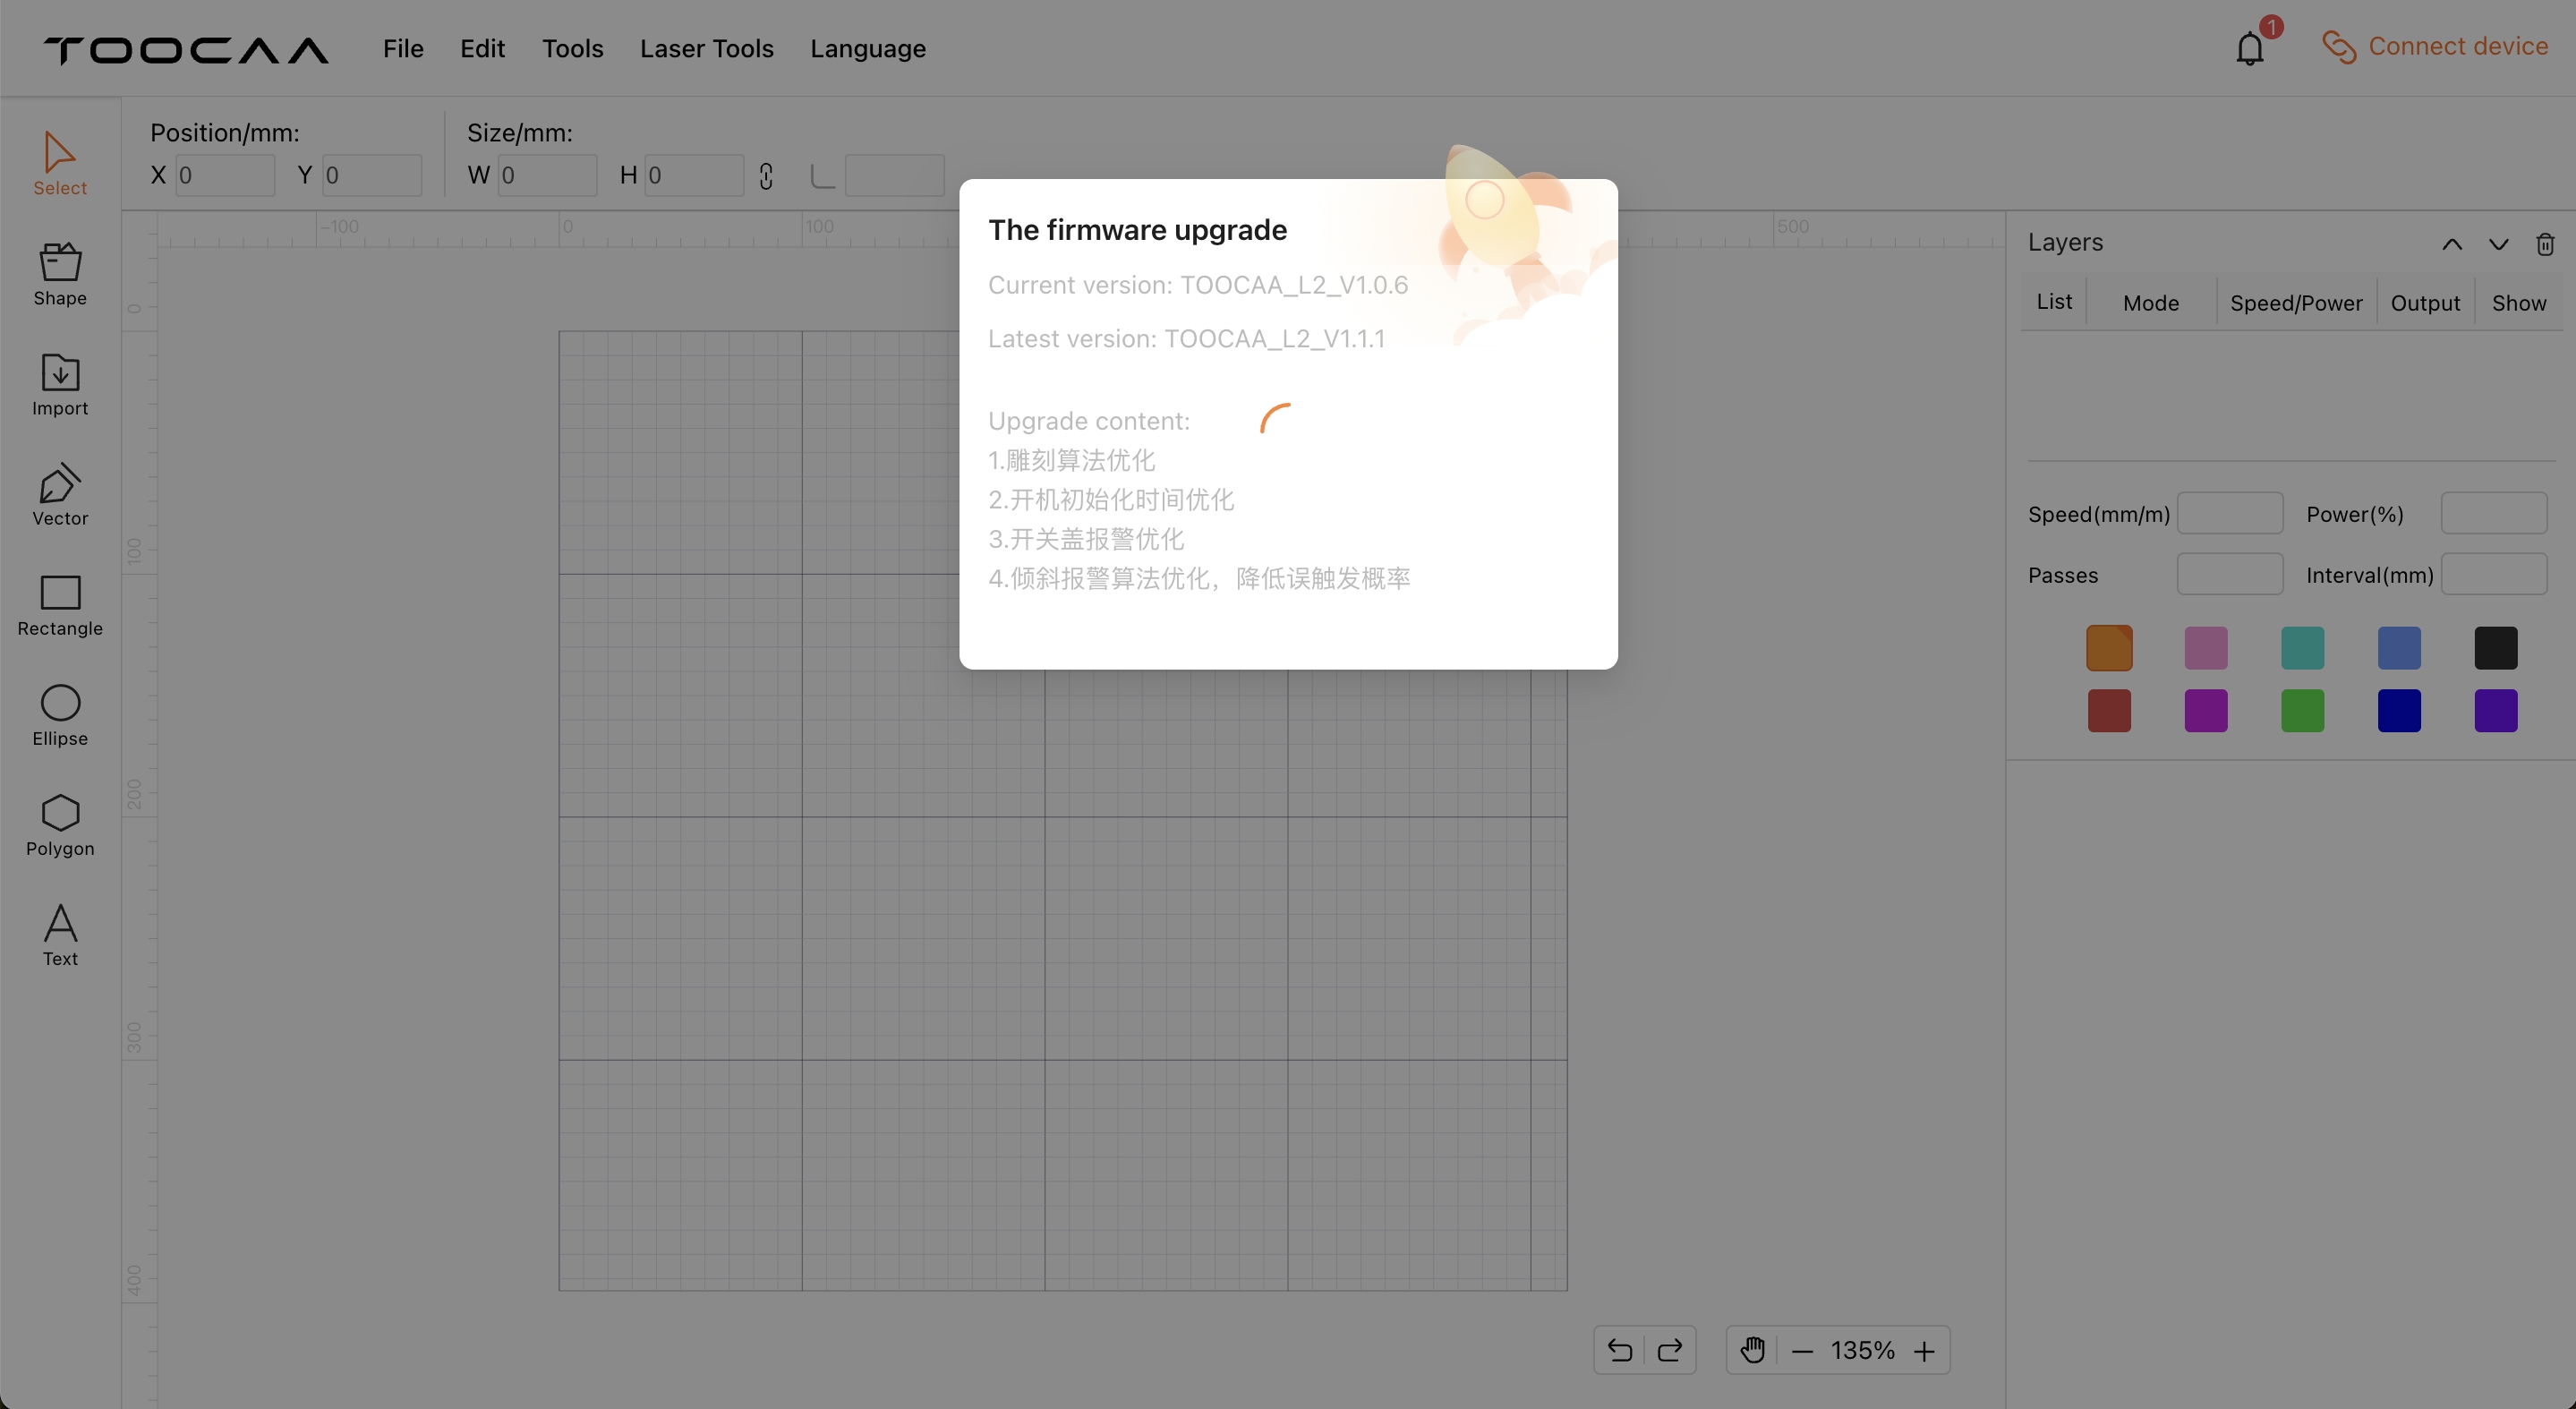
Q&A:After clicking [Upgrade], TOOCAA Studio starts to establish a firmware update connection with TOOCAA L2. No operation is required on this interface.

¶ How to handle firmware upgrade failure
1.If the TOOCAA Studio firmware information pop-up window shows that the update failed, please restart the TOOCAA L2 laser cutting machine and TOOCAA Studio, check whether the serial port matches, and try to update again.
2. If you still cannot successfully update the firmware after multiple retries, please contact TOOCAA after-sales technicians in time (TOOCAA after-sales technicians contact information: zack@toocaa.com), and we will solve it for you as soon as possible.