¶ Learn About Your TOOCAA NOVA Rotary
¶ Key Features
-
Flexible & Versatile
The 2-in-1 multifunctional rotary attachment features a 180° adjustable three-jaw chuck, suitable for approximately 90% of common cylindrical objects, spherical items, and irregularly shaped workpieces. It supports a wide range of materials and objects, including wine glasses, jewelry, baseball bats, rings, and more. -
Exclusive Patented Design
Equipped with a globally exclusive patented quick-release jaw system, allowing jaw replacement within three seconds. By switching between different locking components, objects of various diameters can be engraved at 360° without disassembly or additional part storage, significantly improving workflow efficiency. -
High Speed & Precision
The rotary chuck attachment supports engraving speeds of up to 360° per second. Powered by a high-precision stepper motor with a minimum step angle of 0.02°, it ensures excellent accuracy and captures fine design details. -
Customer-First Service
If you encounter any issues while using the rotary attachment, please contact us. TOOCAA product specialists provide friendly customer service and professional technical support within 24 hours.
¶ Specifications
| Item | Description |
|---|---|
| Product Name | TOOCAA NOVA Rotary |
| Dimensions | 130.00 × 106.00 × 80.00 mm |
| Net Weight | 0.83 kg |
| Accessories | Chuck rotation; Circular rotation |
| Compatible Machine | TOOCAA NOVA |
| Compatible Software | TOOCAA Studio / LightBurn |
¶ Applicable Object Reference
When engraving large or irregularly shaped materials, different accessories may be required. The table below provides a reference for suitable objects for each accessory type.
| Accessory | Applicable Objects | Diameter Range | Application Scenarios |
|---|---|---|---|
| Chuck Rotation | Objects with round or non-circular bases | 0–120 mm | 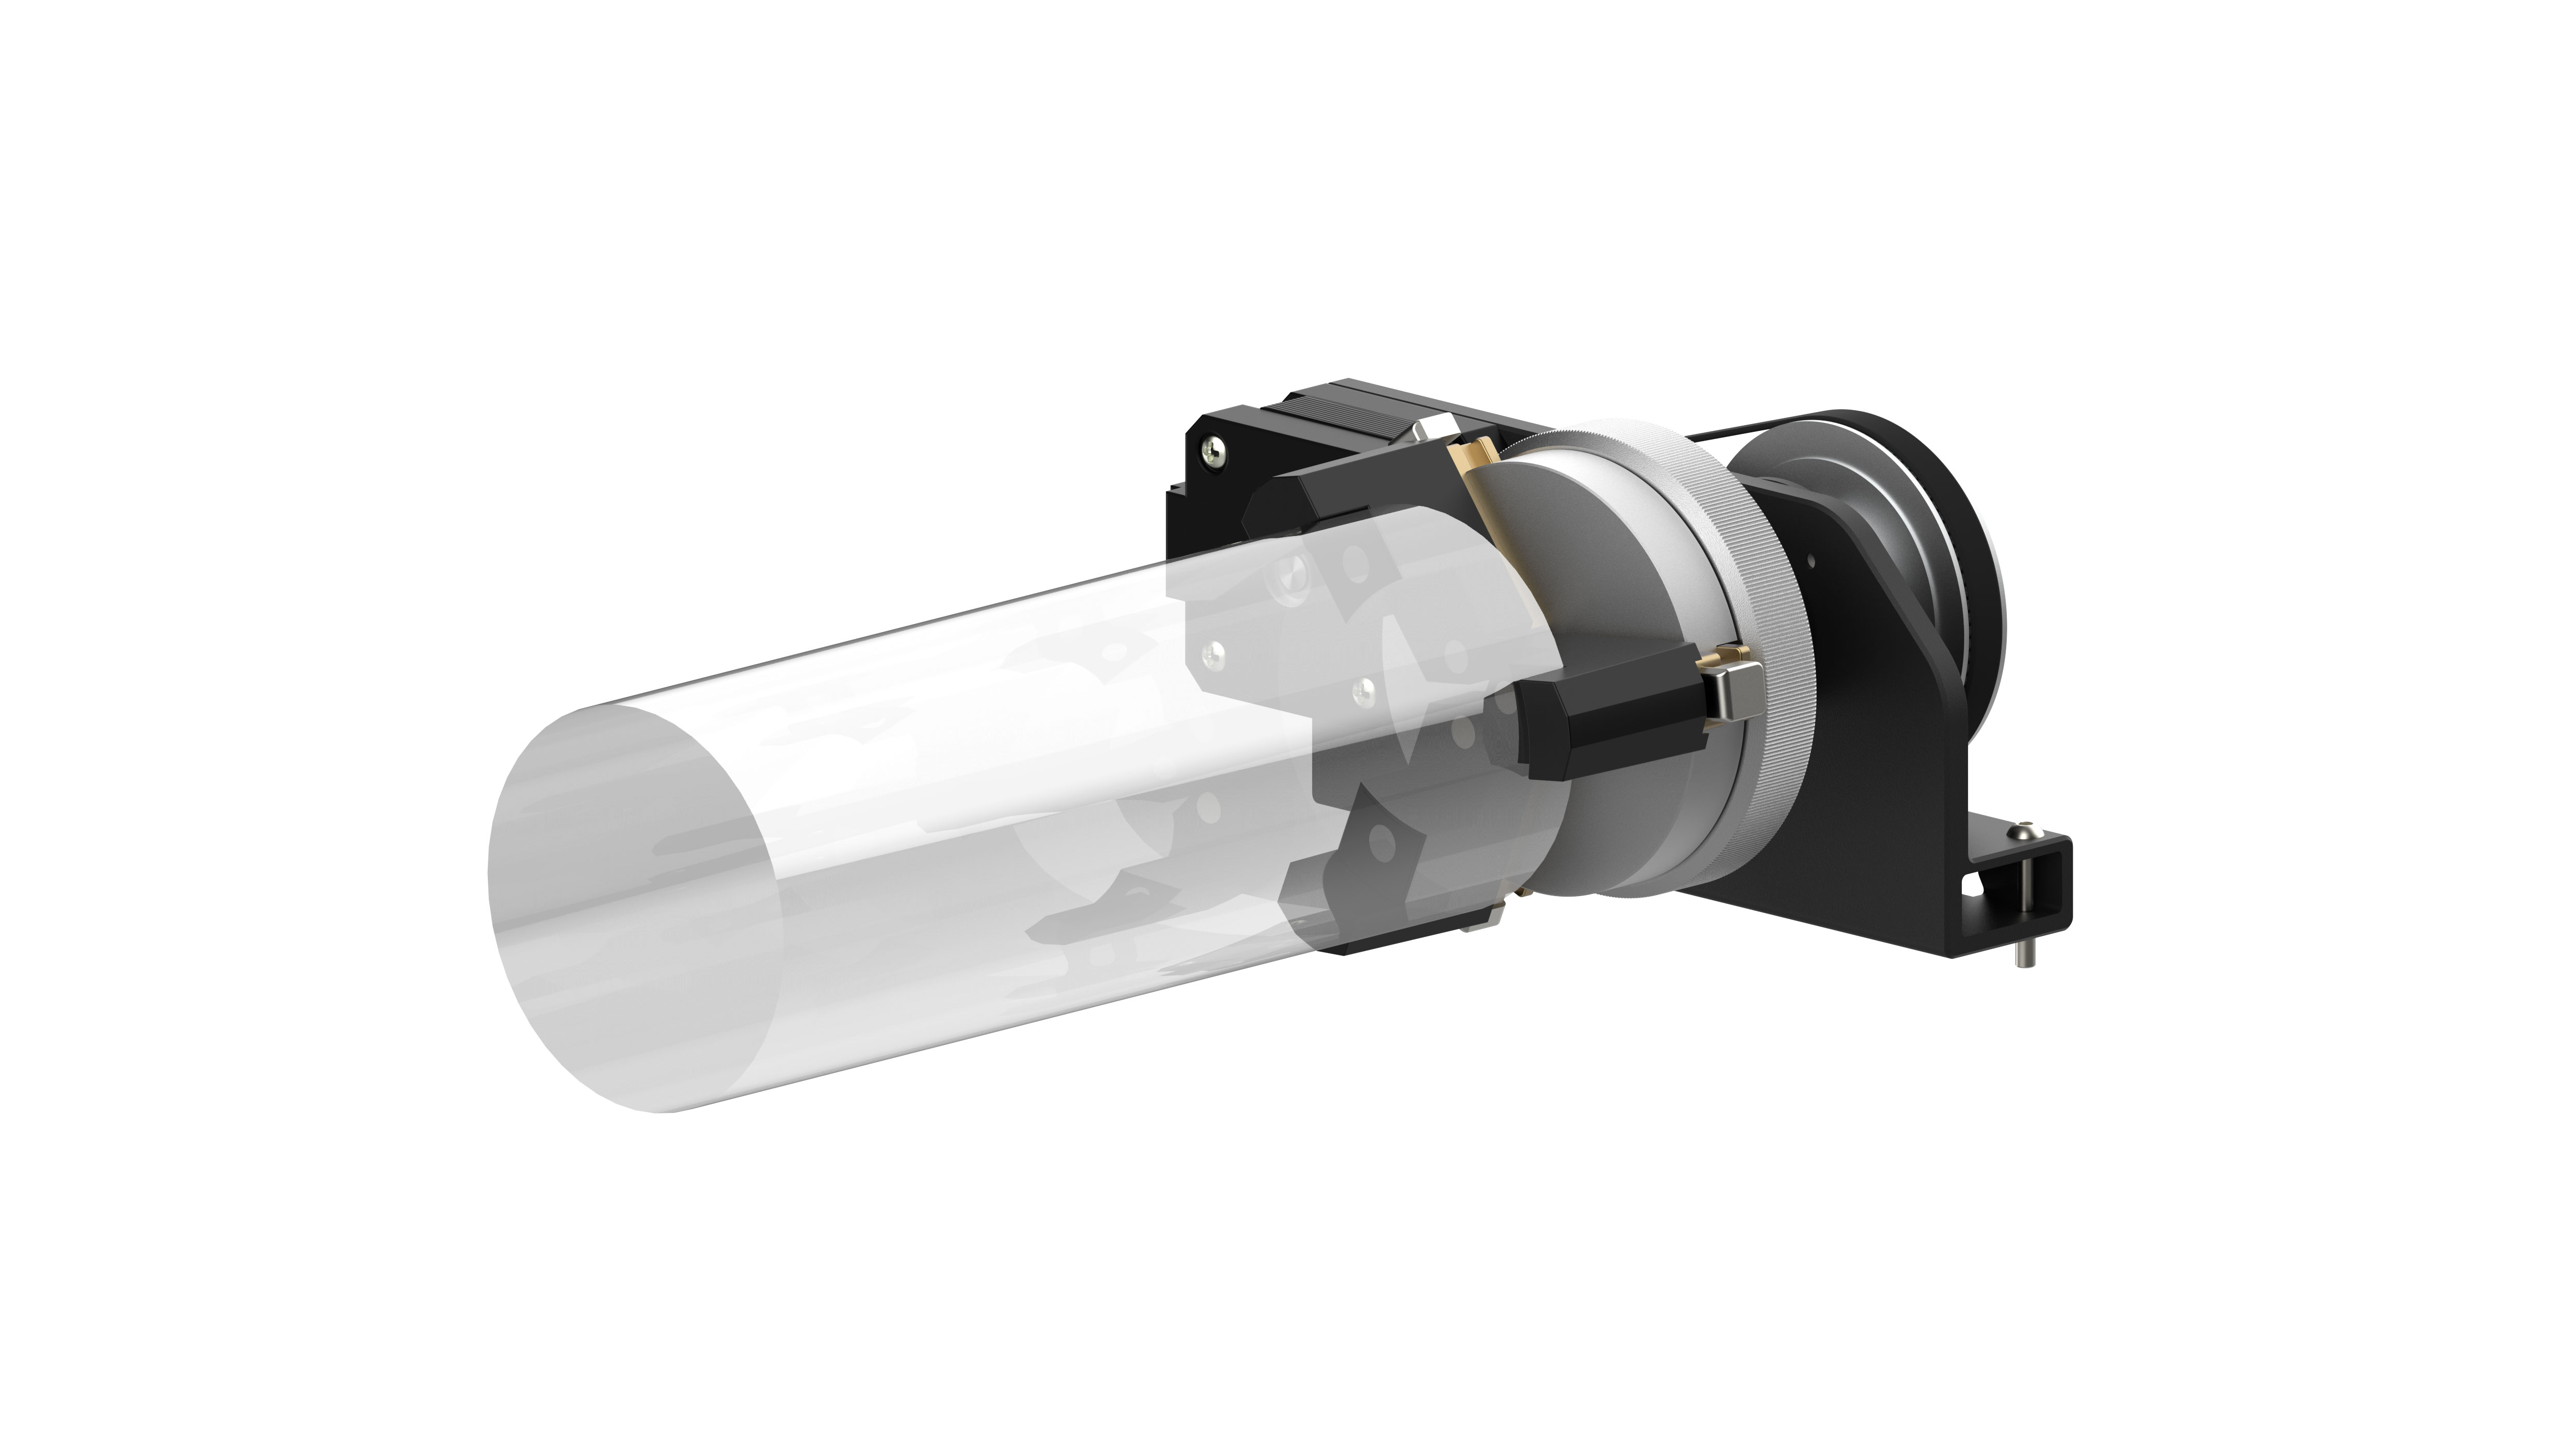 |
| Circular Rotation | Objects with outer ring structures | 12–100 mm | 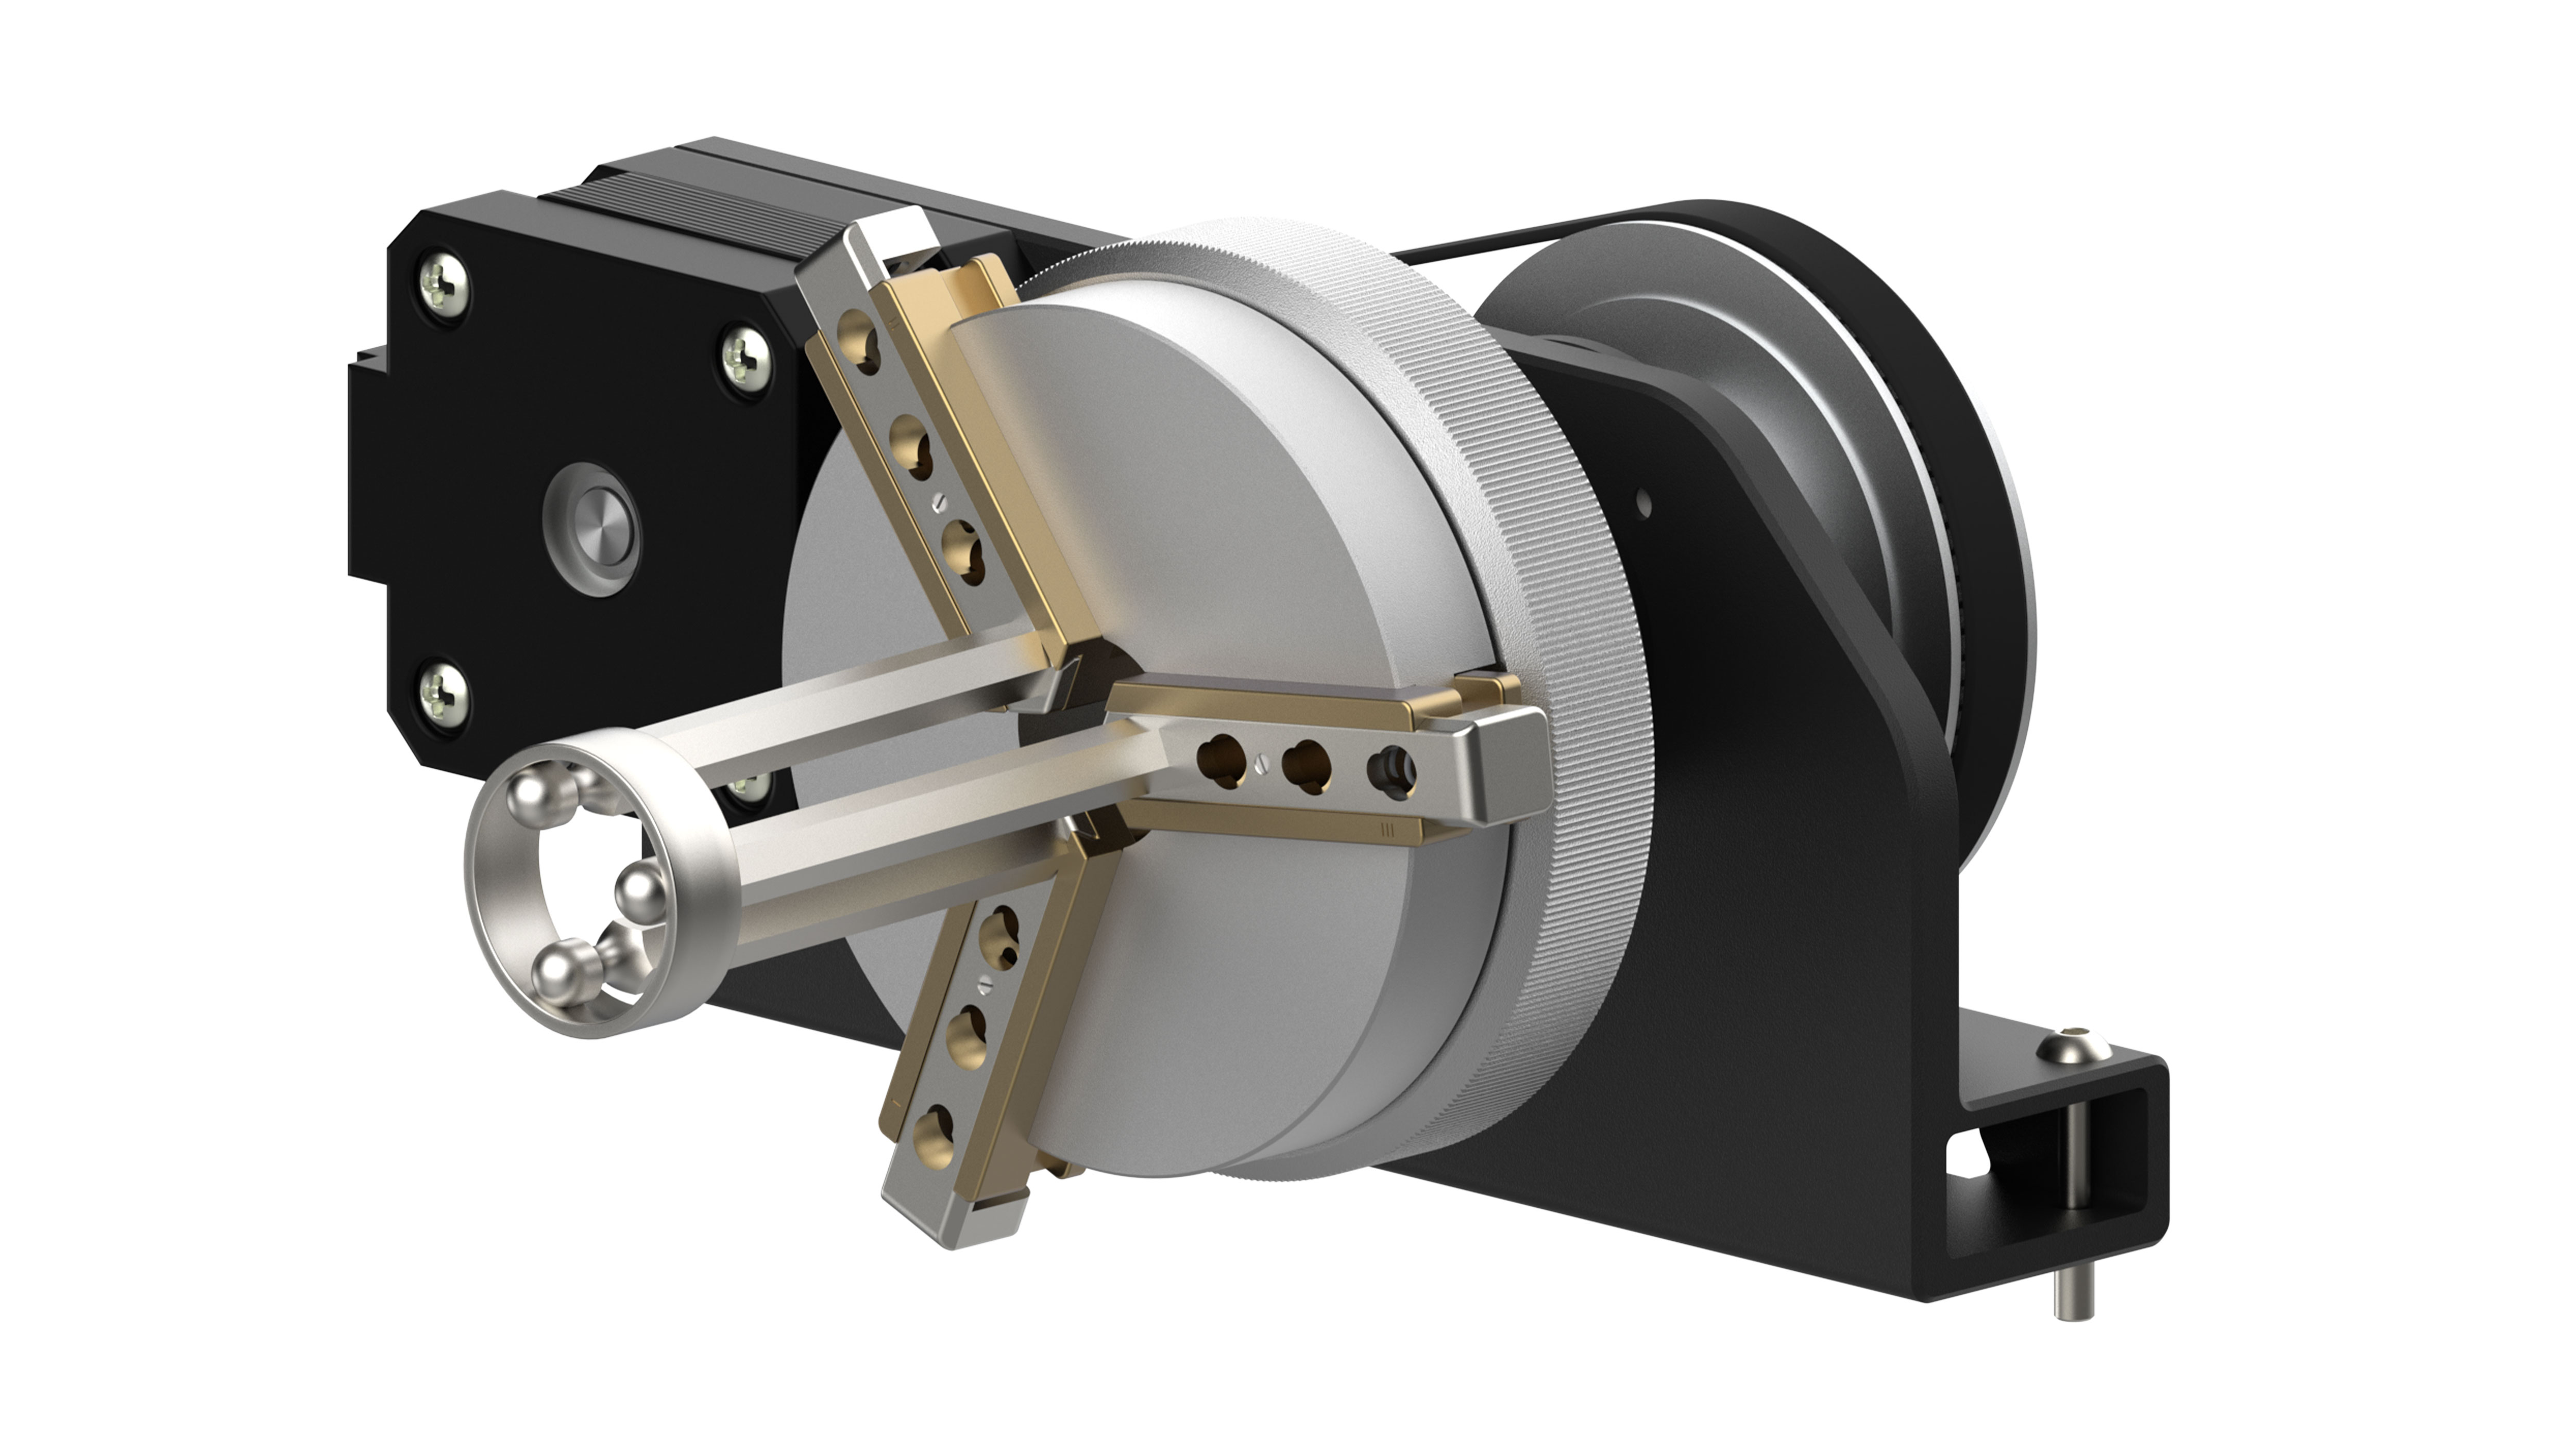 |
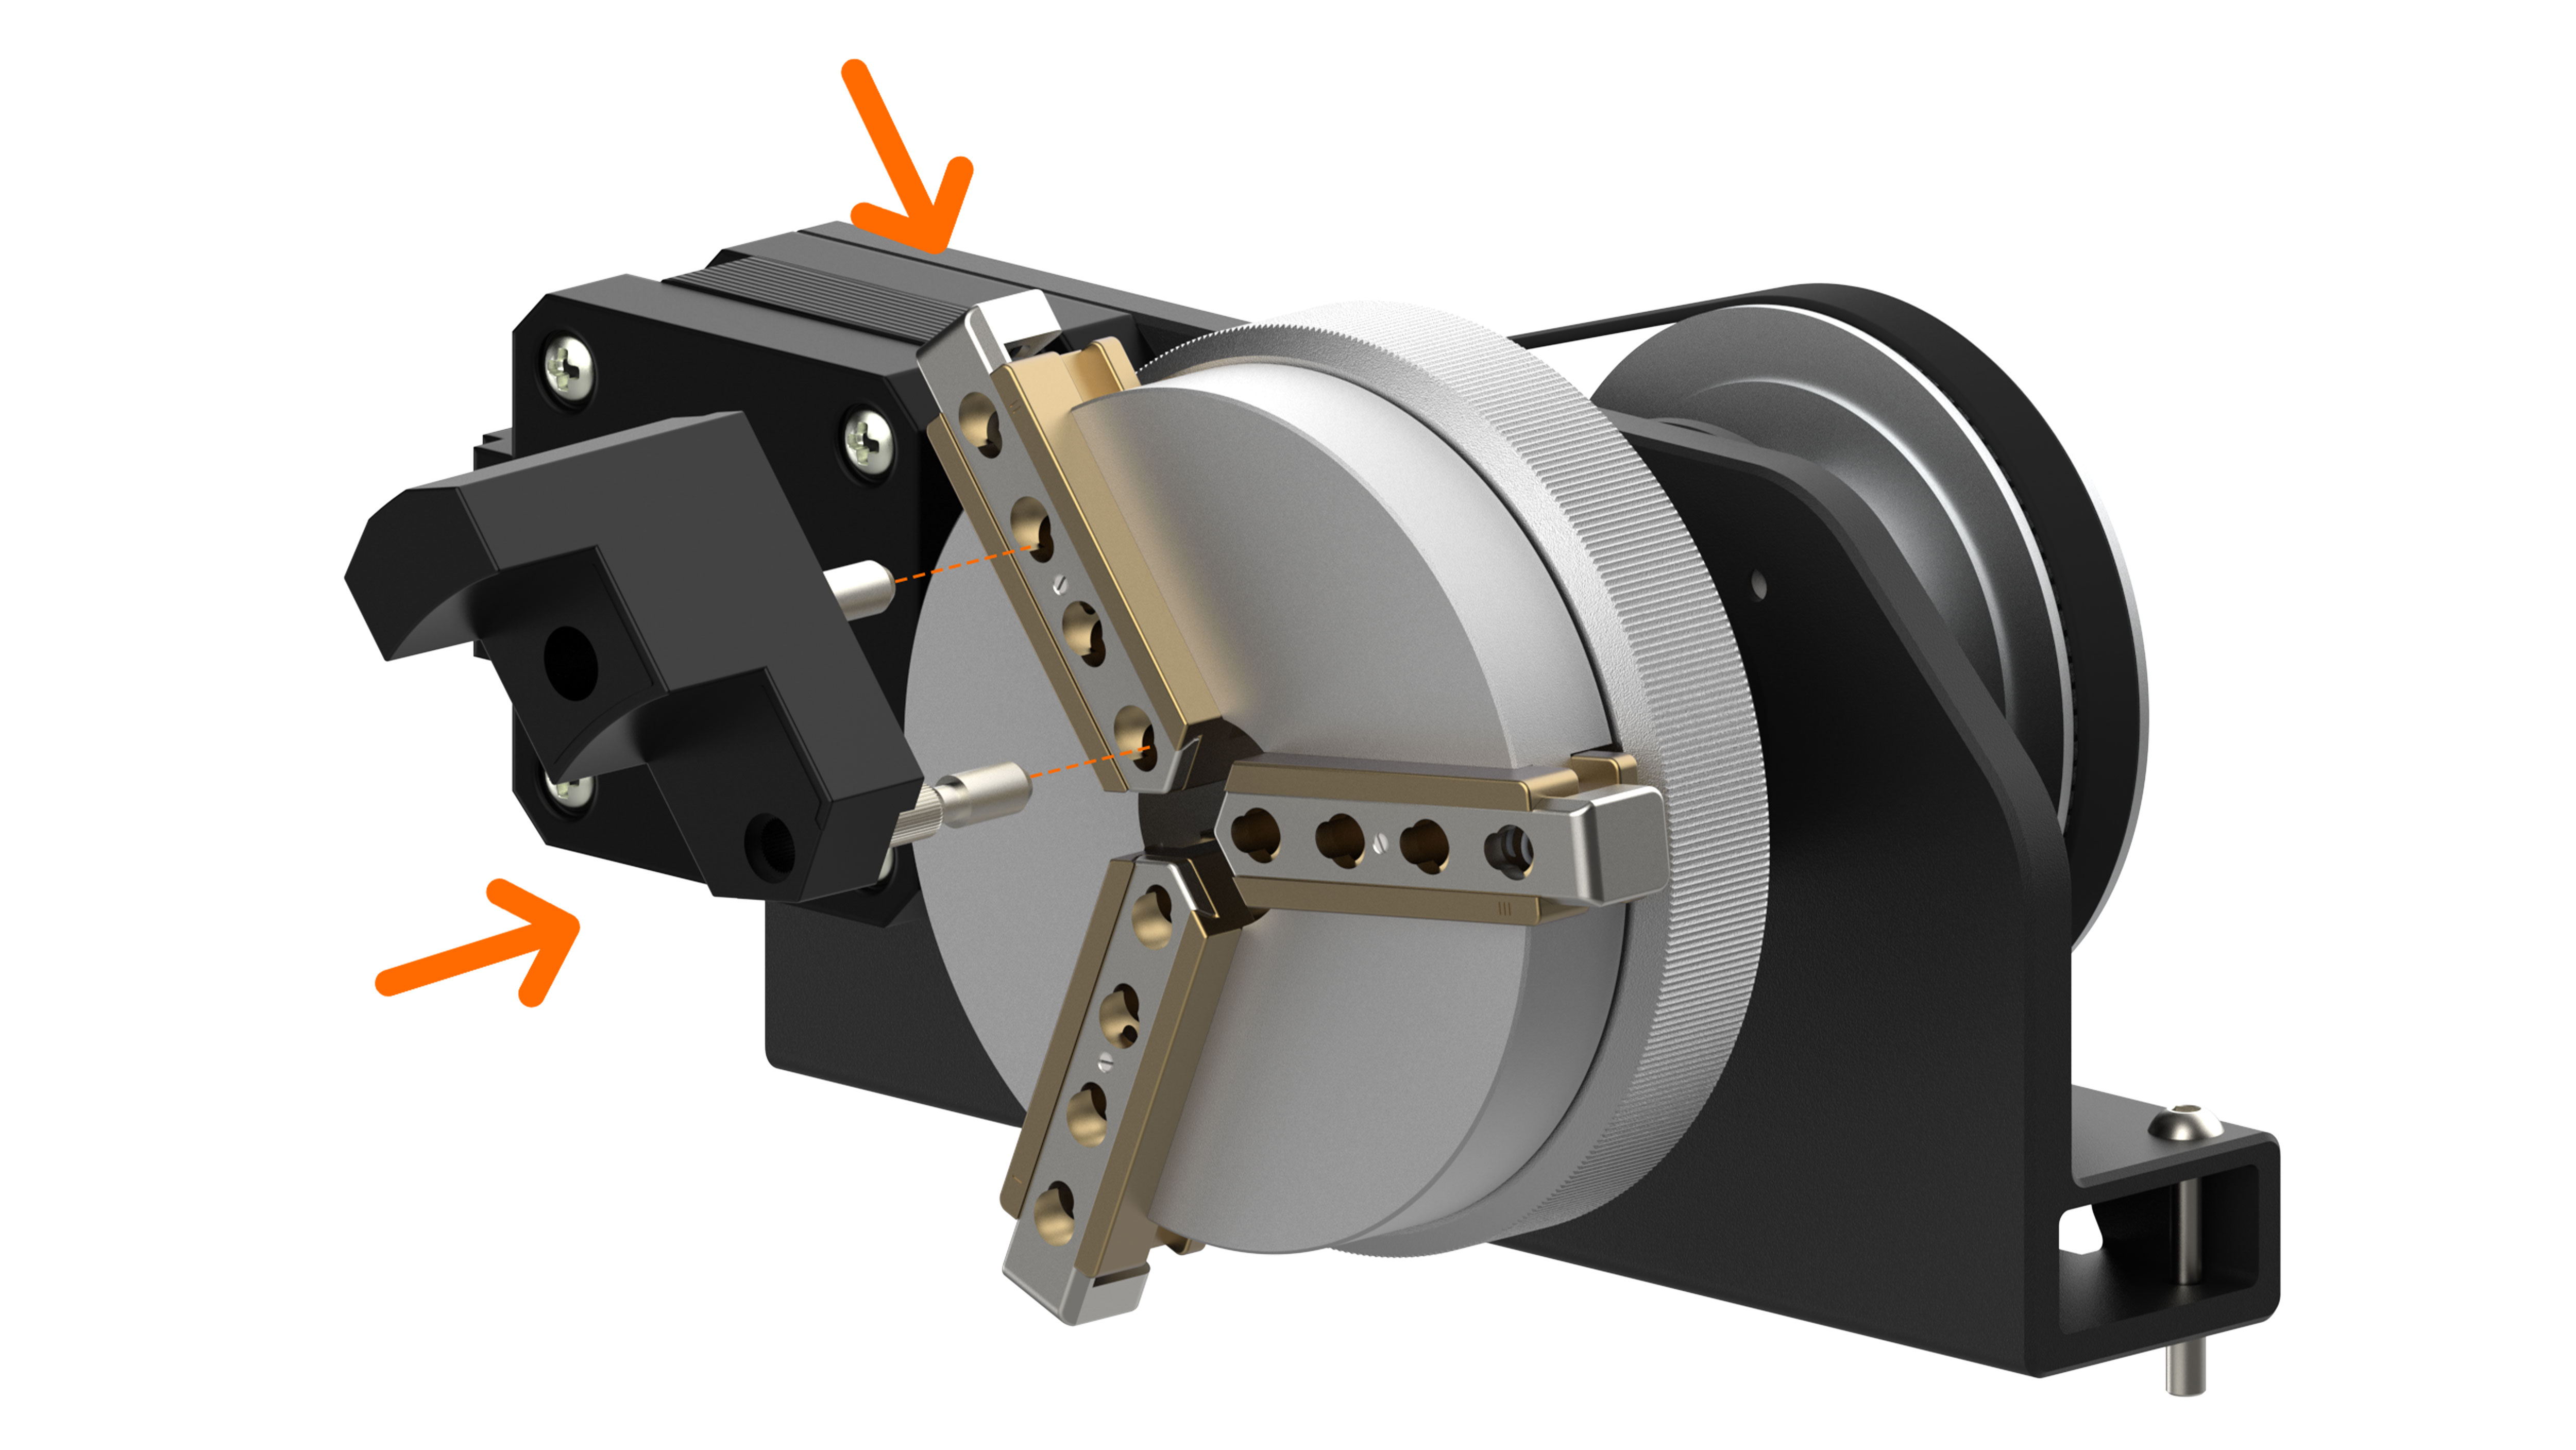
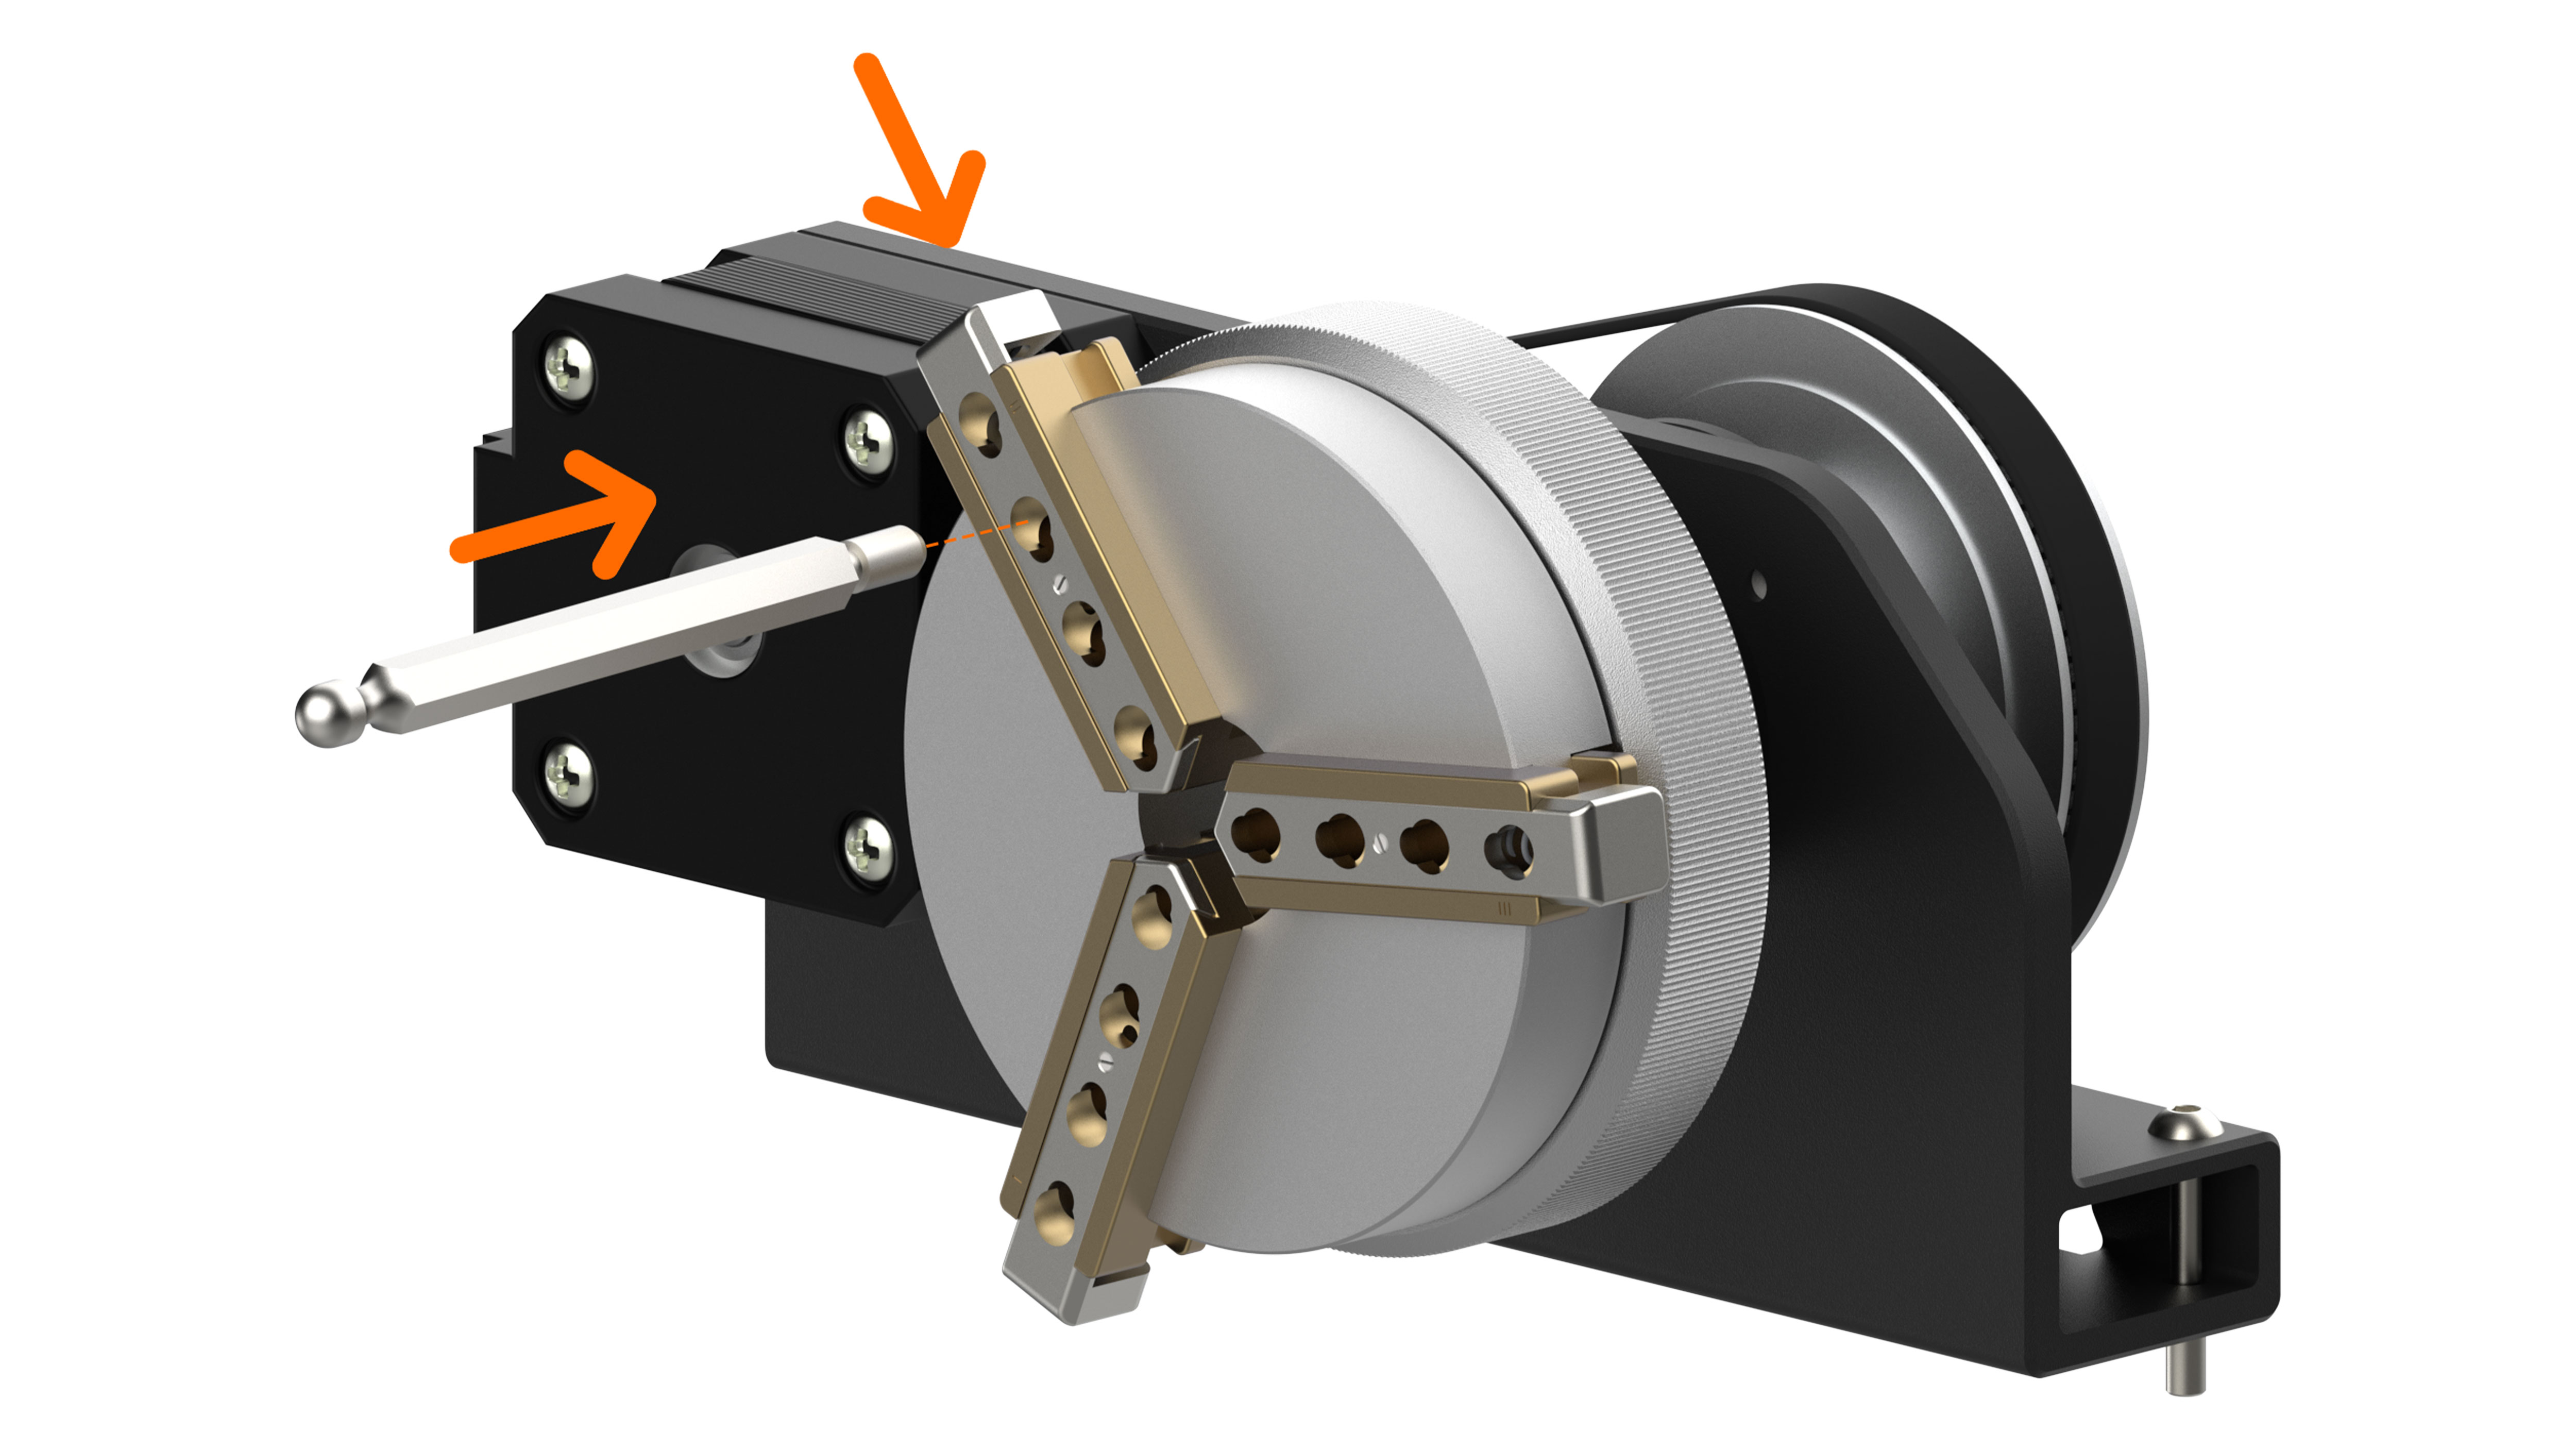
¶ Rotary Accessory Installation Guide
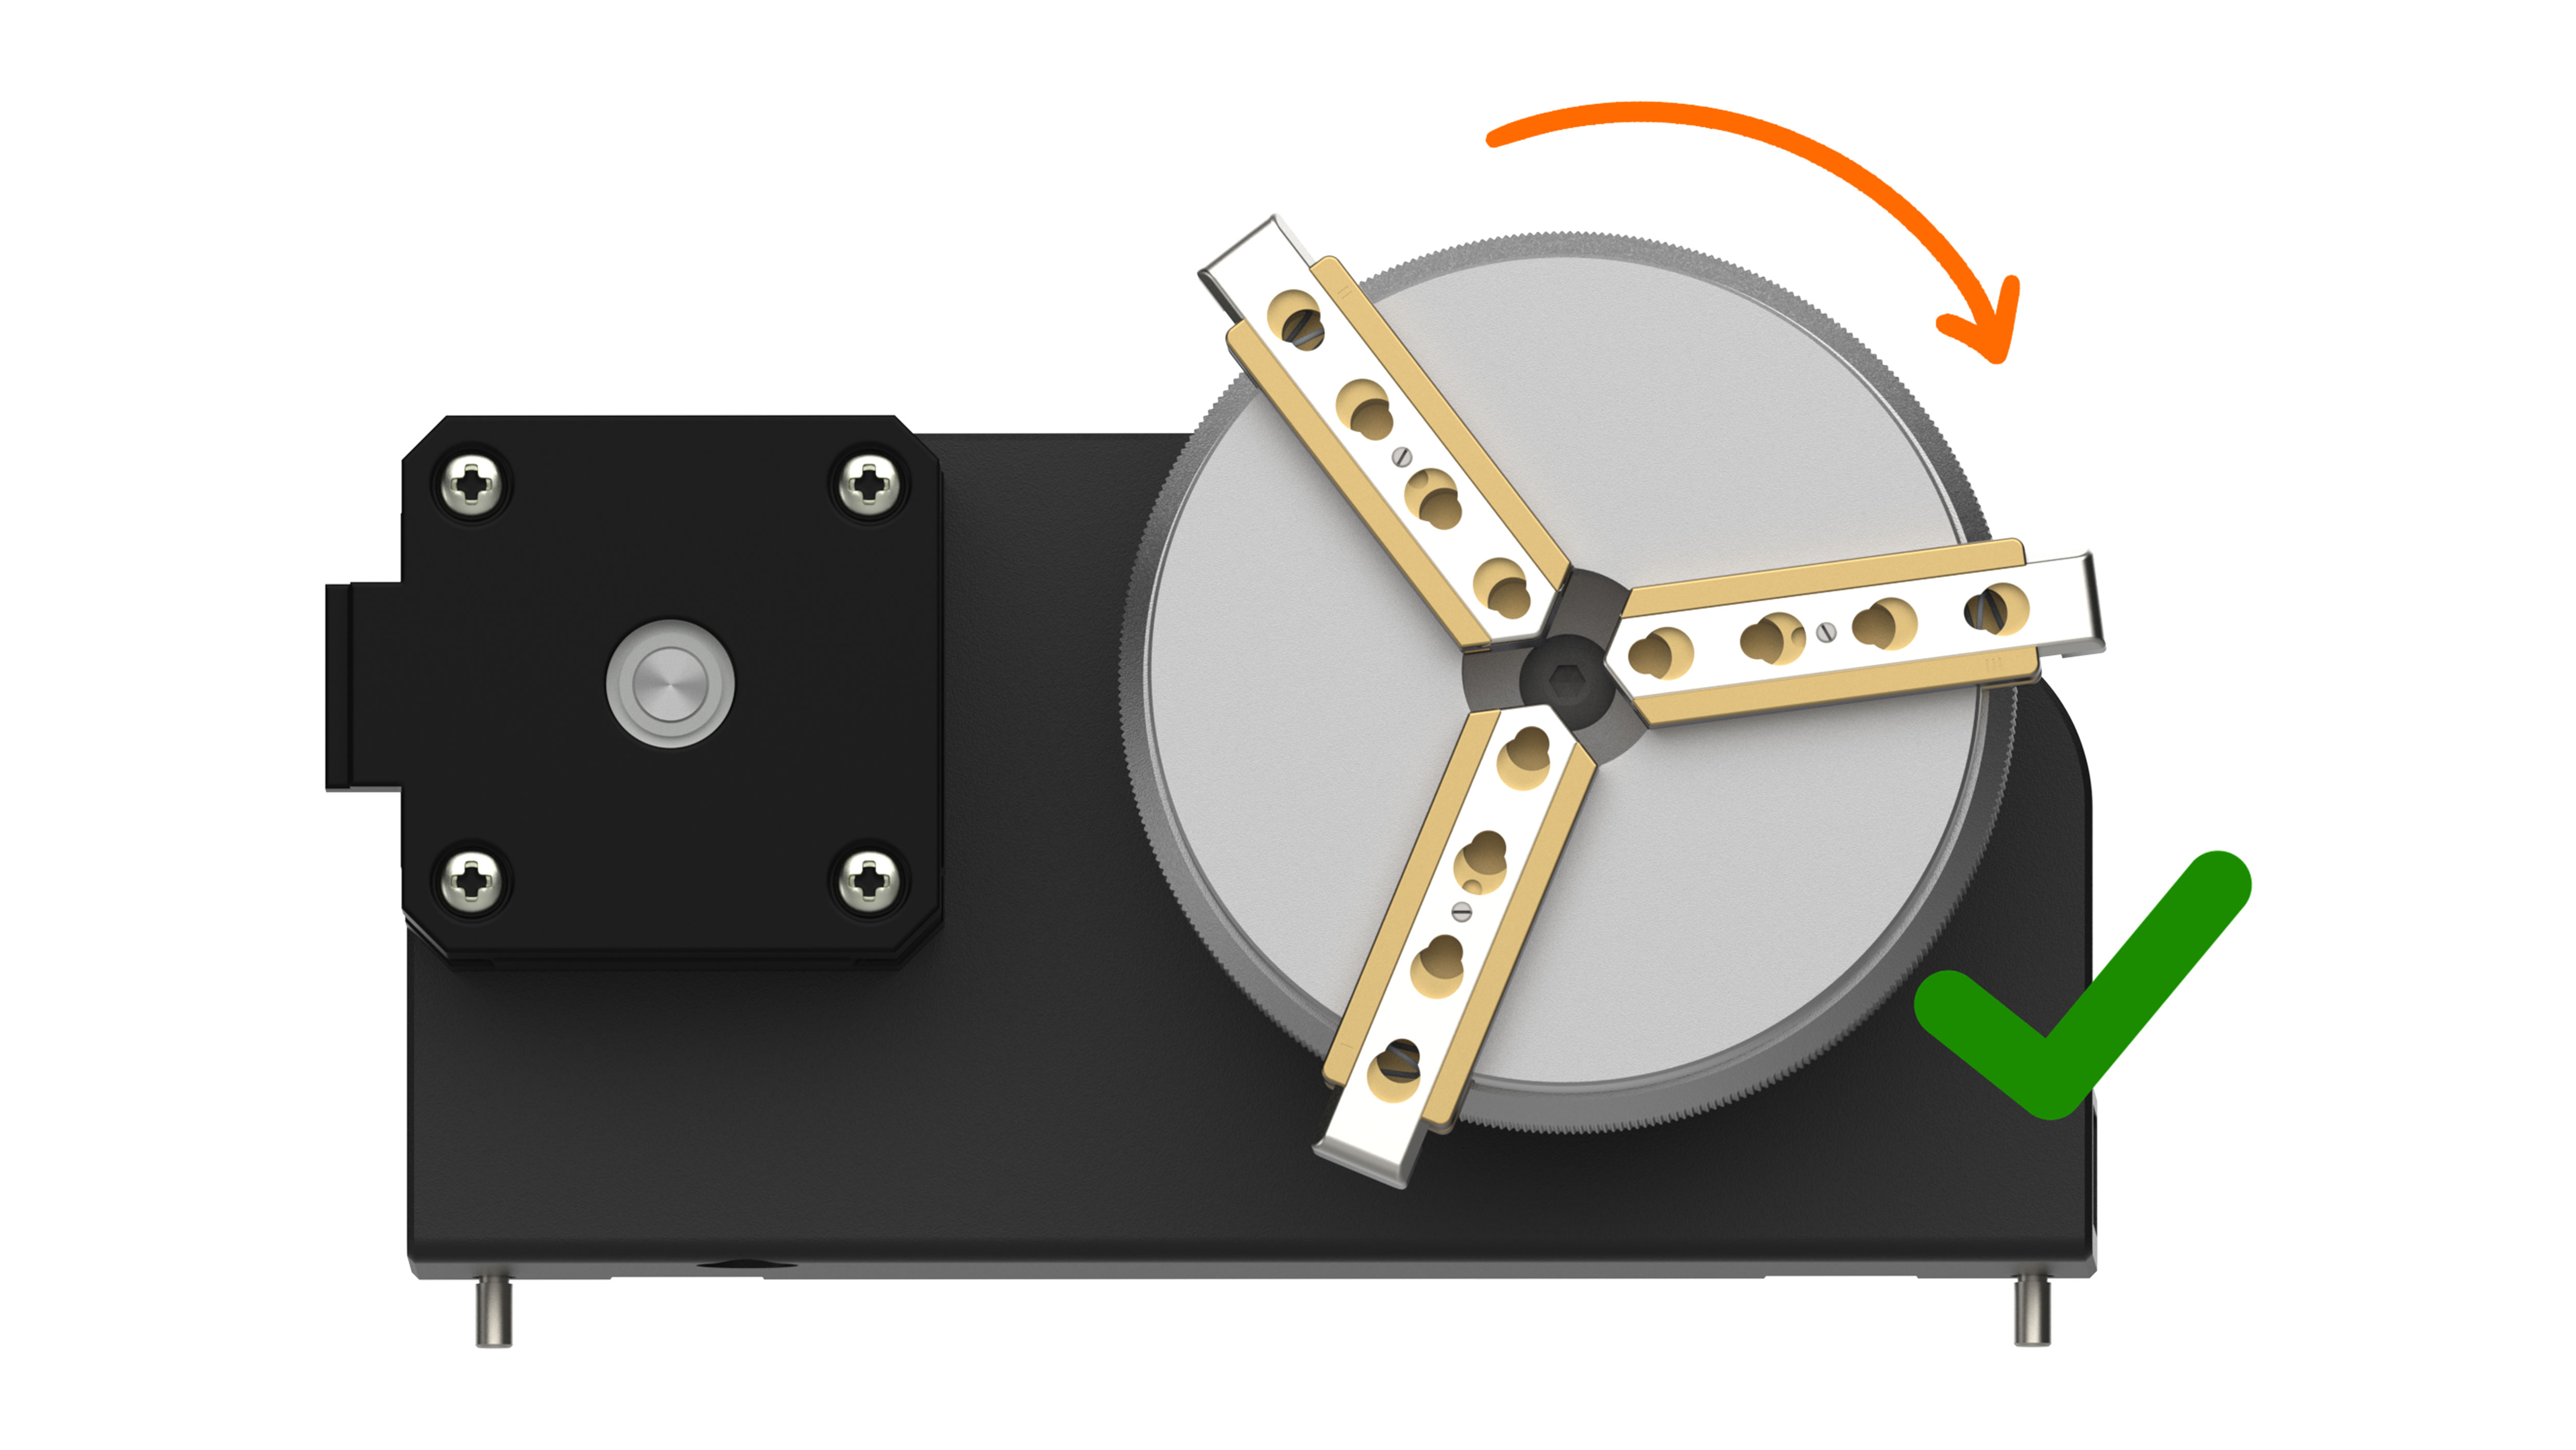
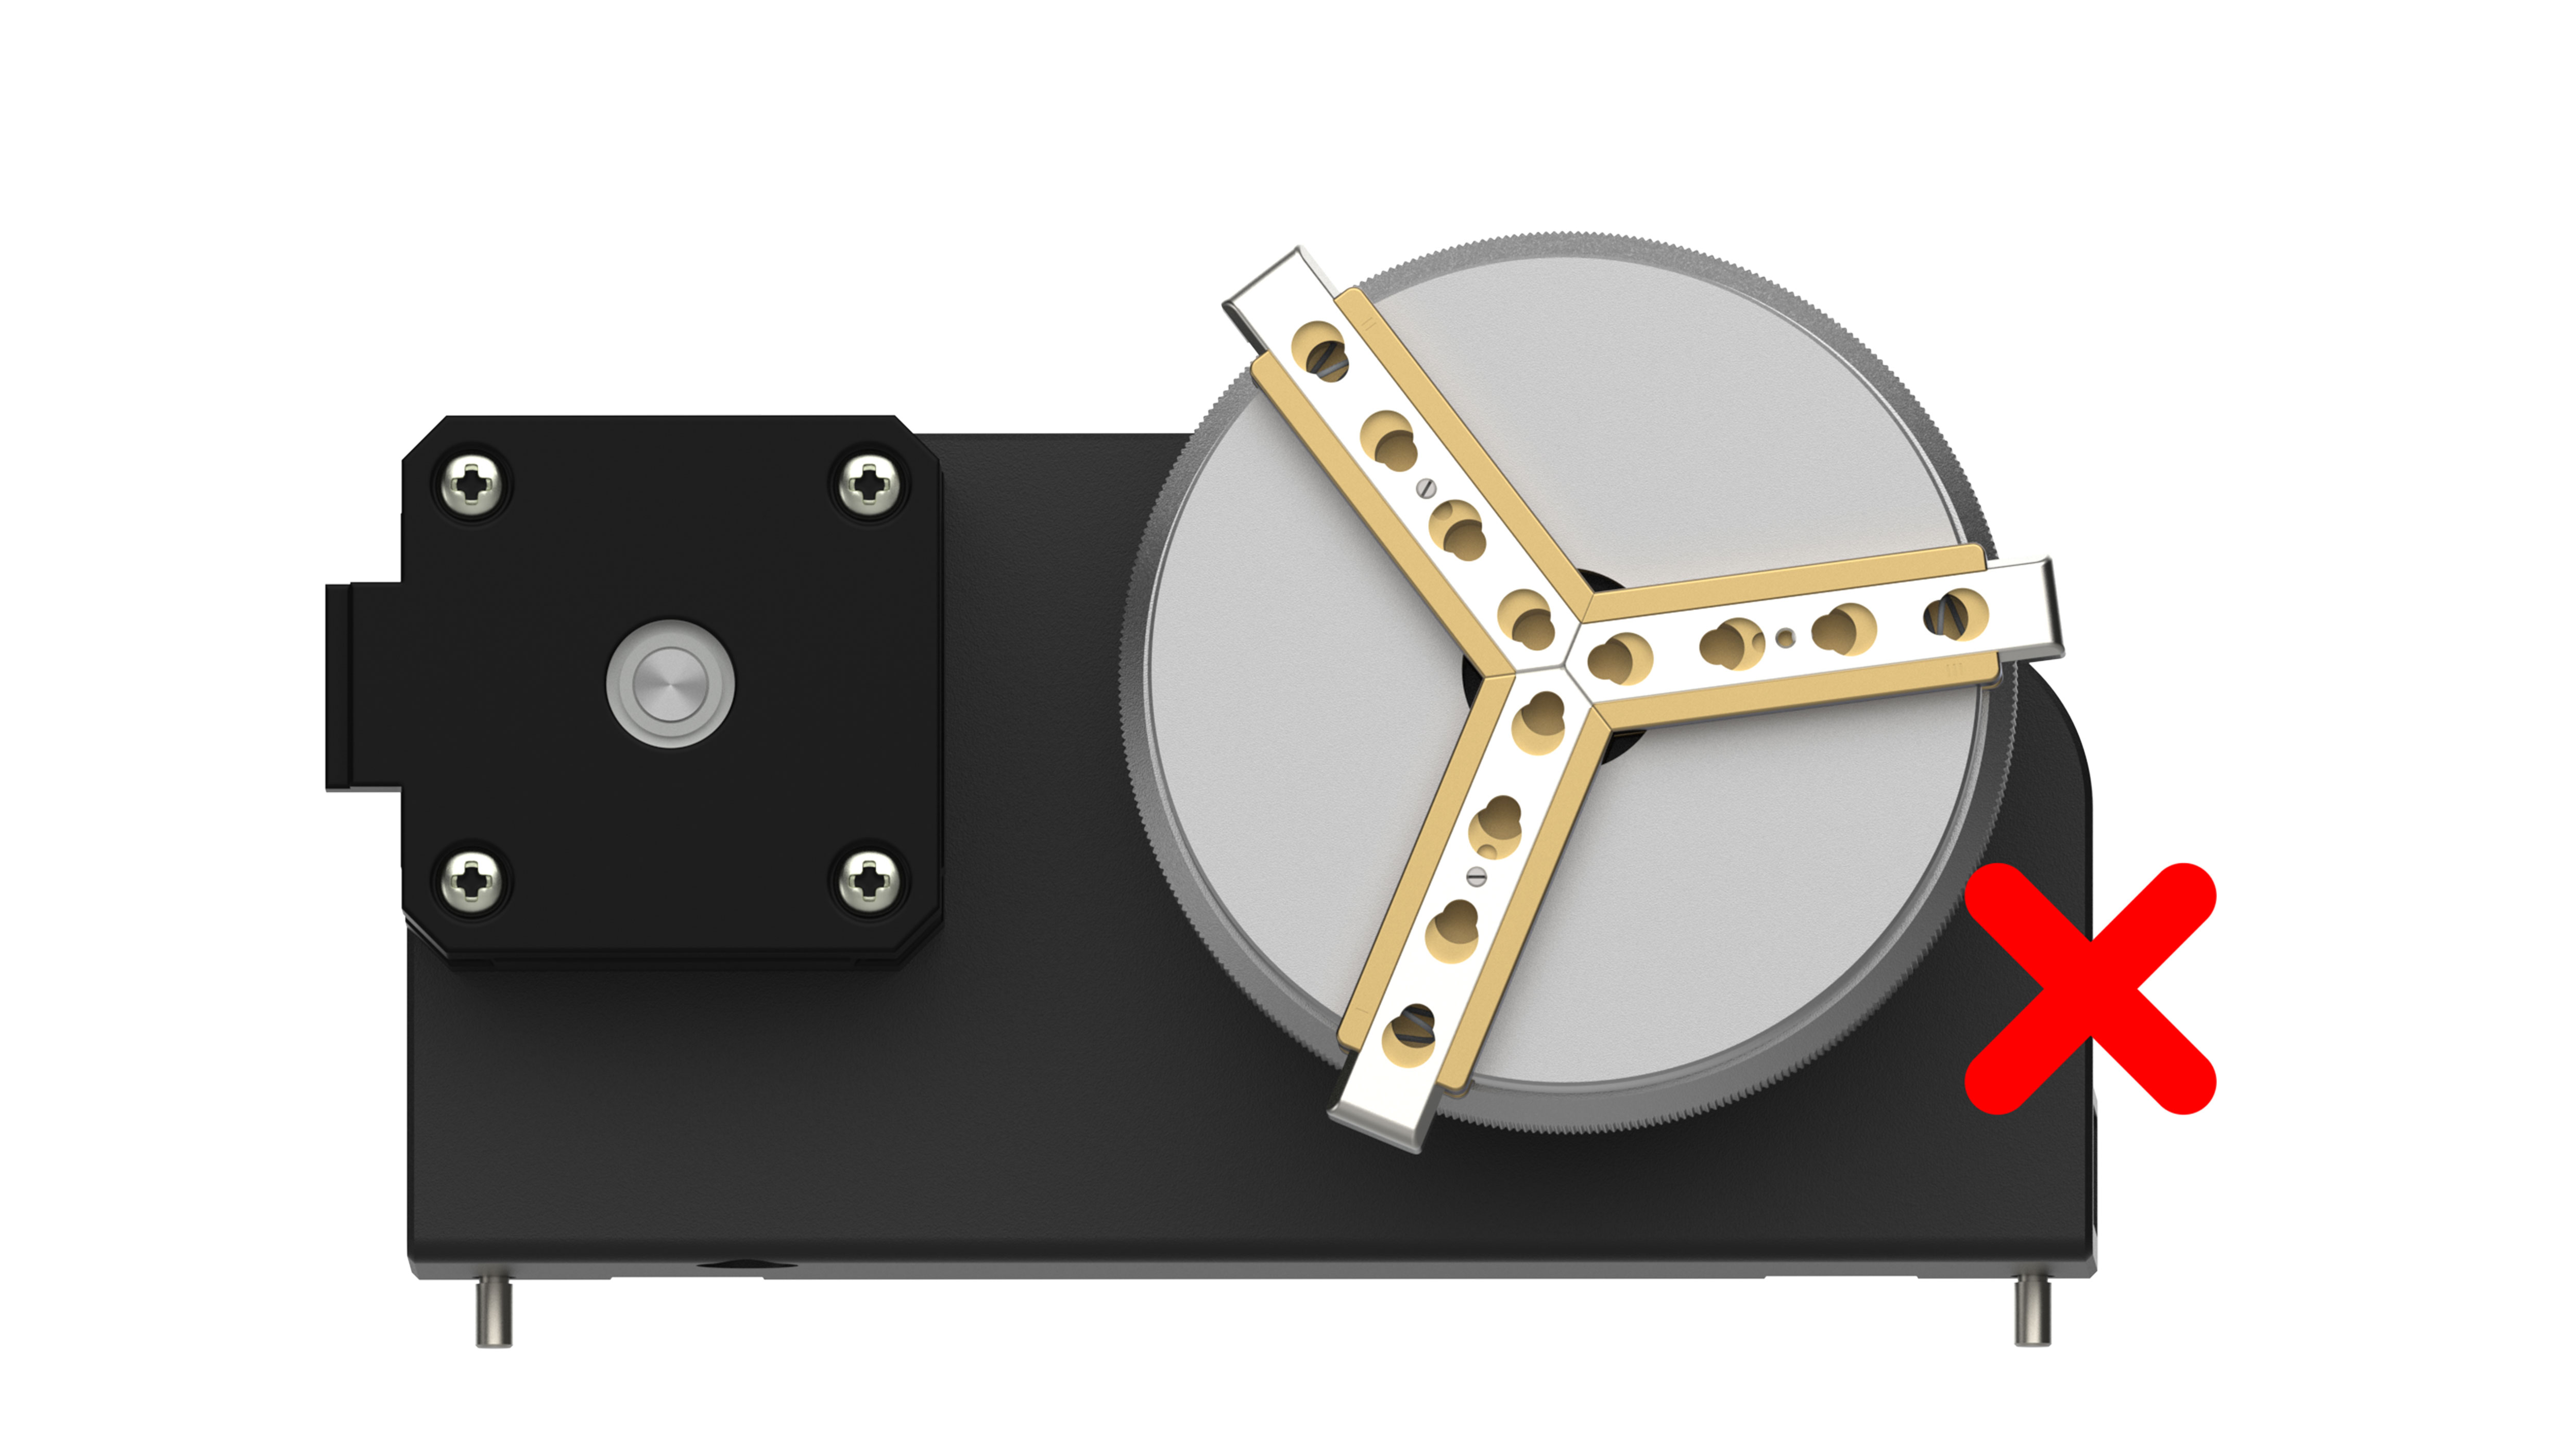
- As shown in the figure, turn the chuck knob clockwise to unlock and counterclockwise to lock. Adjusting the knob allows the jaws to expand or contract for easier insertion of the rotary jaws / needles.
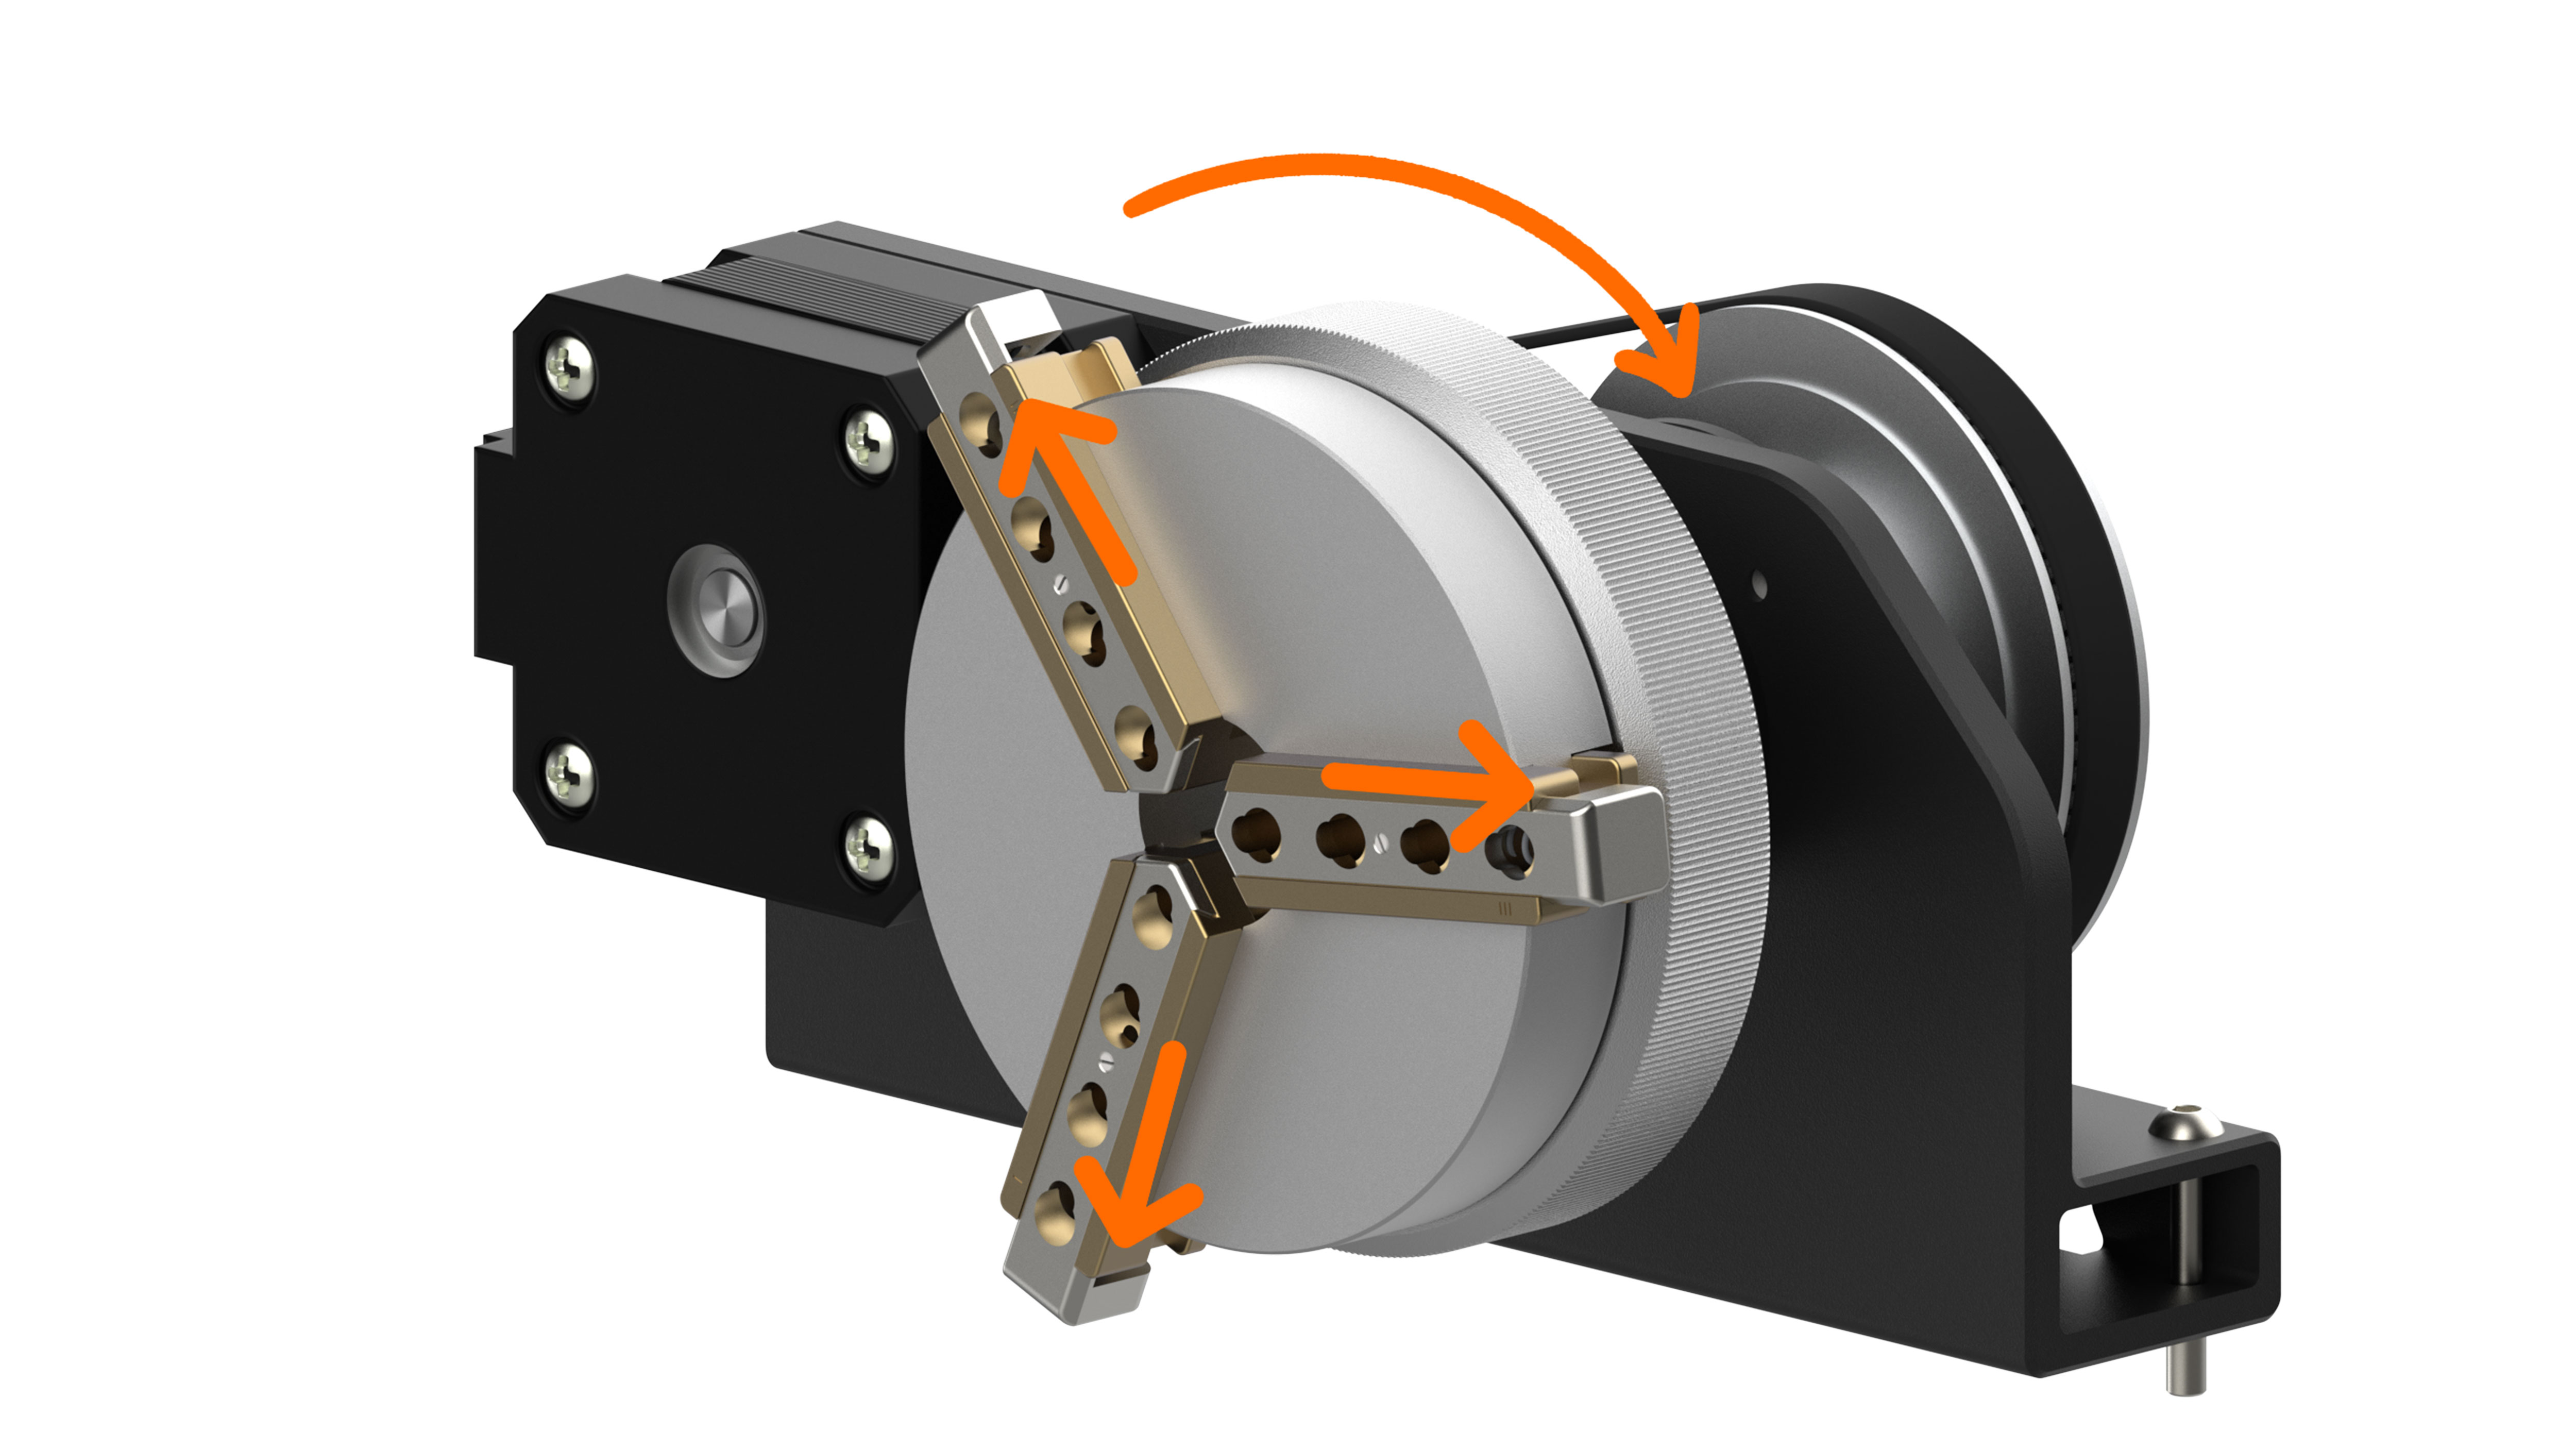
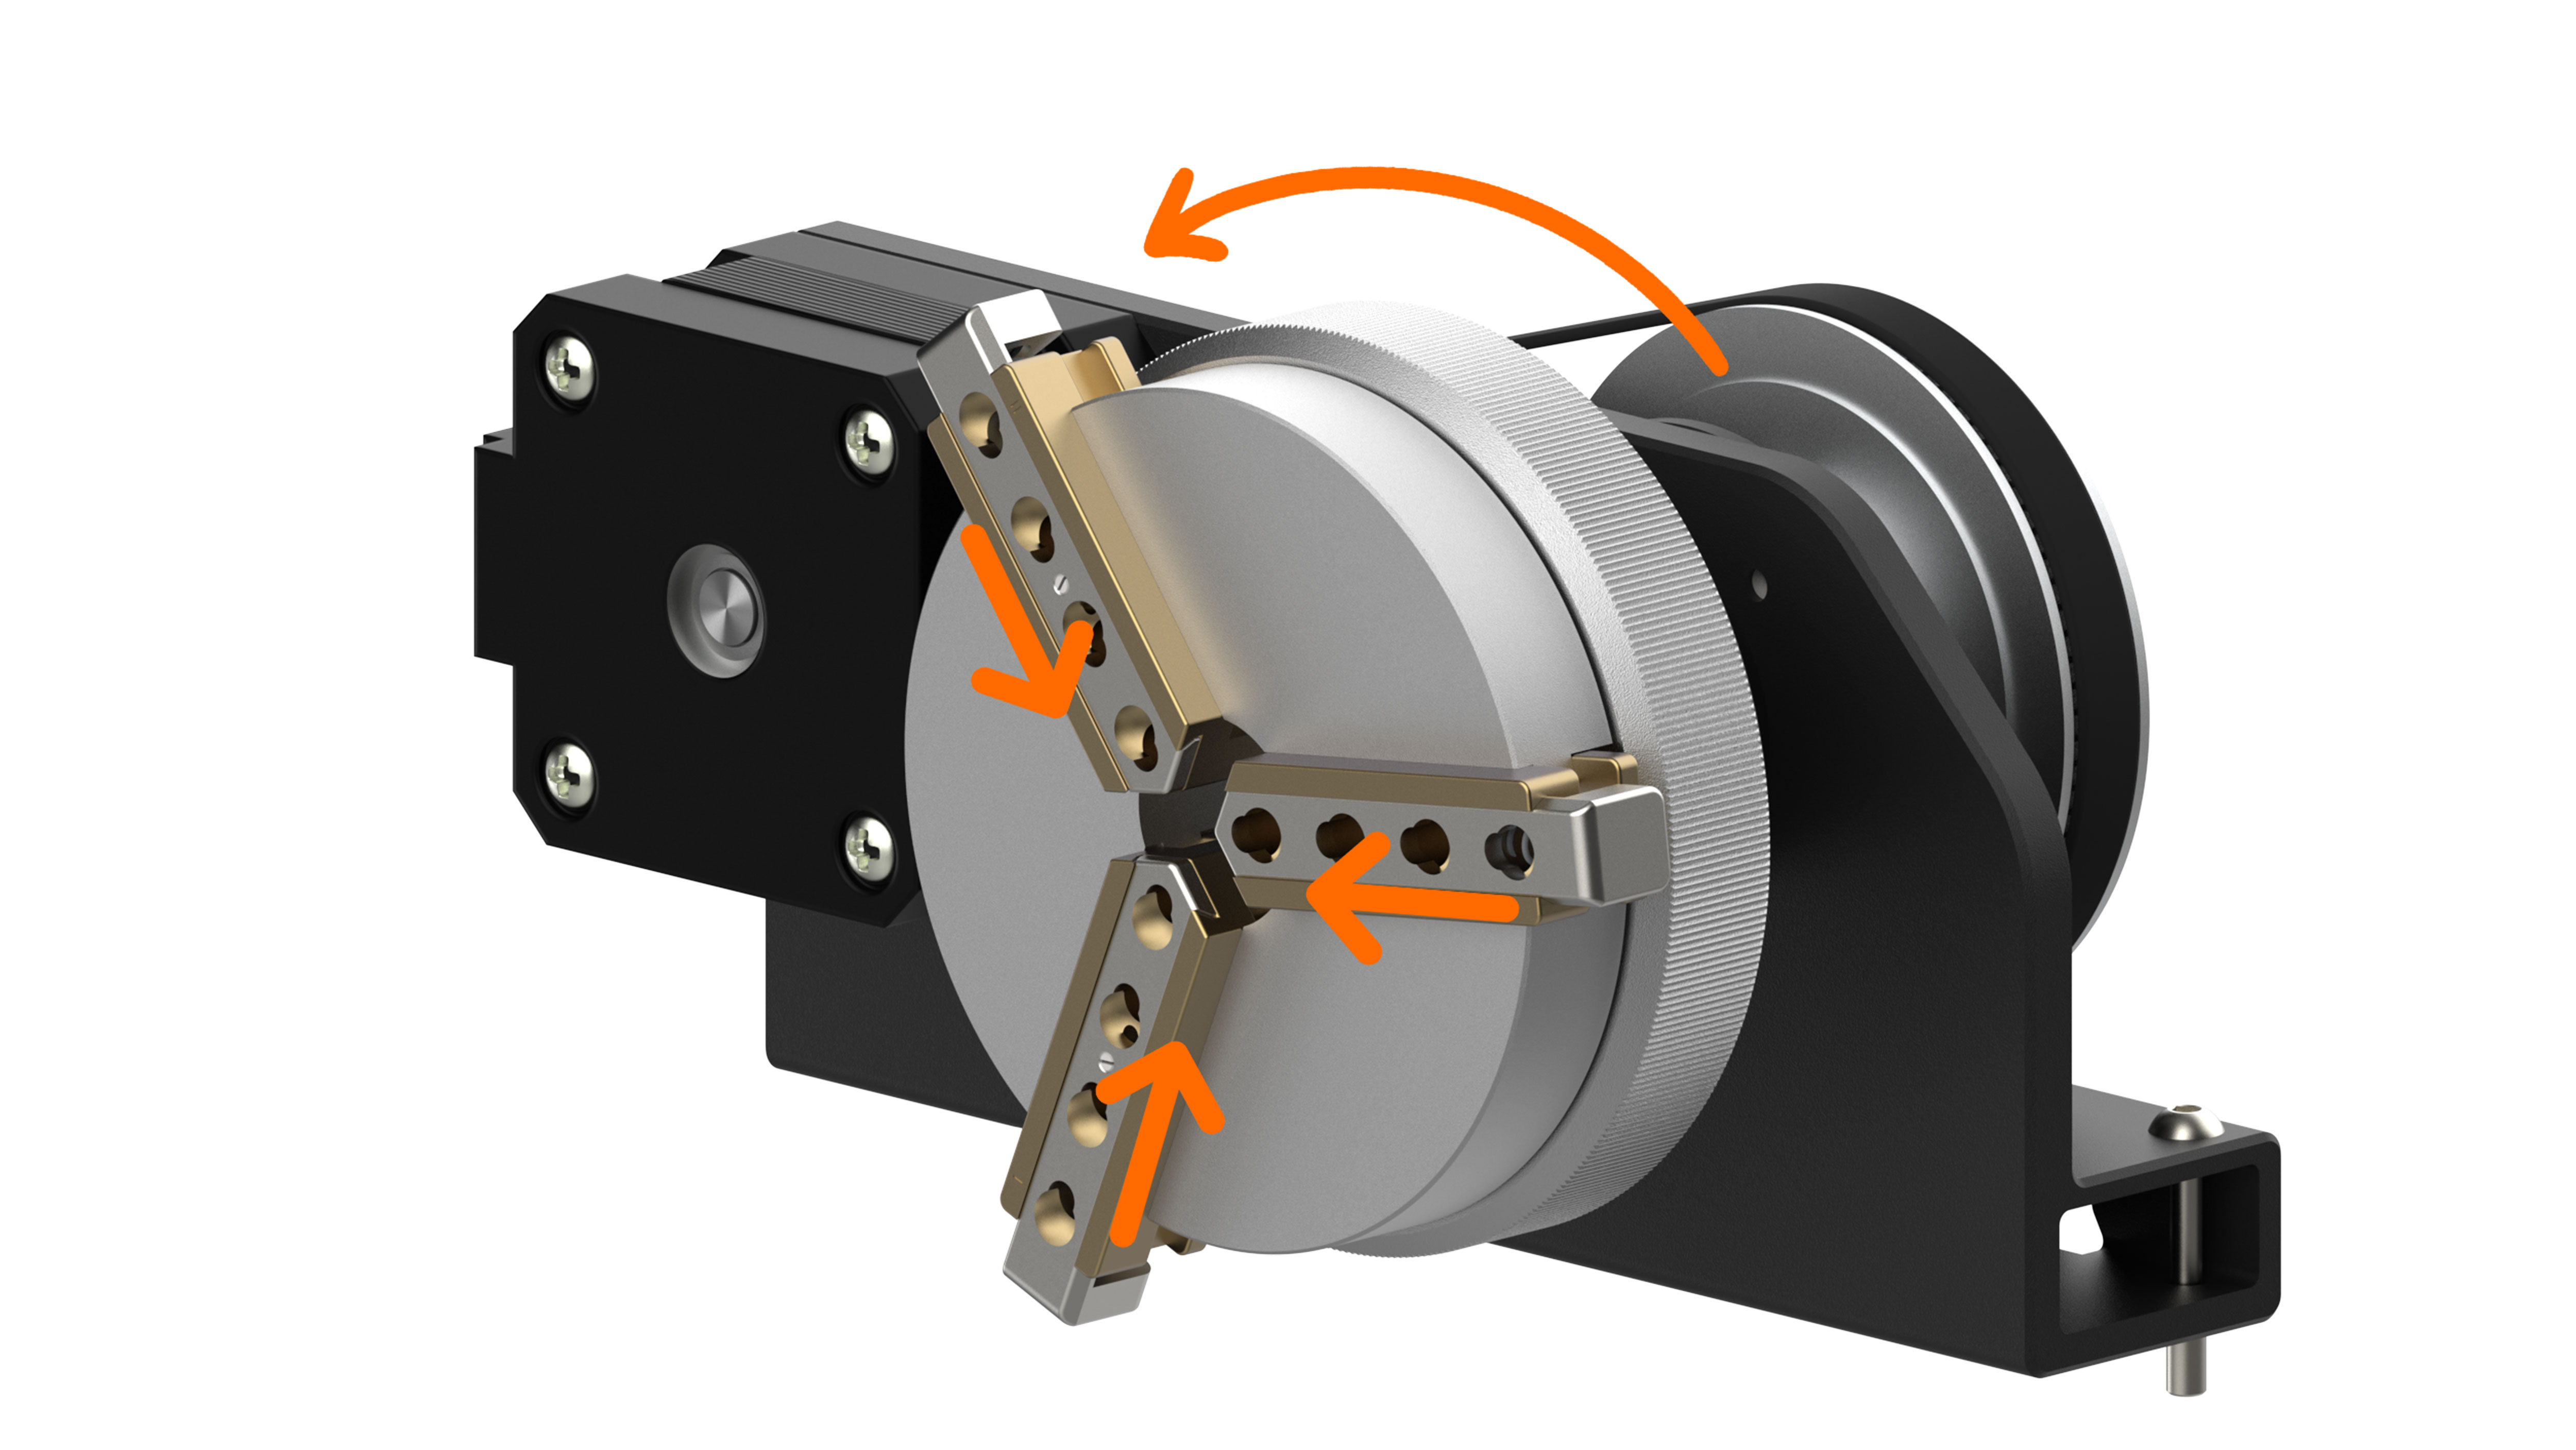
- Press and hold the button on top of the chuck, then insert the rotary jaws / needles that match the size of the material into the chuck.
¶ Device Connection Operation
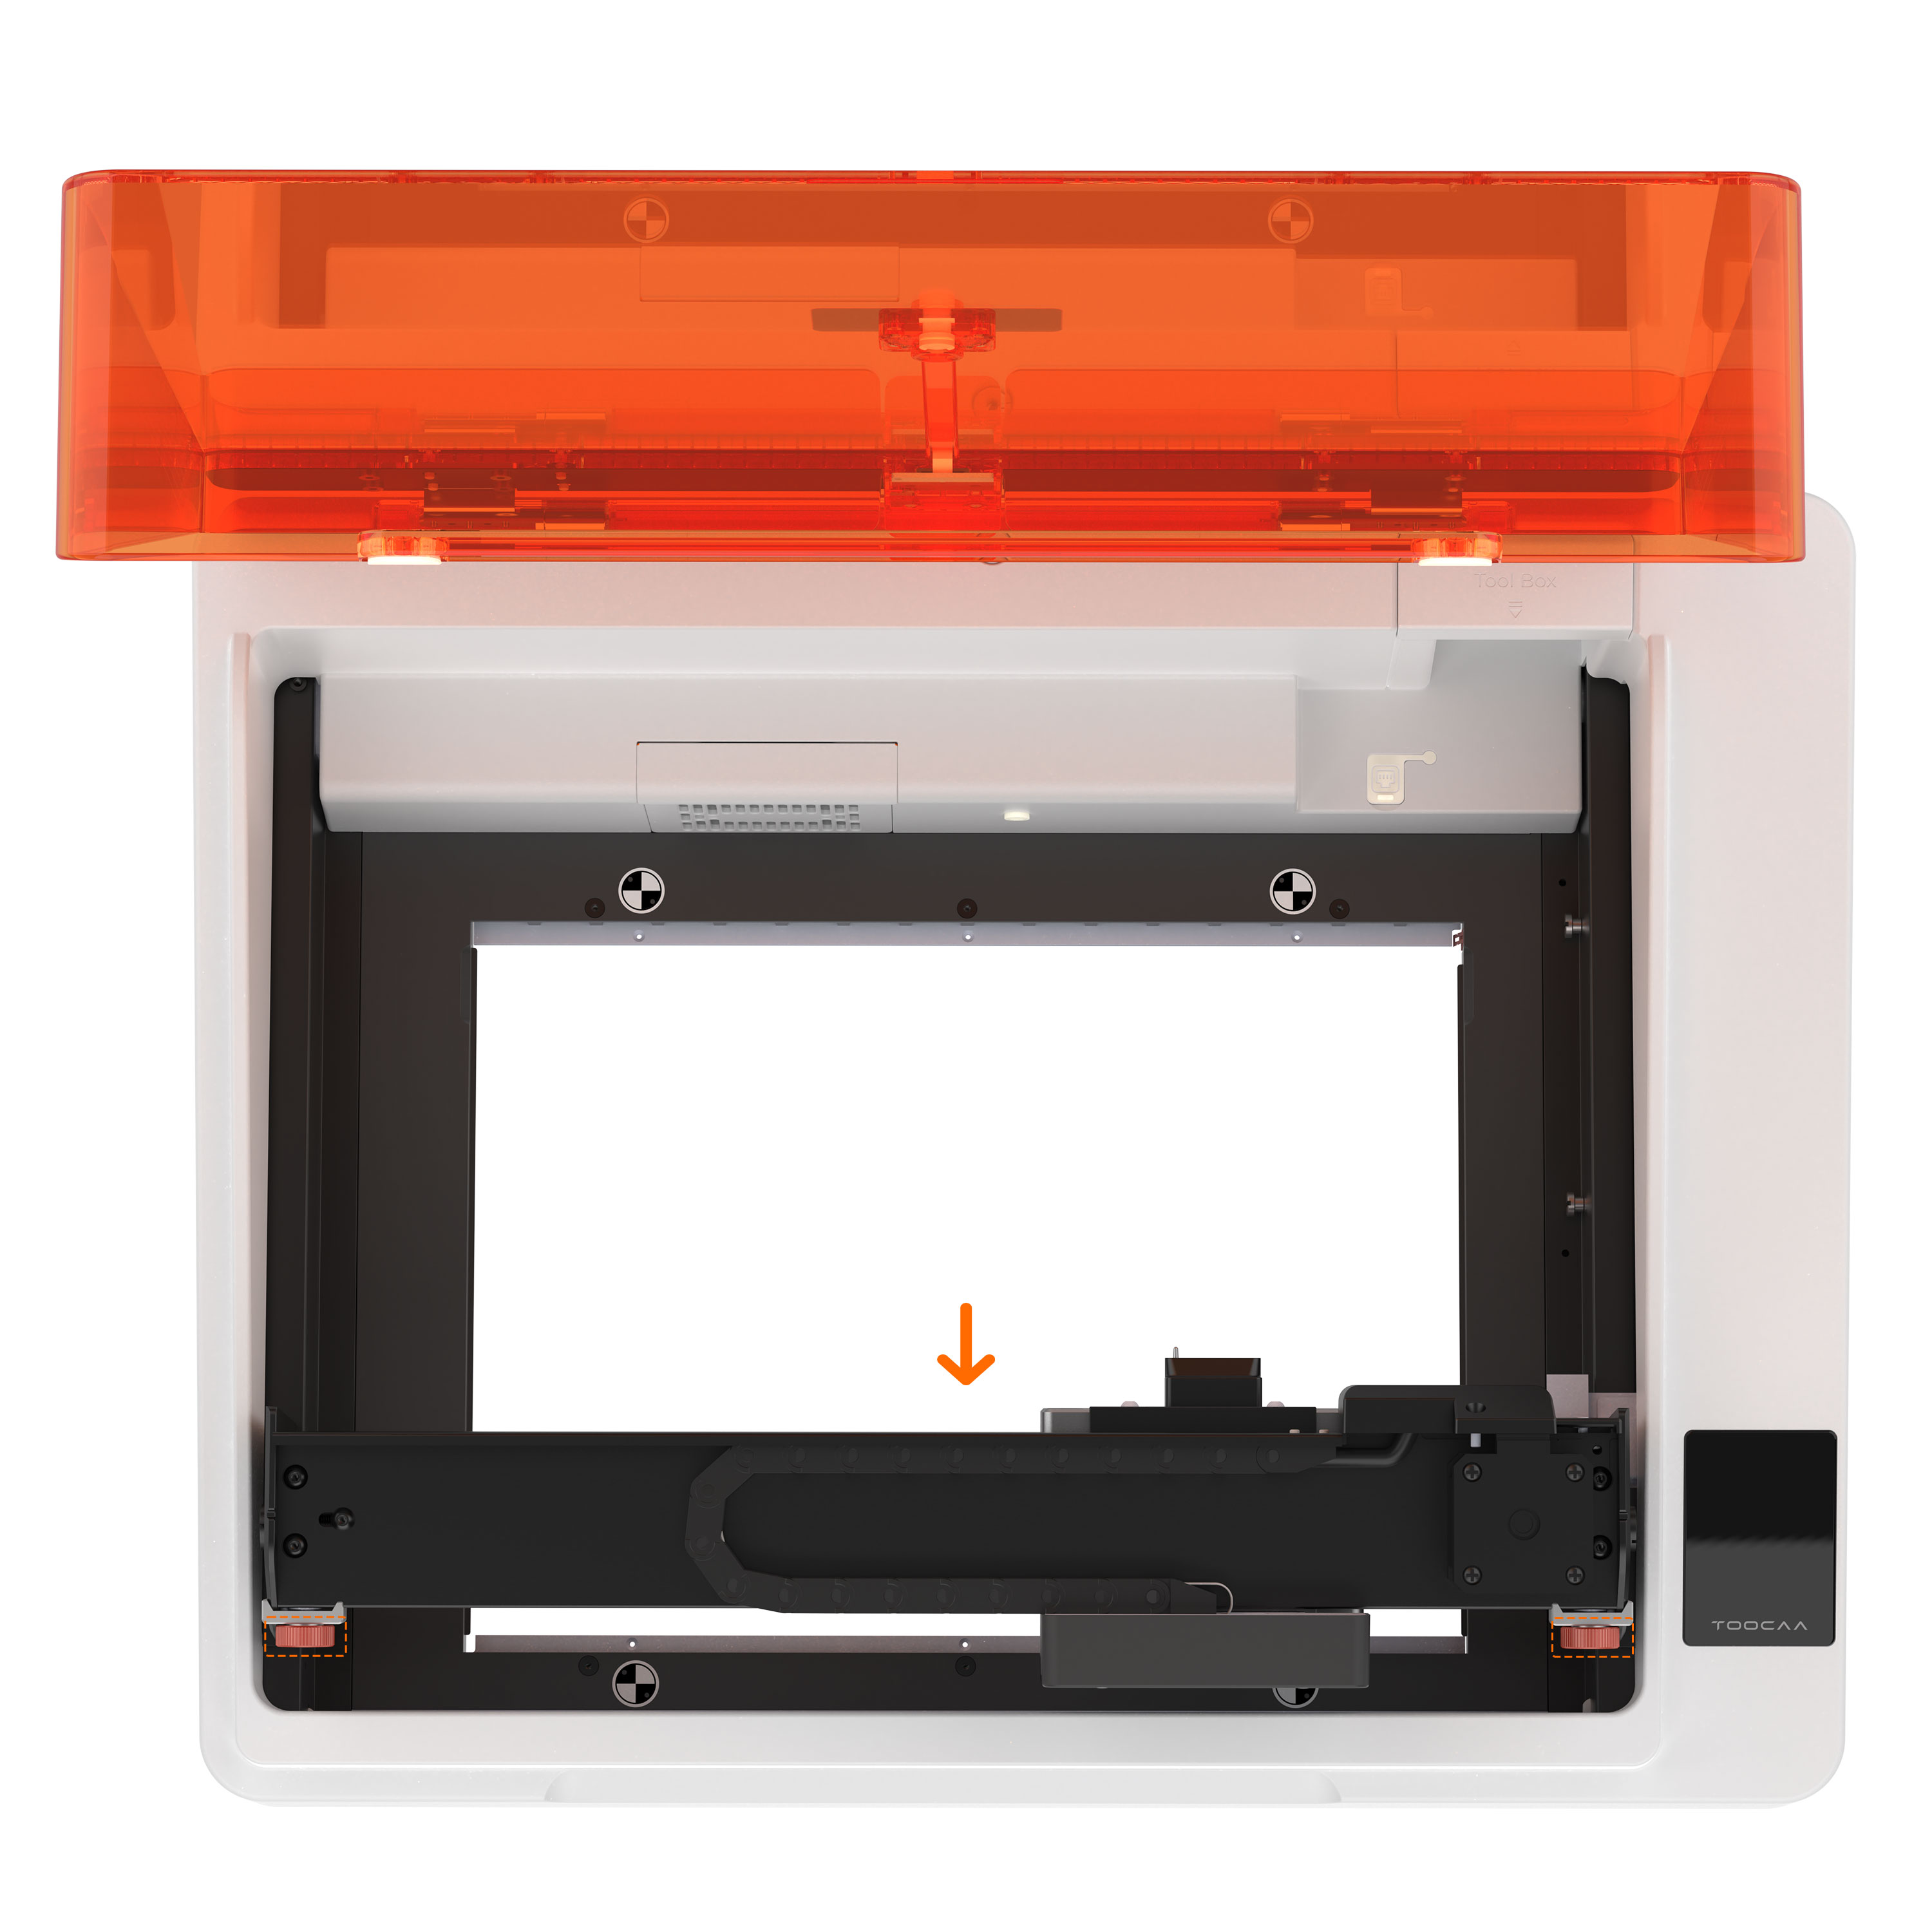
- With the device powered off, remove the TOOCAA NOVA blade cutting panel and aluminum protective plate using the orange handle.

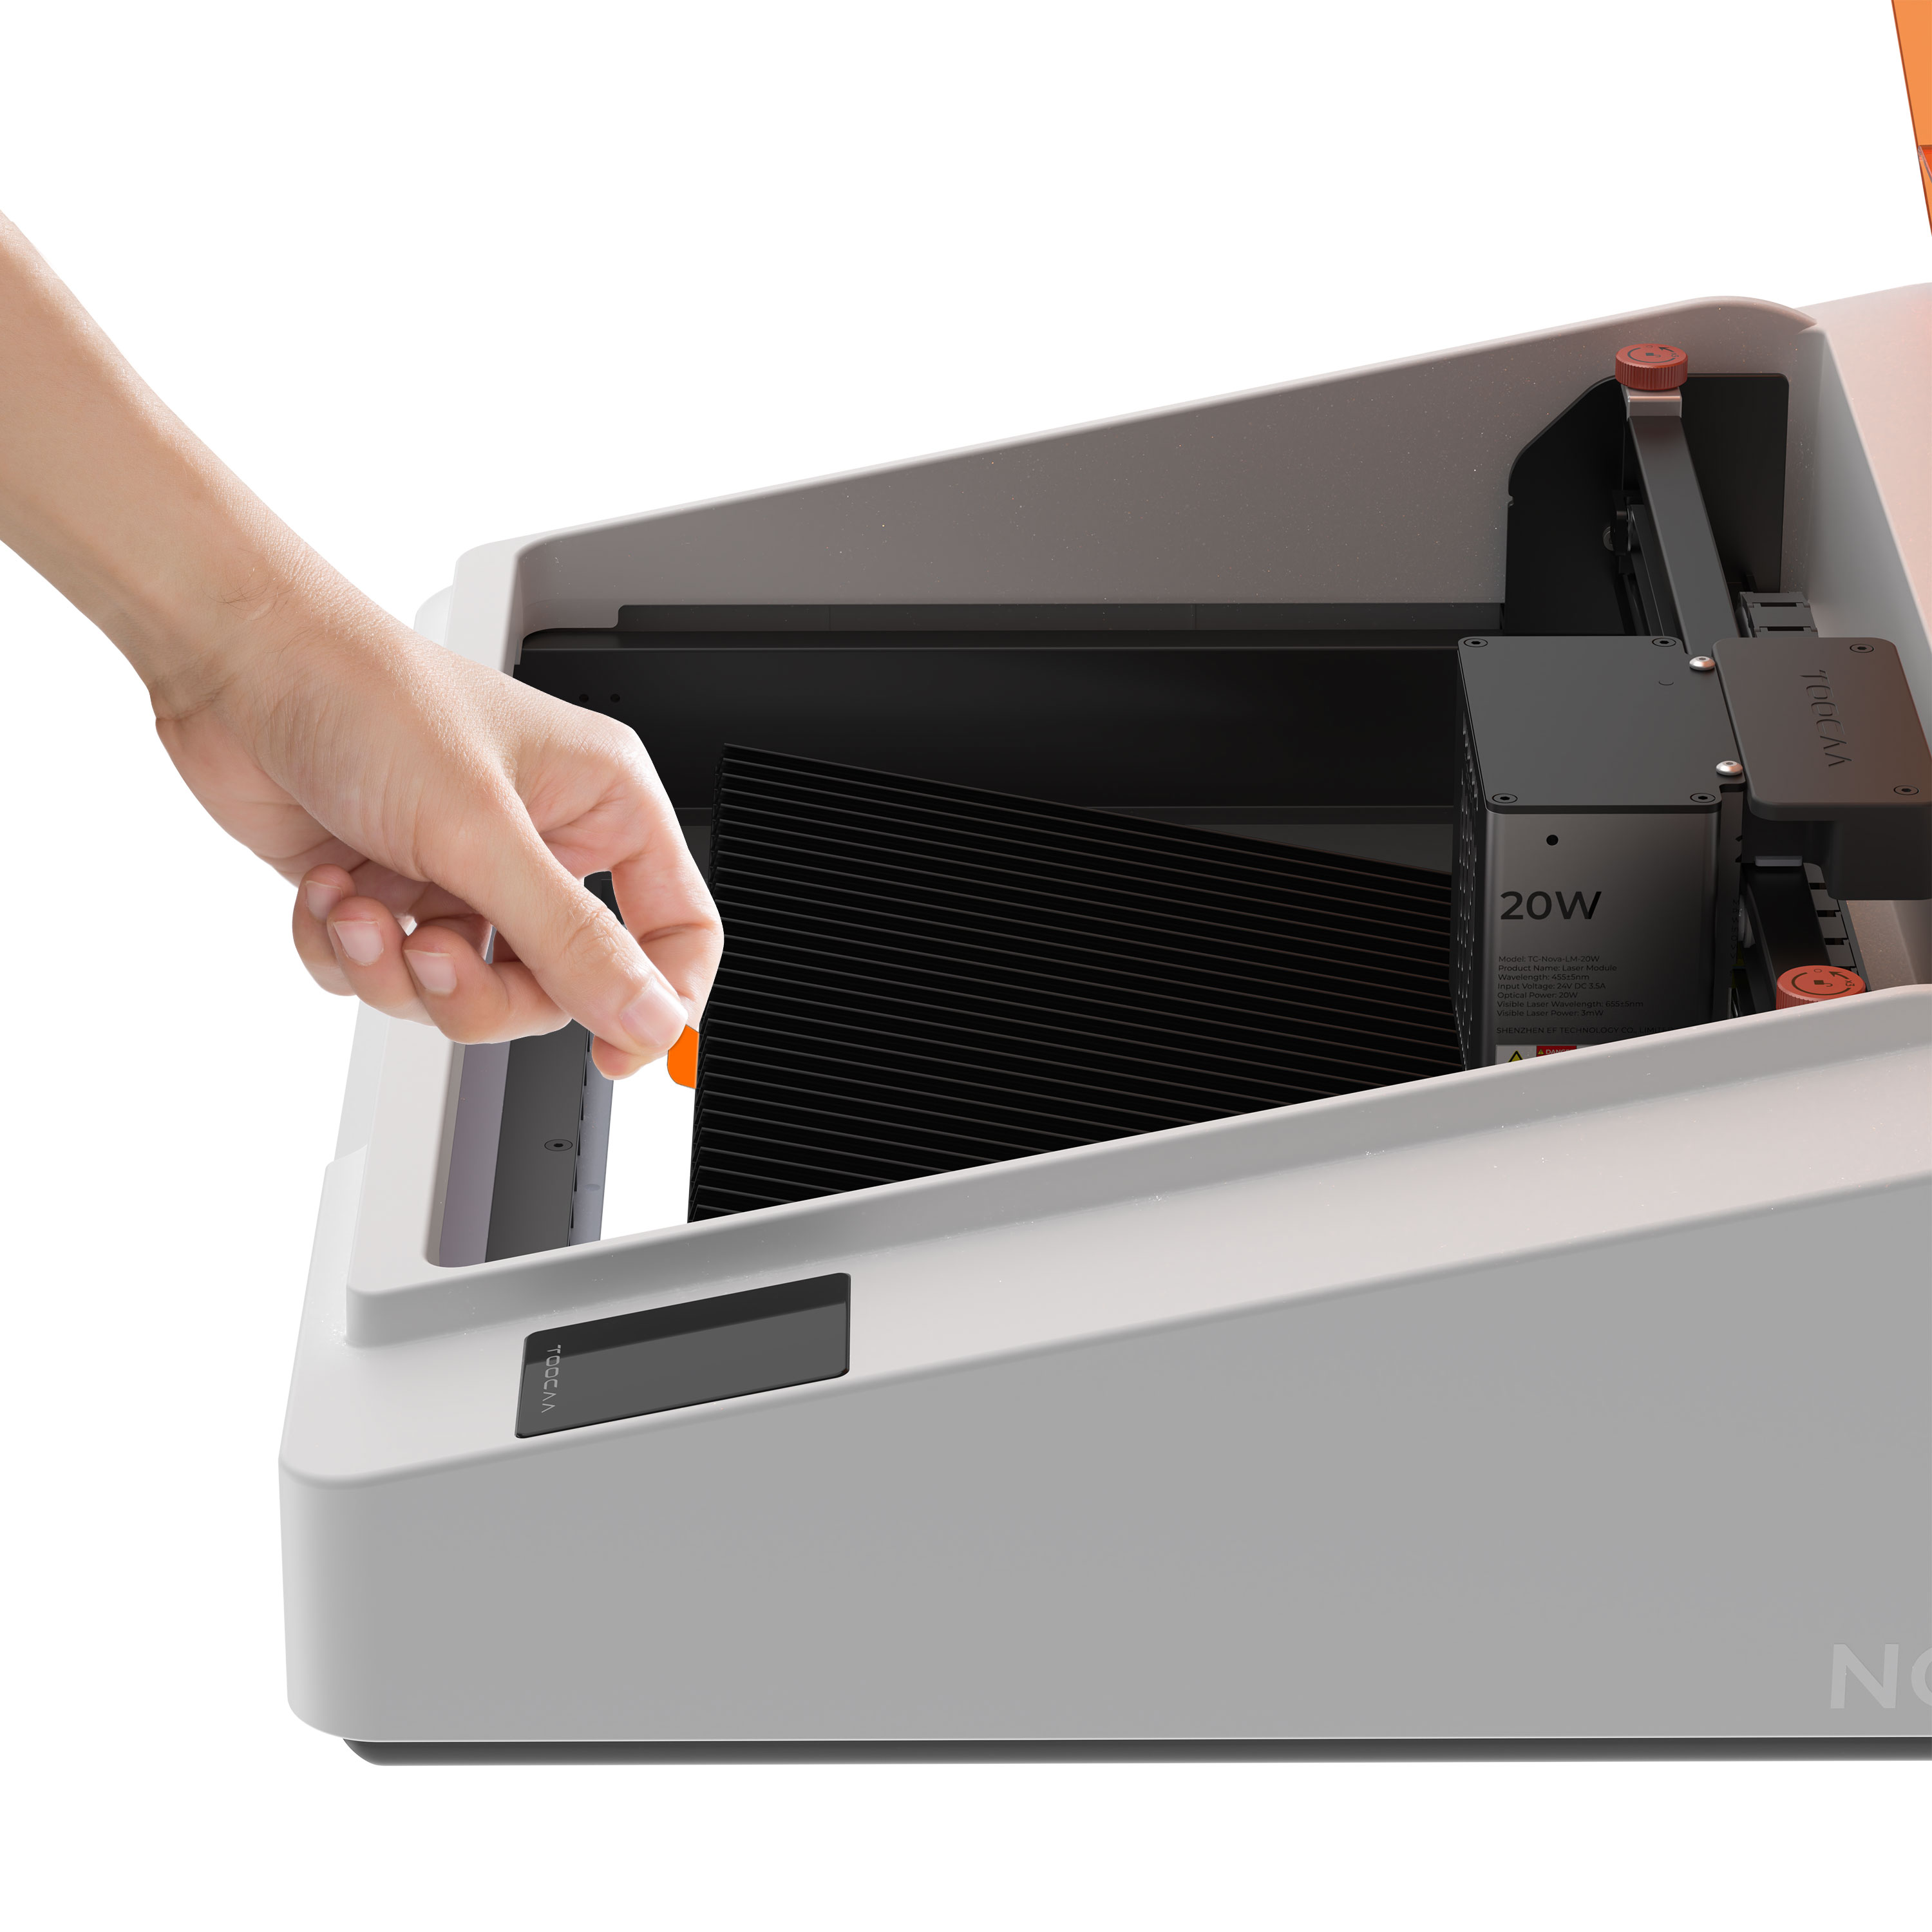
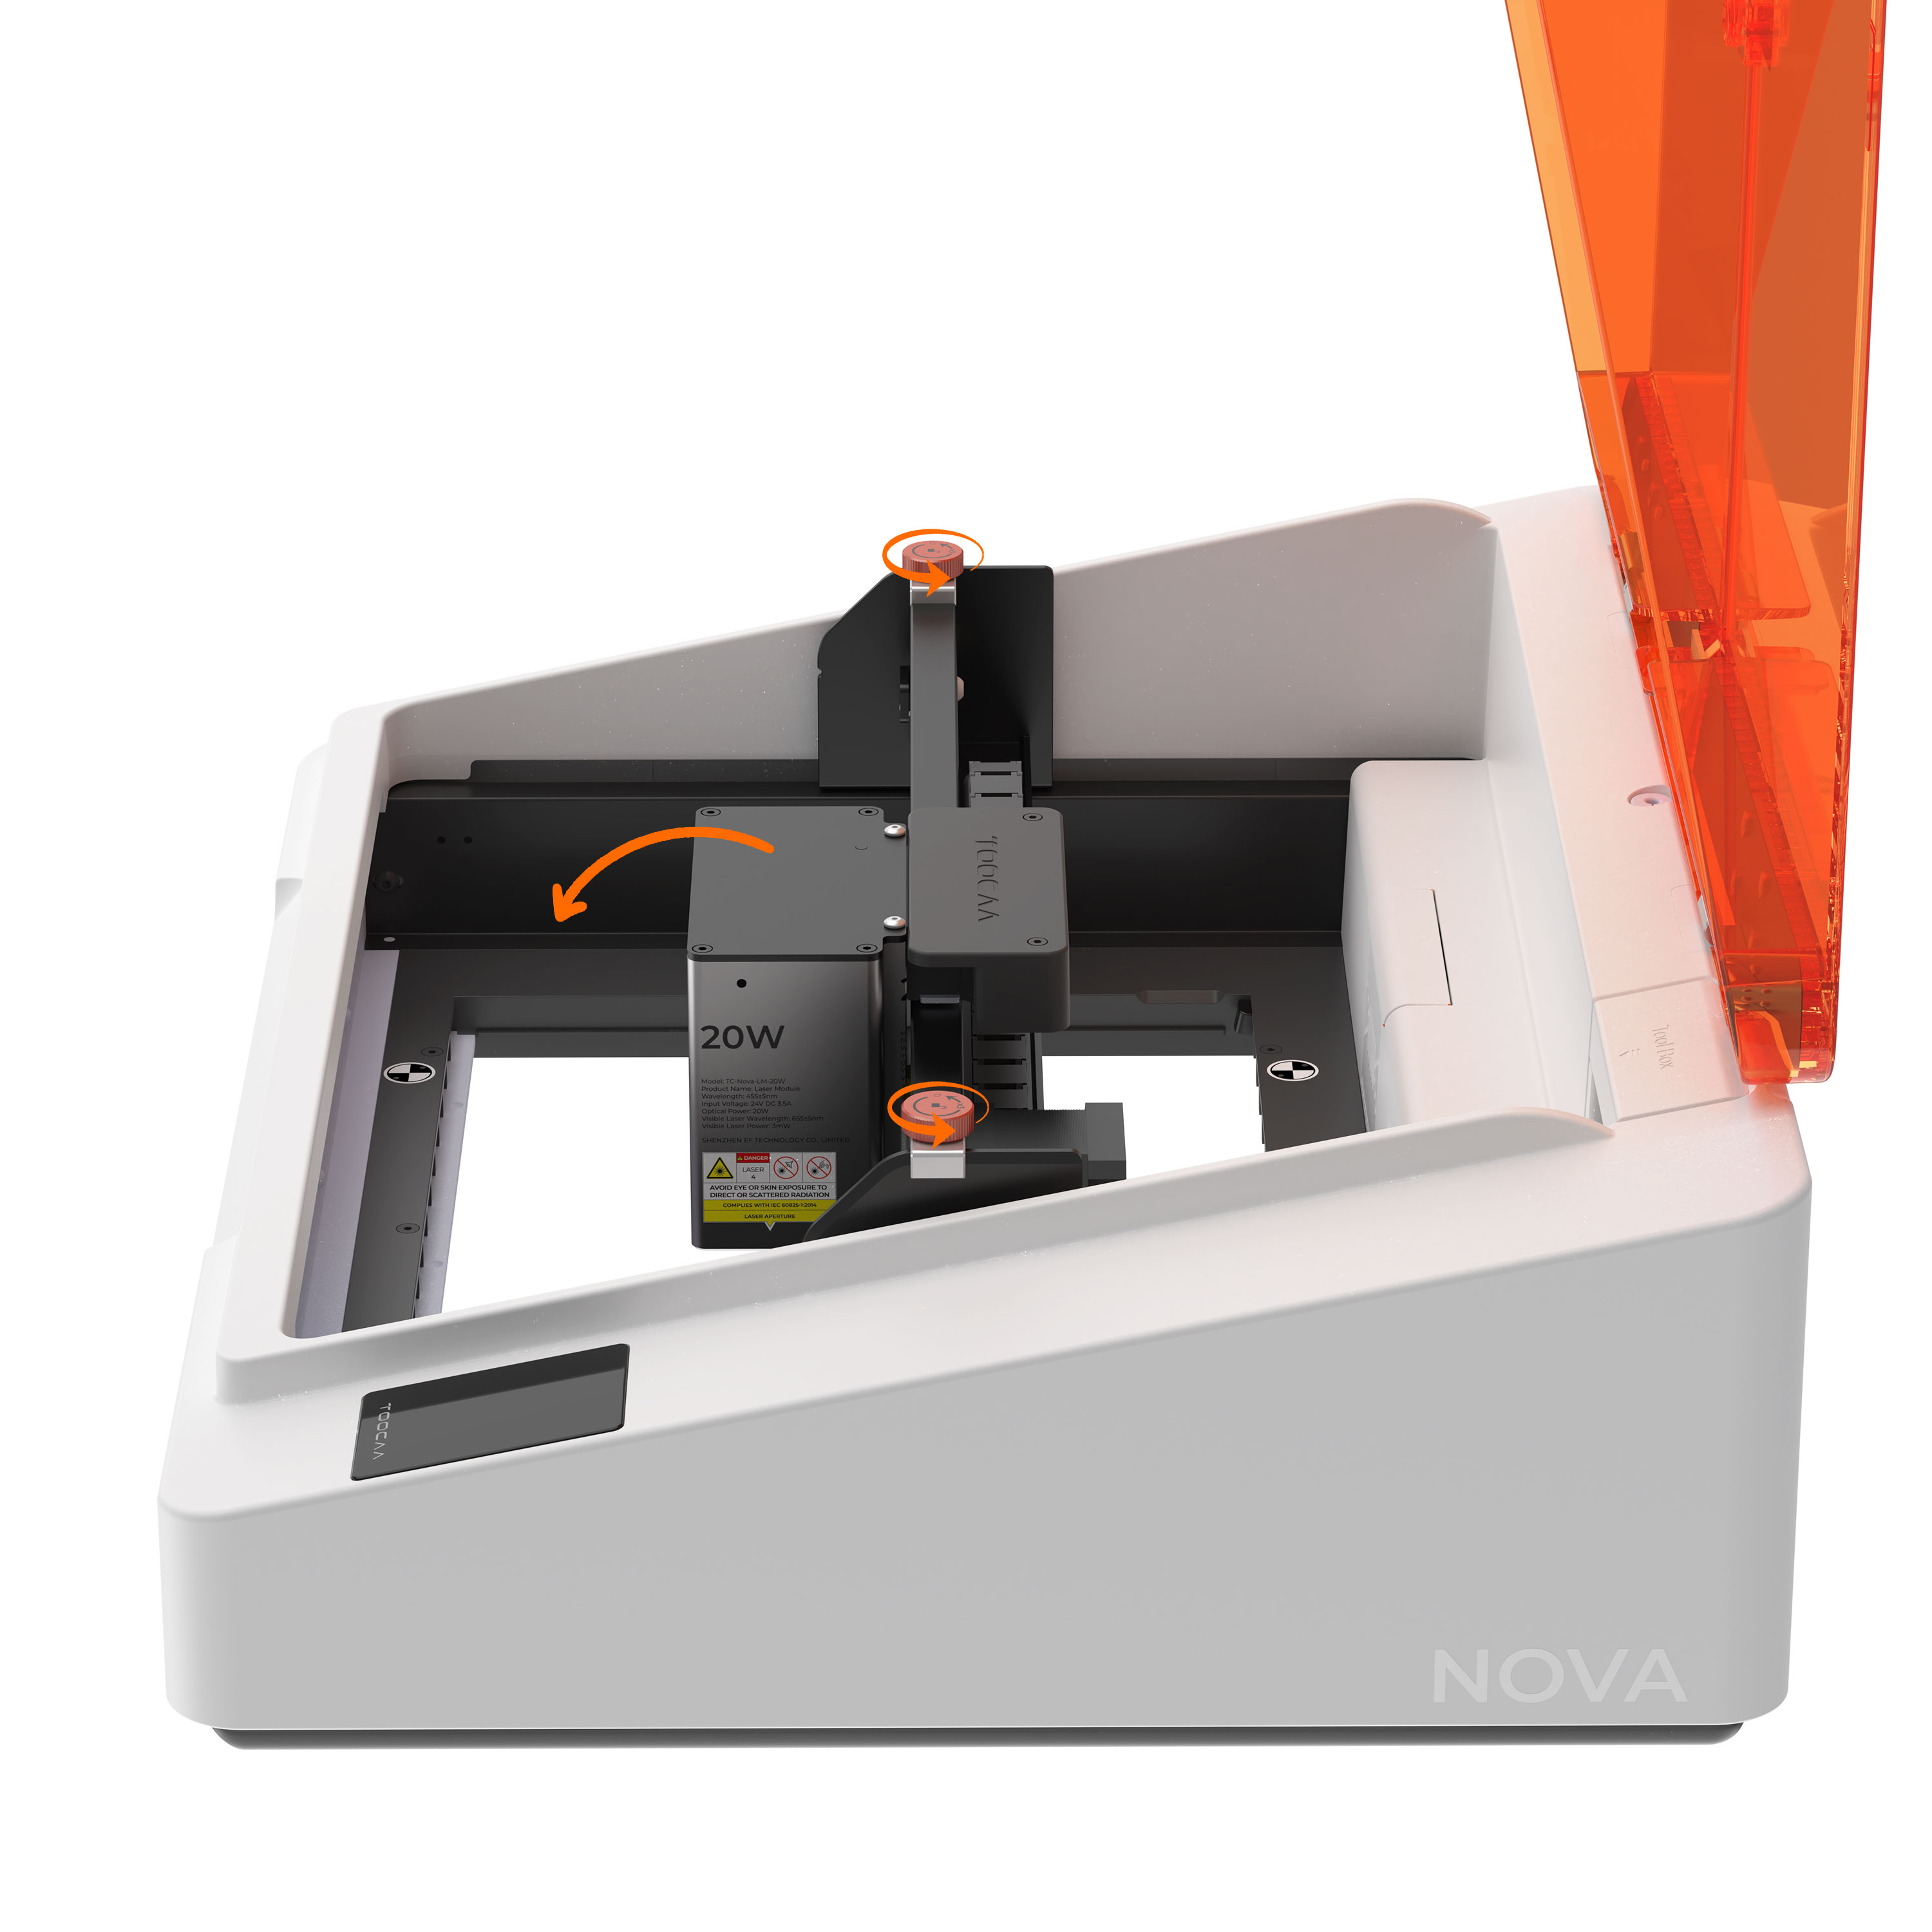
- Turn the X-axis knob counterclockwise for three full rotations. Rotate the X-axis 90°, tighten the knob, and move the X-axis to the bottom side of the machine.
-
Insert the rotary attachment into the connection port on the right side of the machine, then tighten the screws.
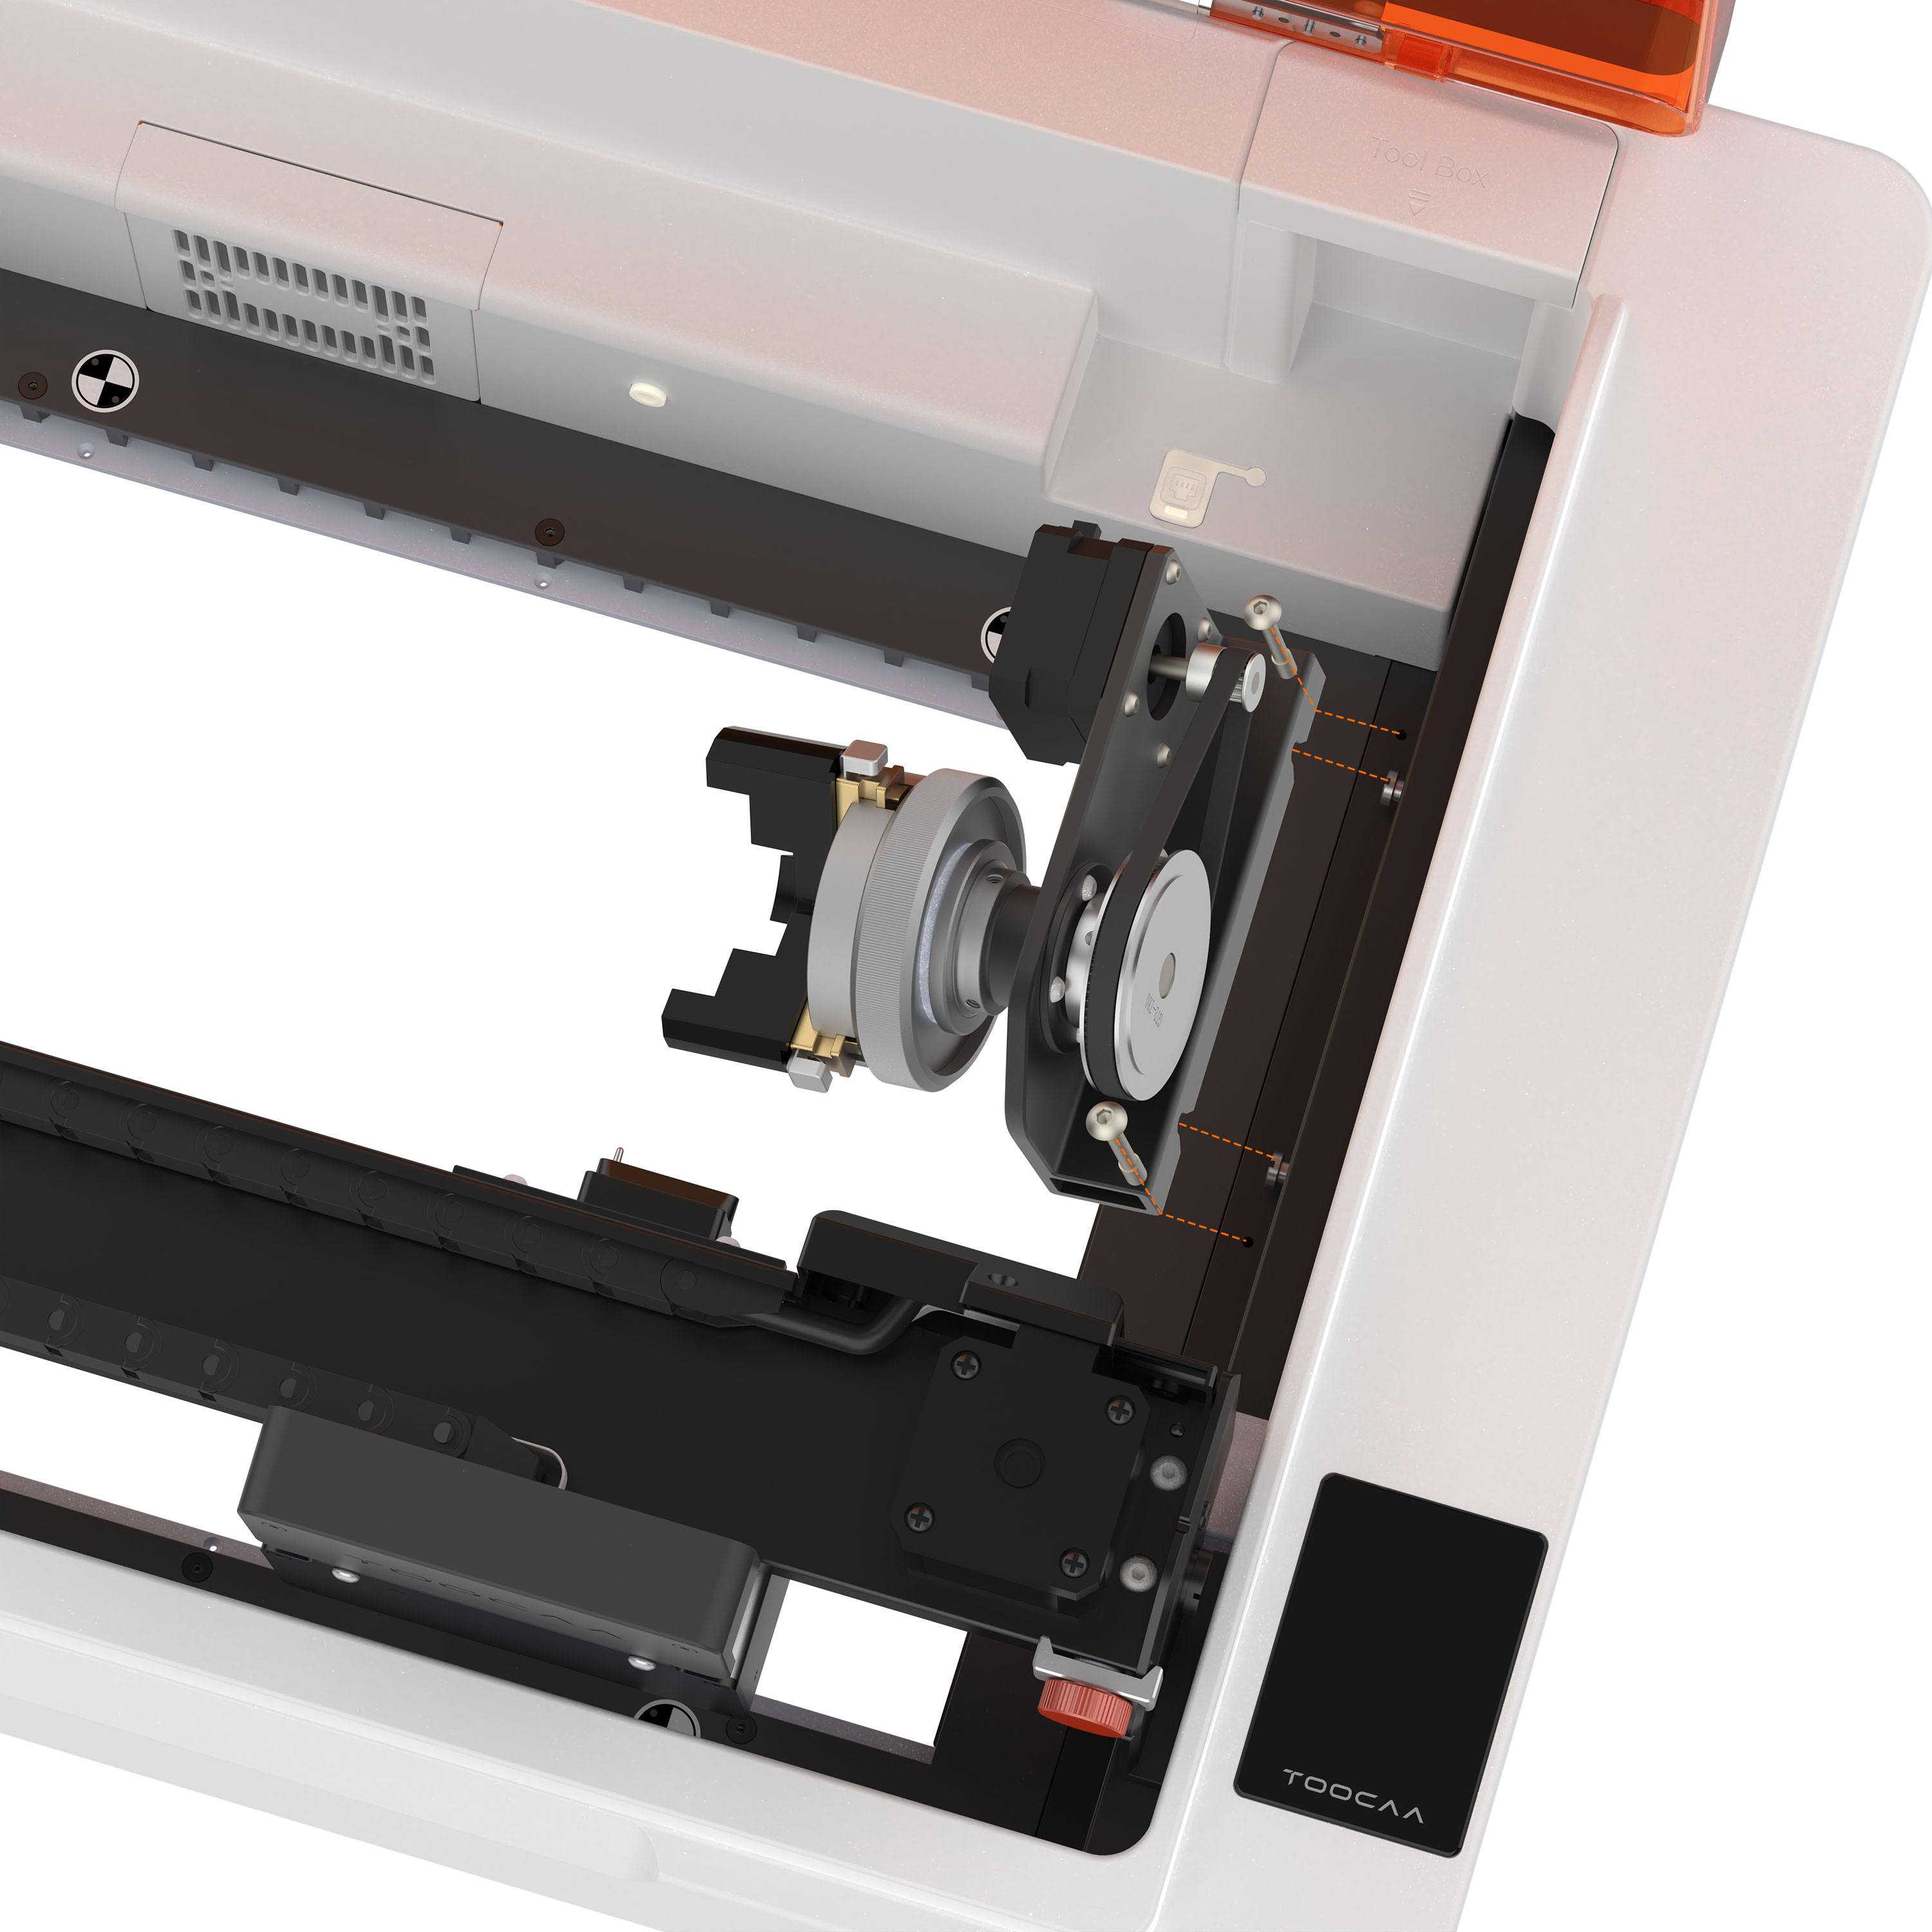
Close-up view of the connection port

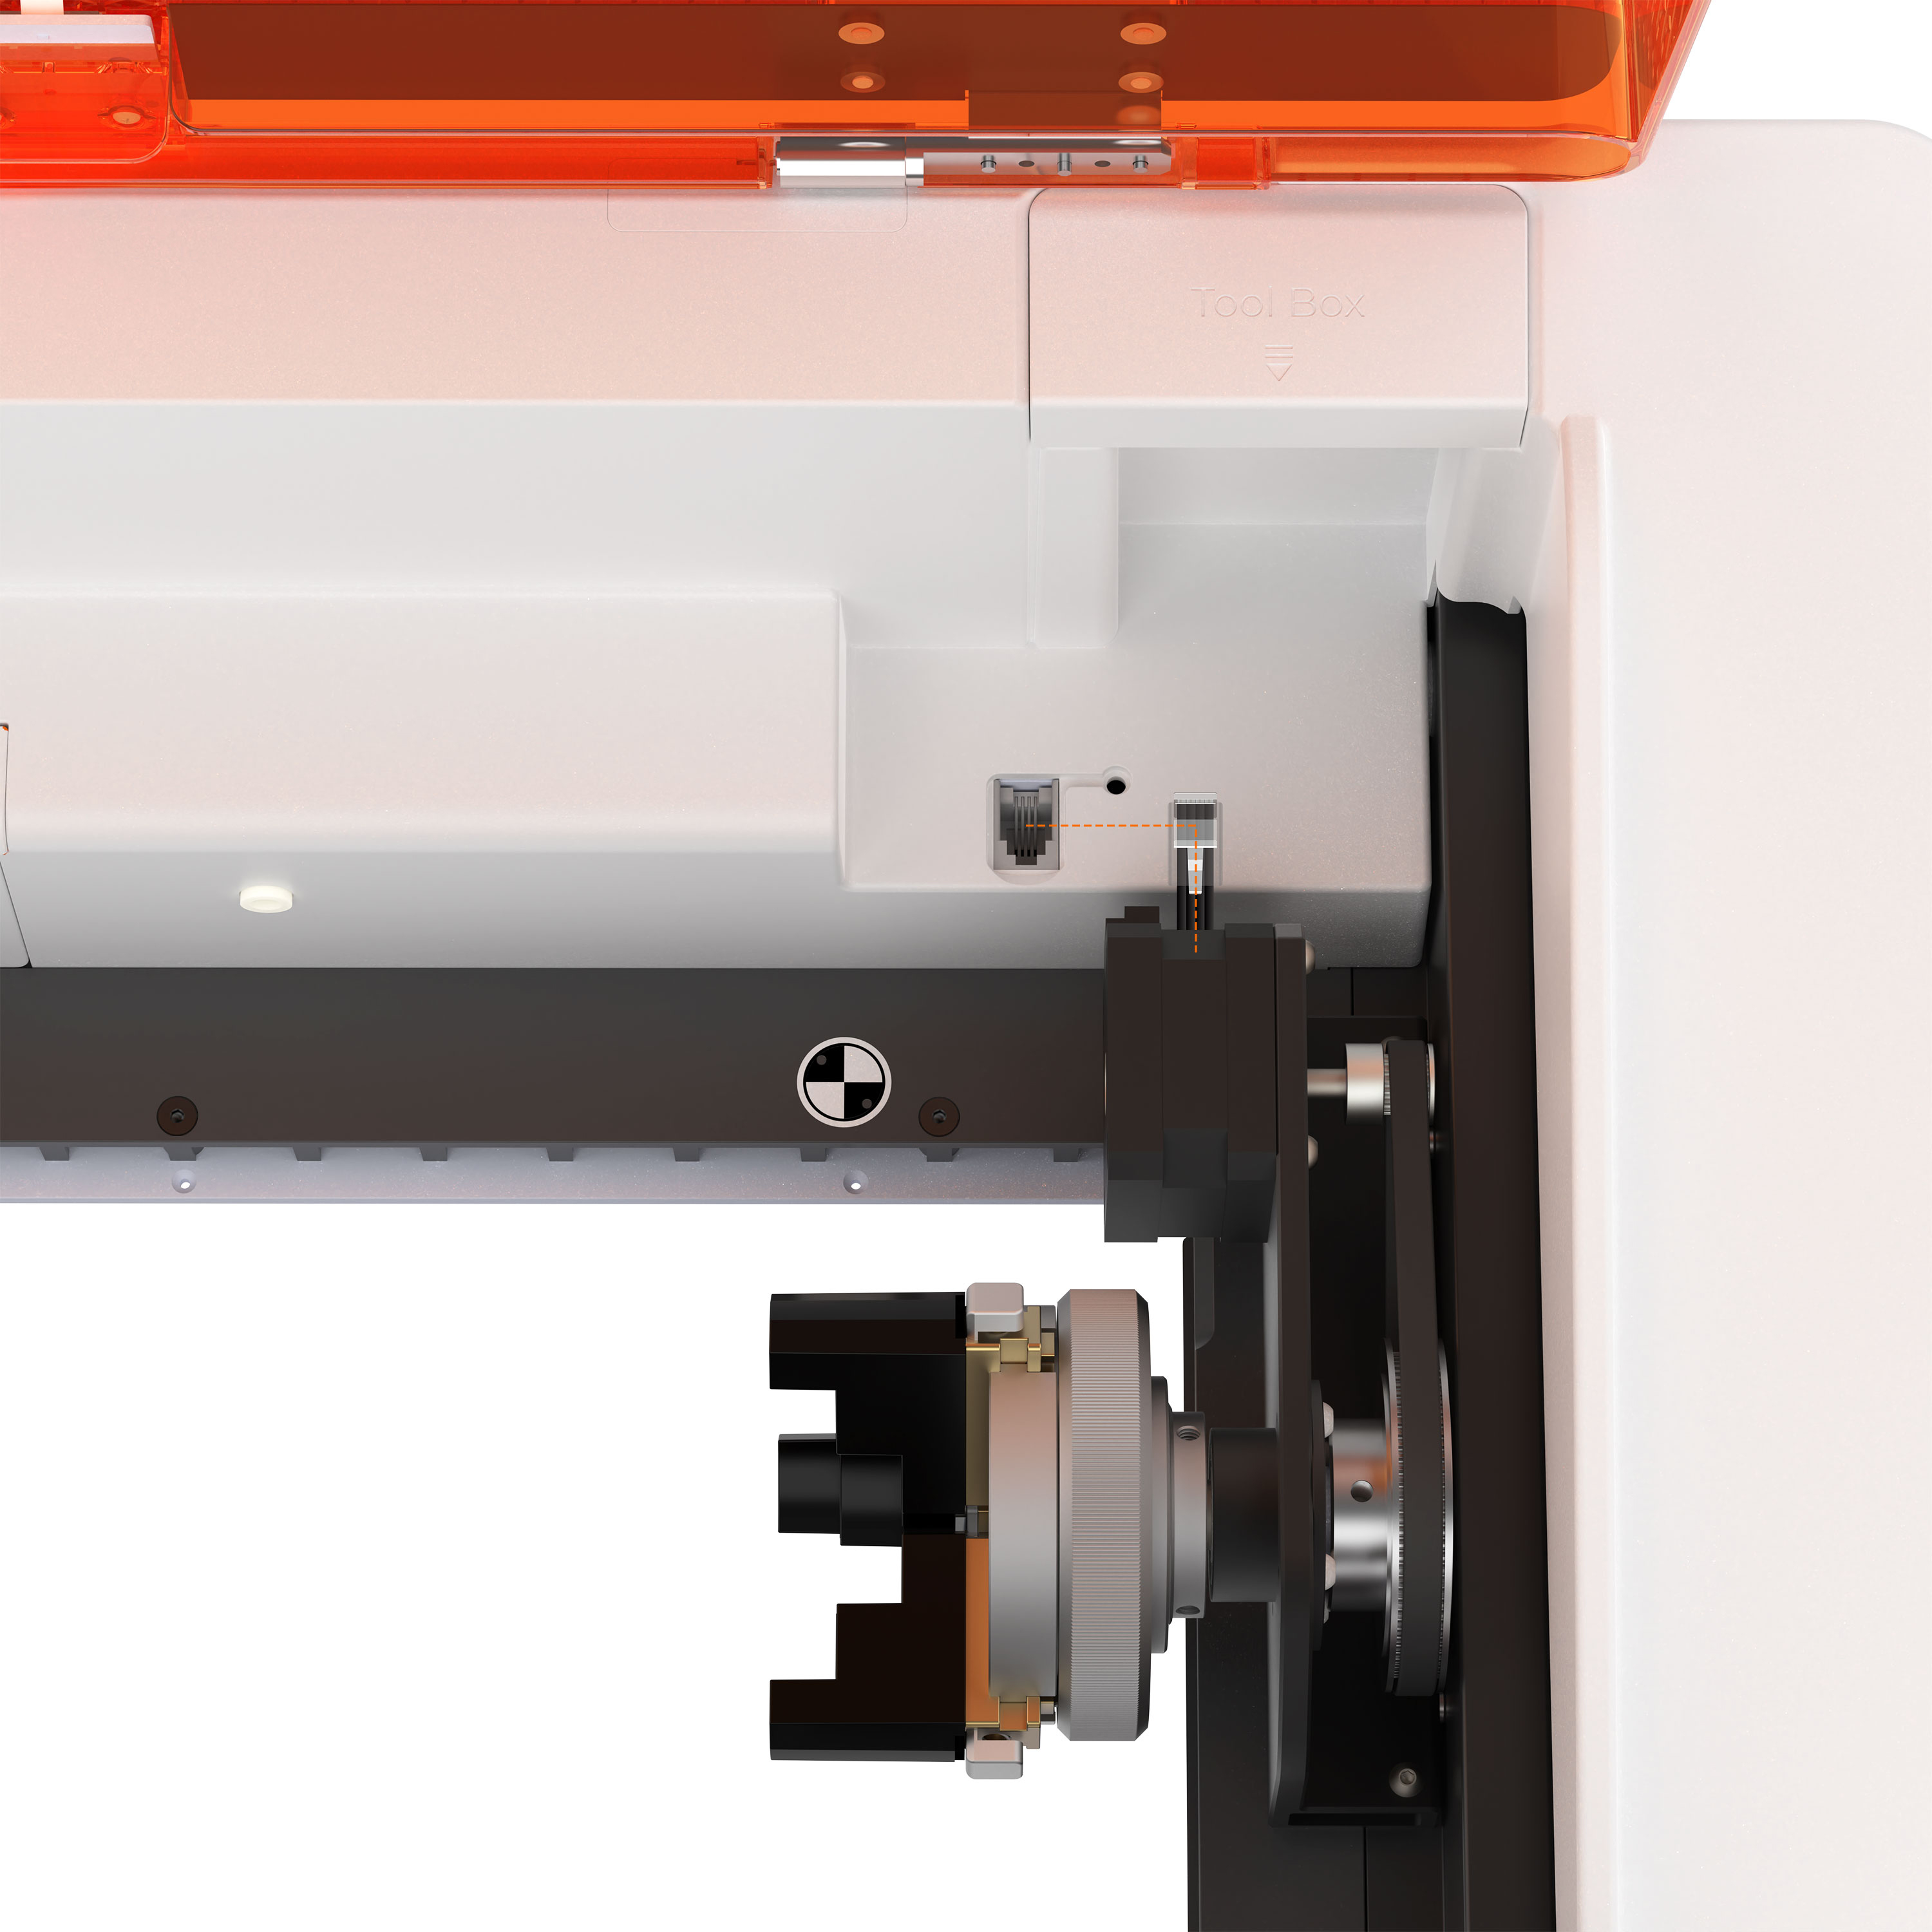
- Insert the X-A cable into the expansion port.
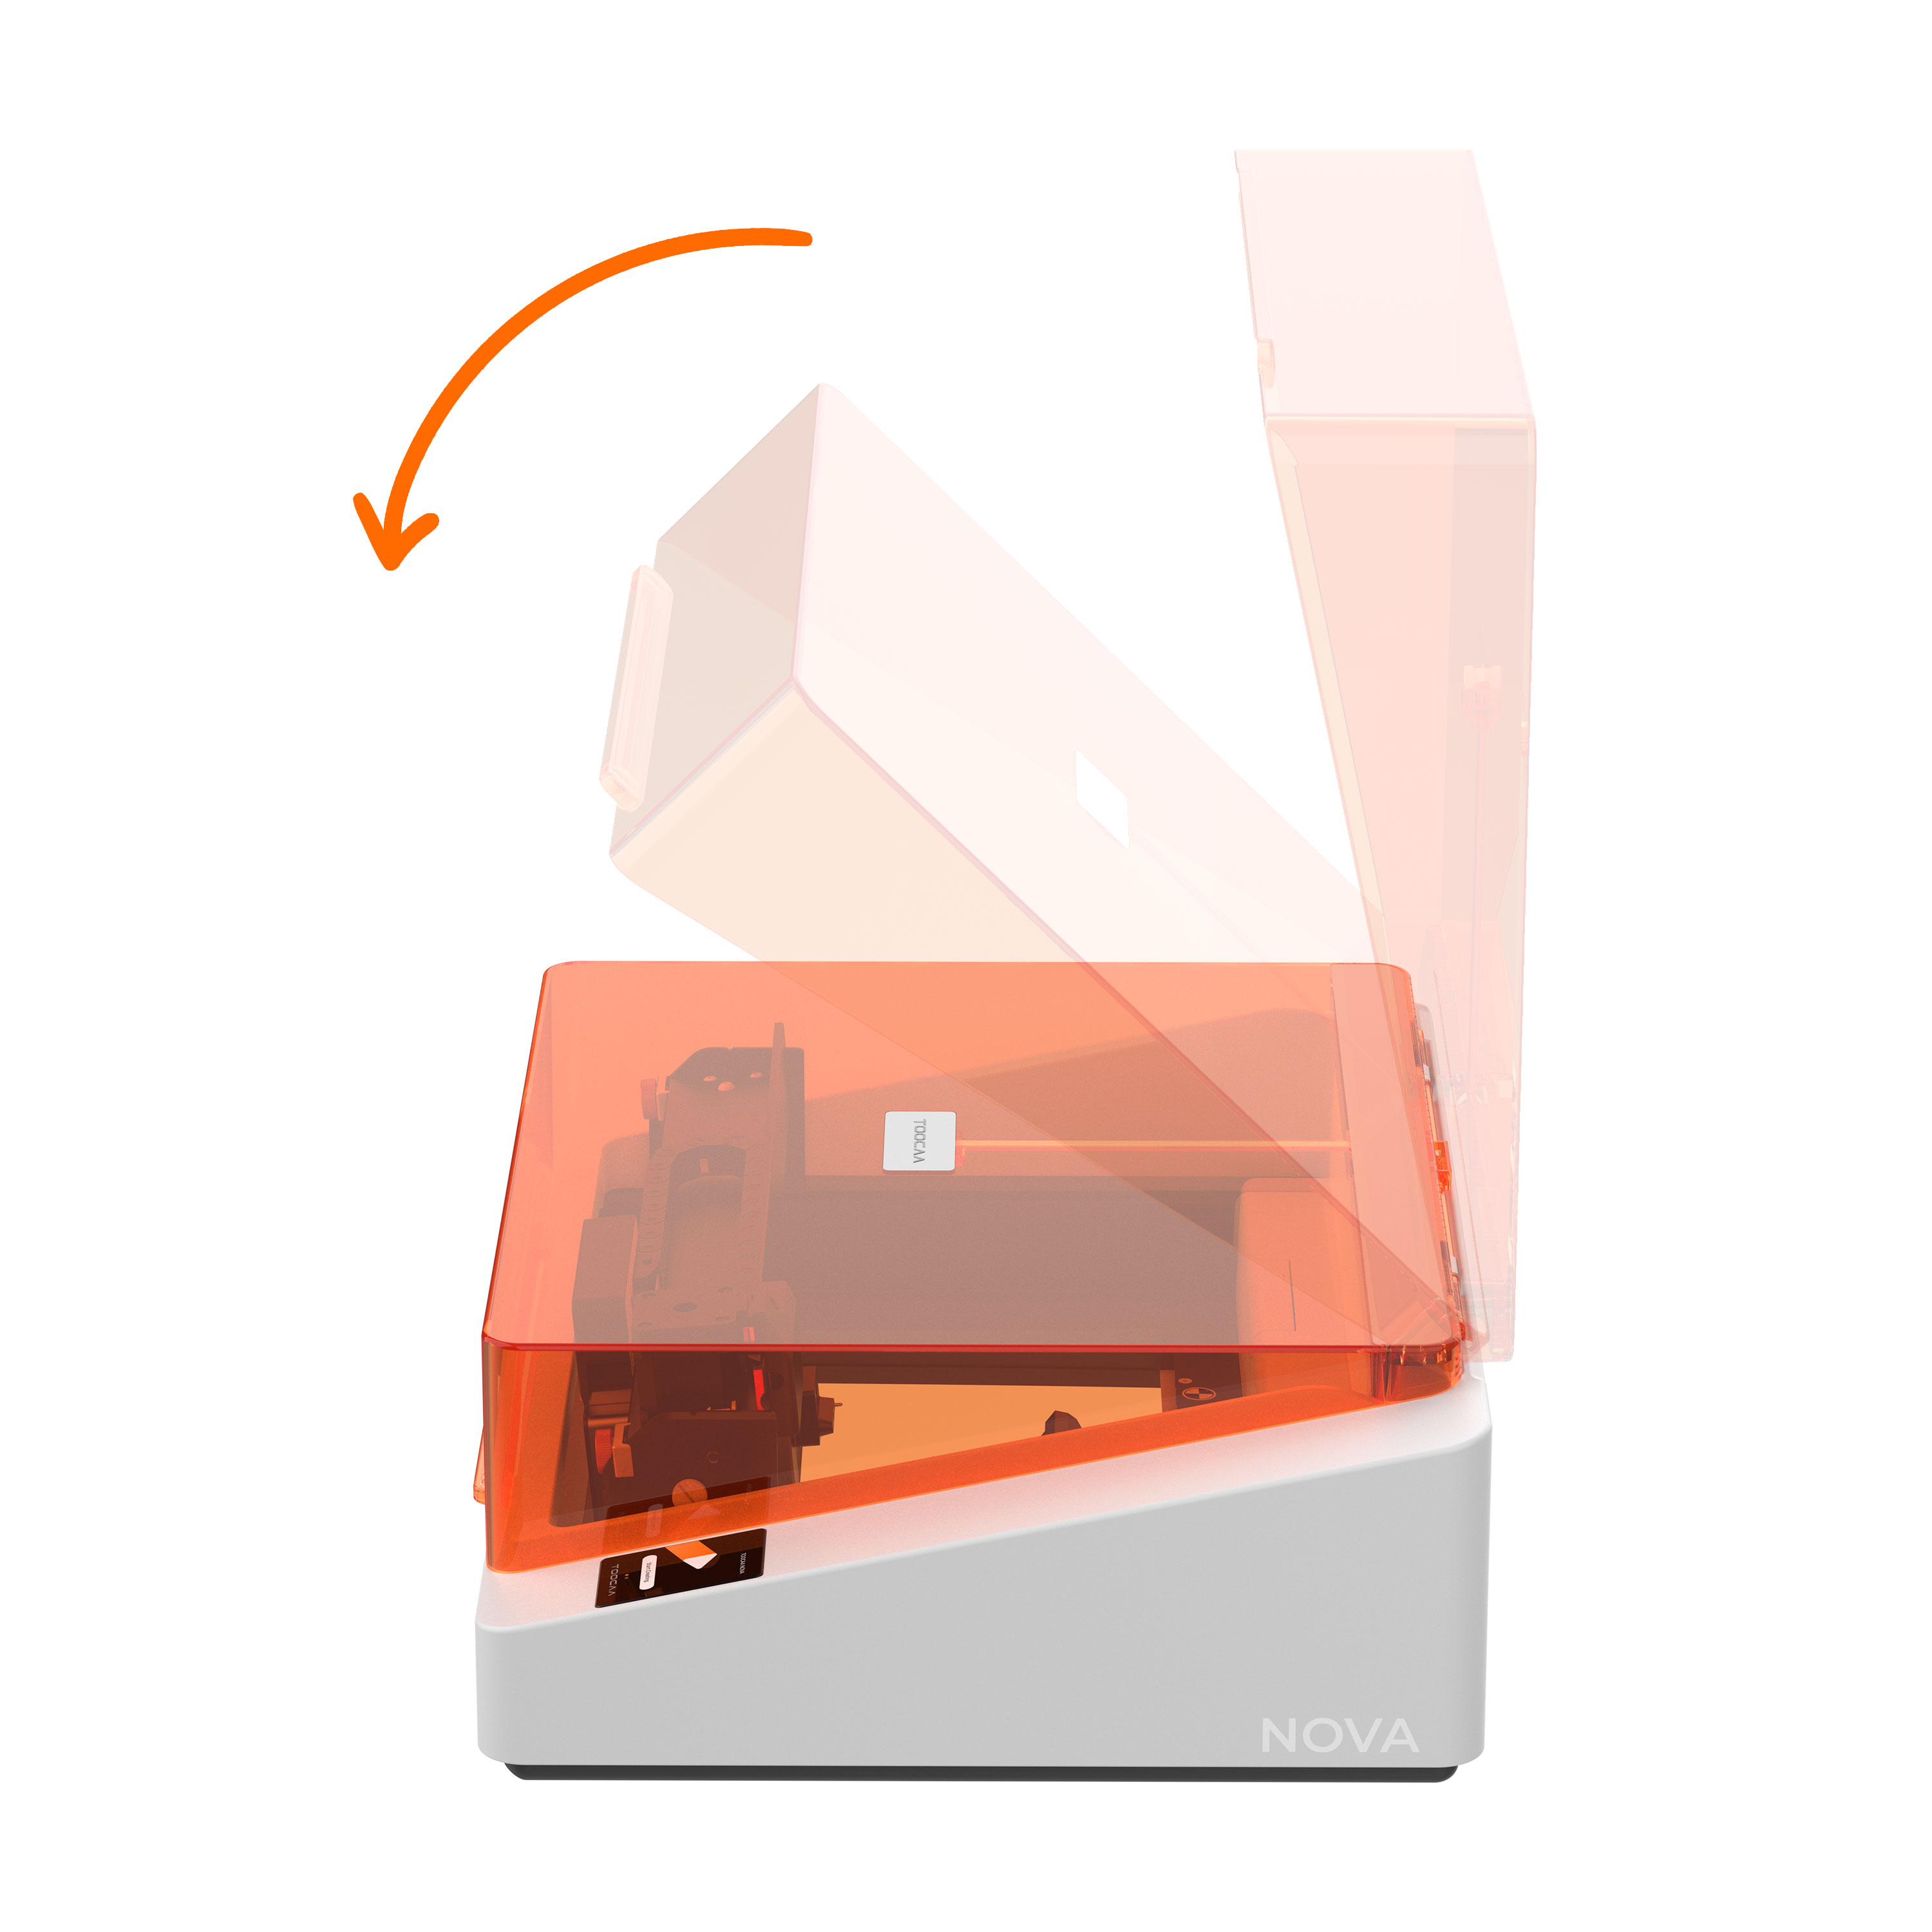
- Close the lid.
¶ TOOCAA Studio & TOOCAA NOVA Rotary Tutorial
- Start TOOCAA NOVA and launch TOOCAA Studio.
Once the device is correctly connected, all detected accessories will be displayed.
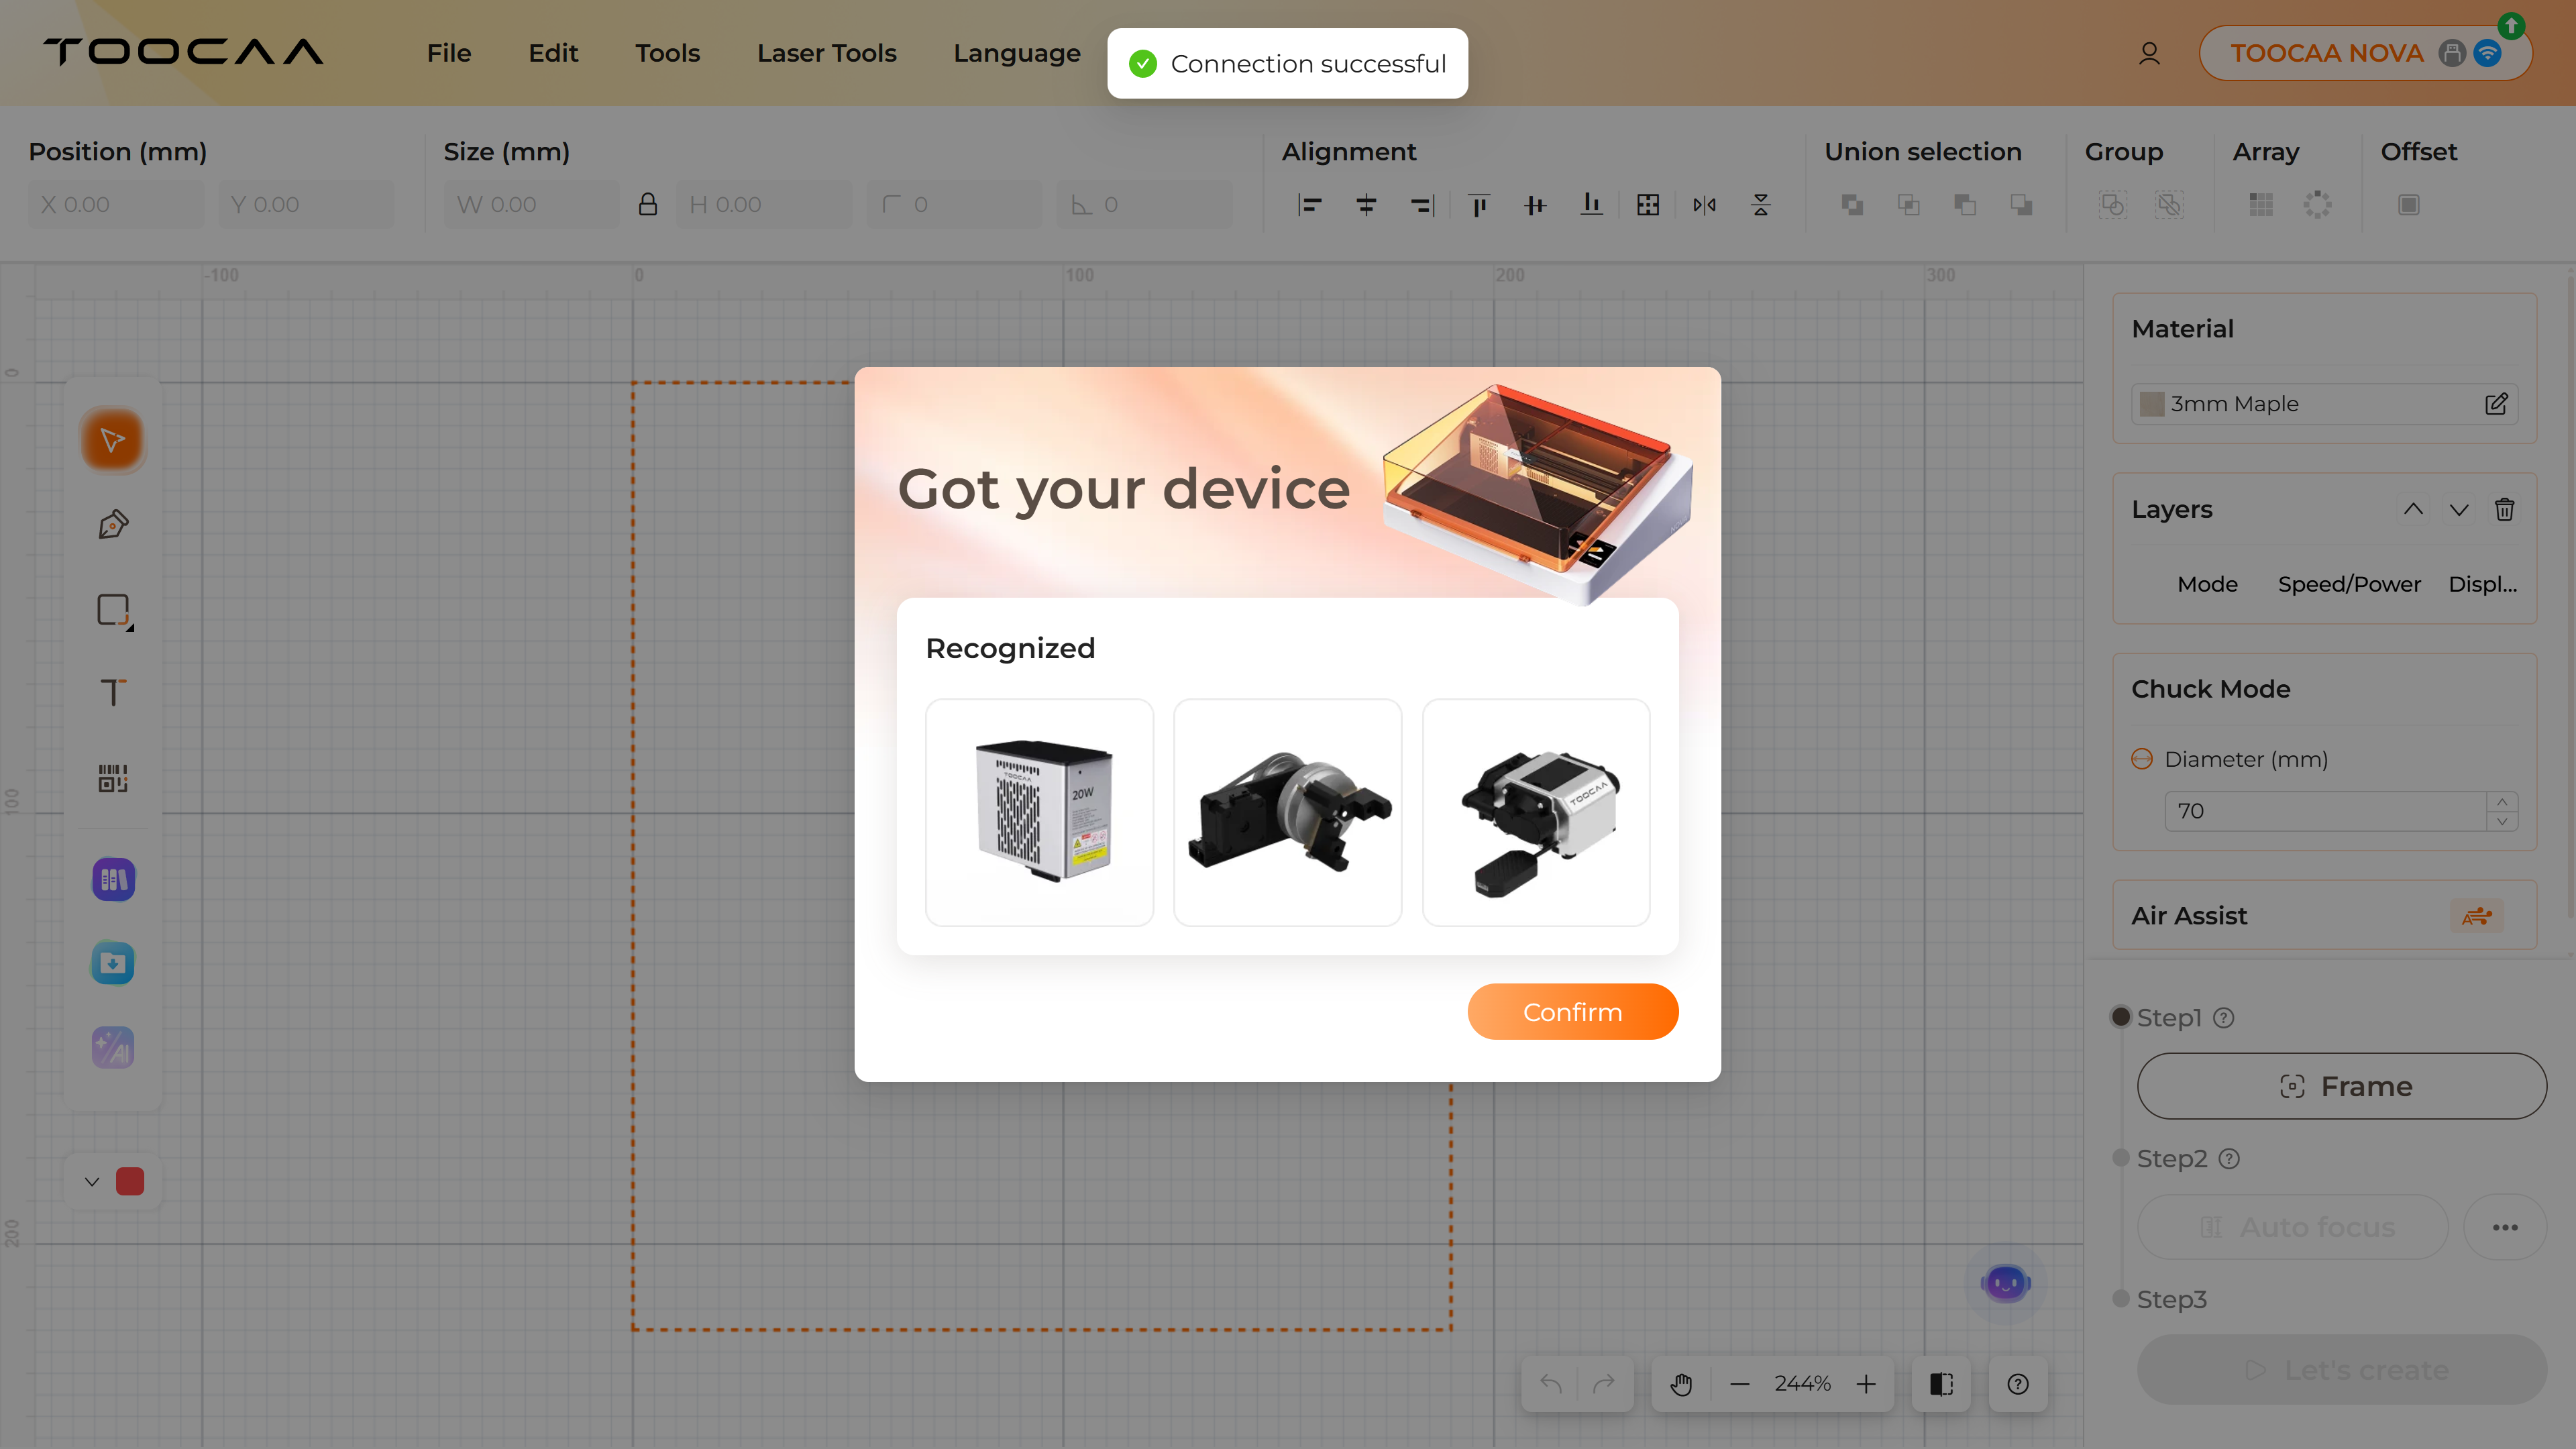
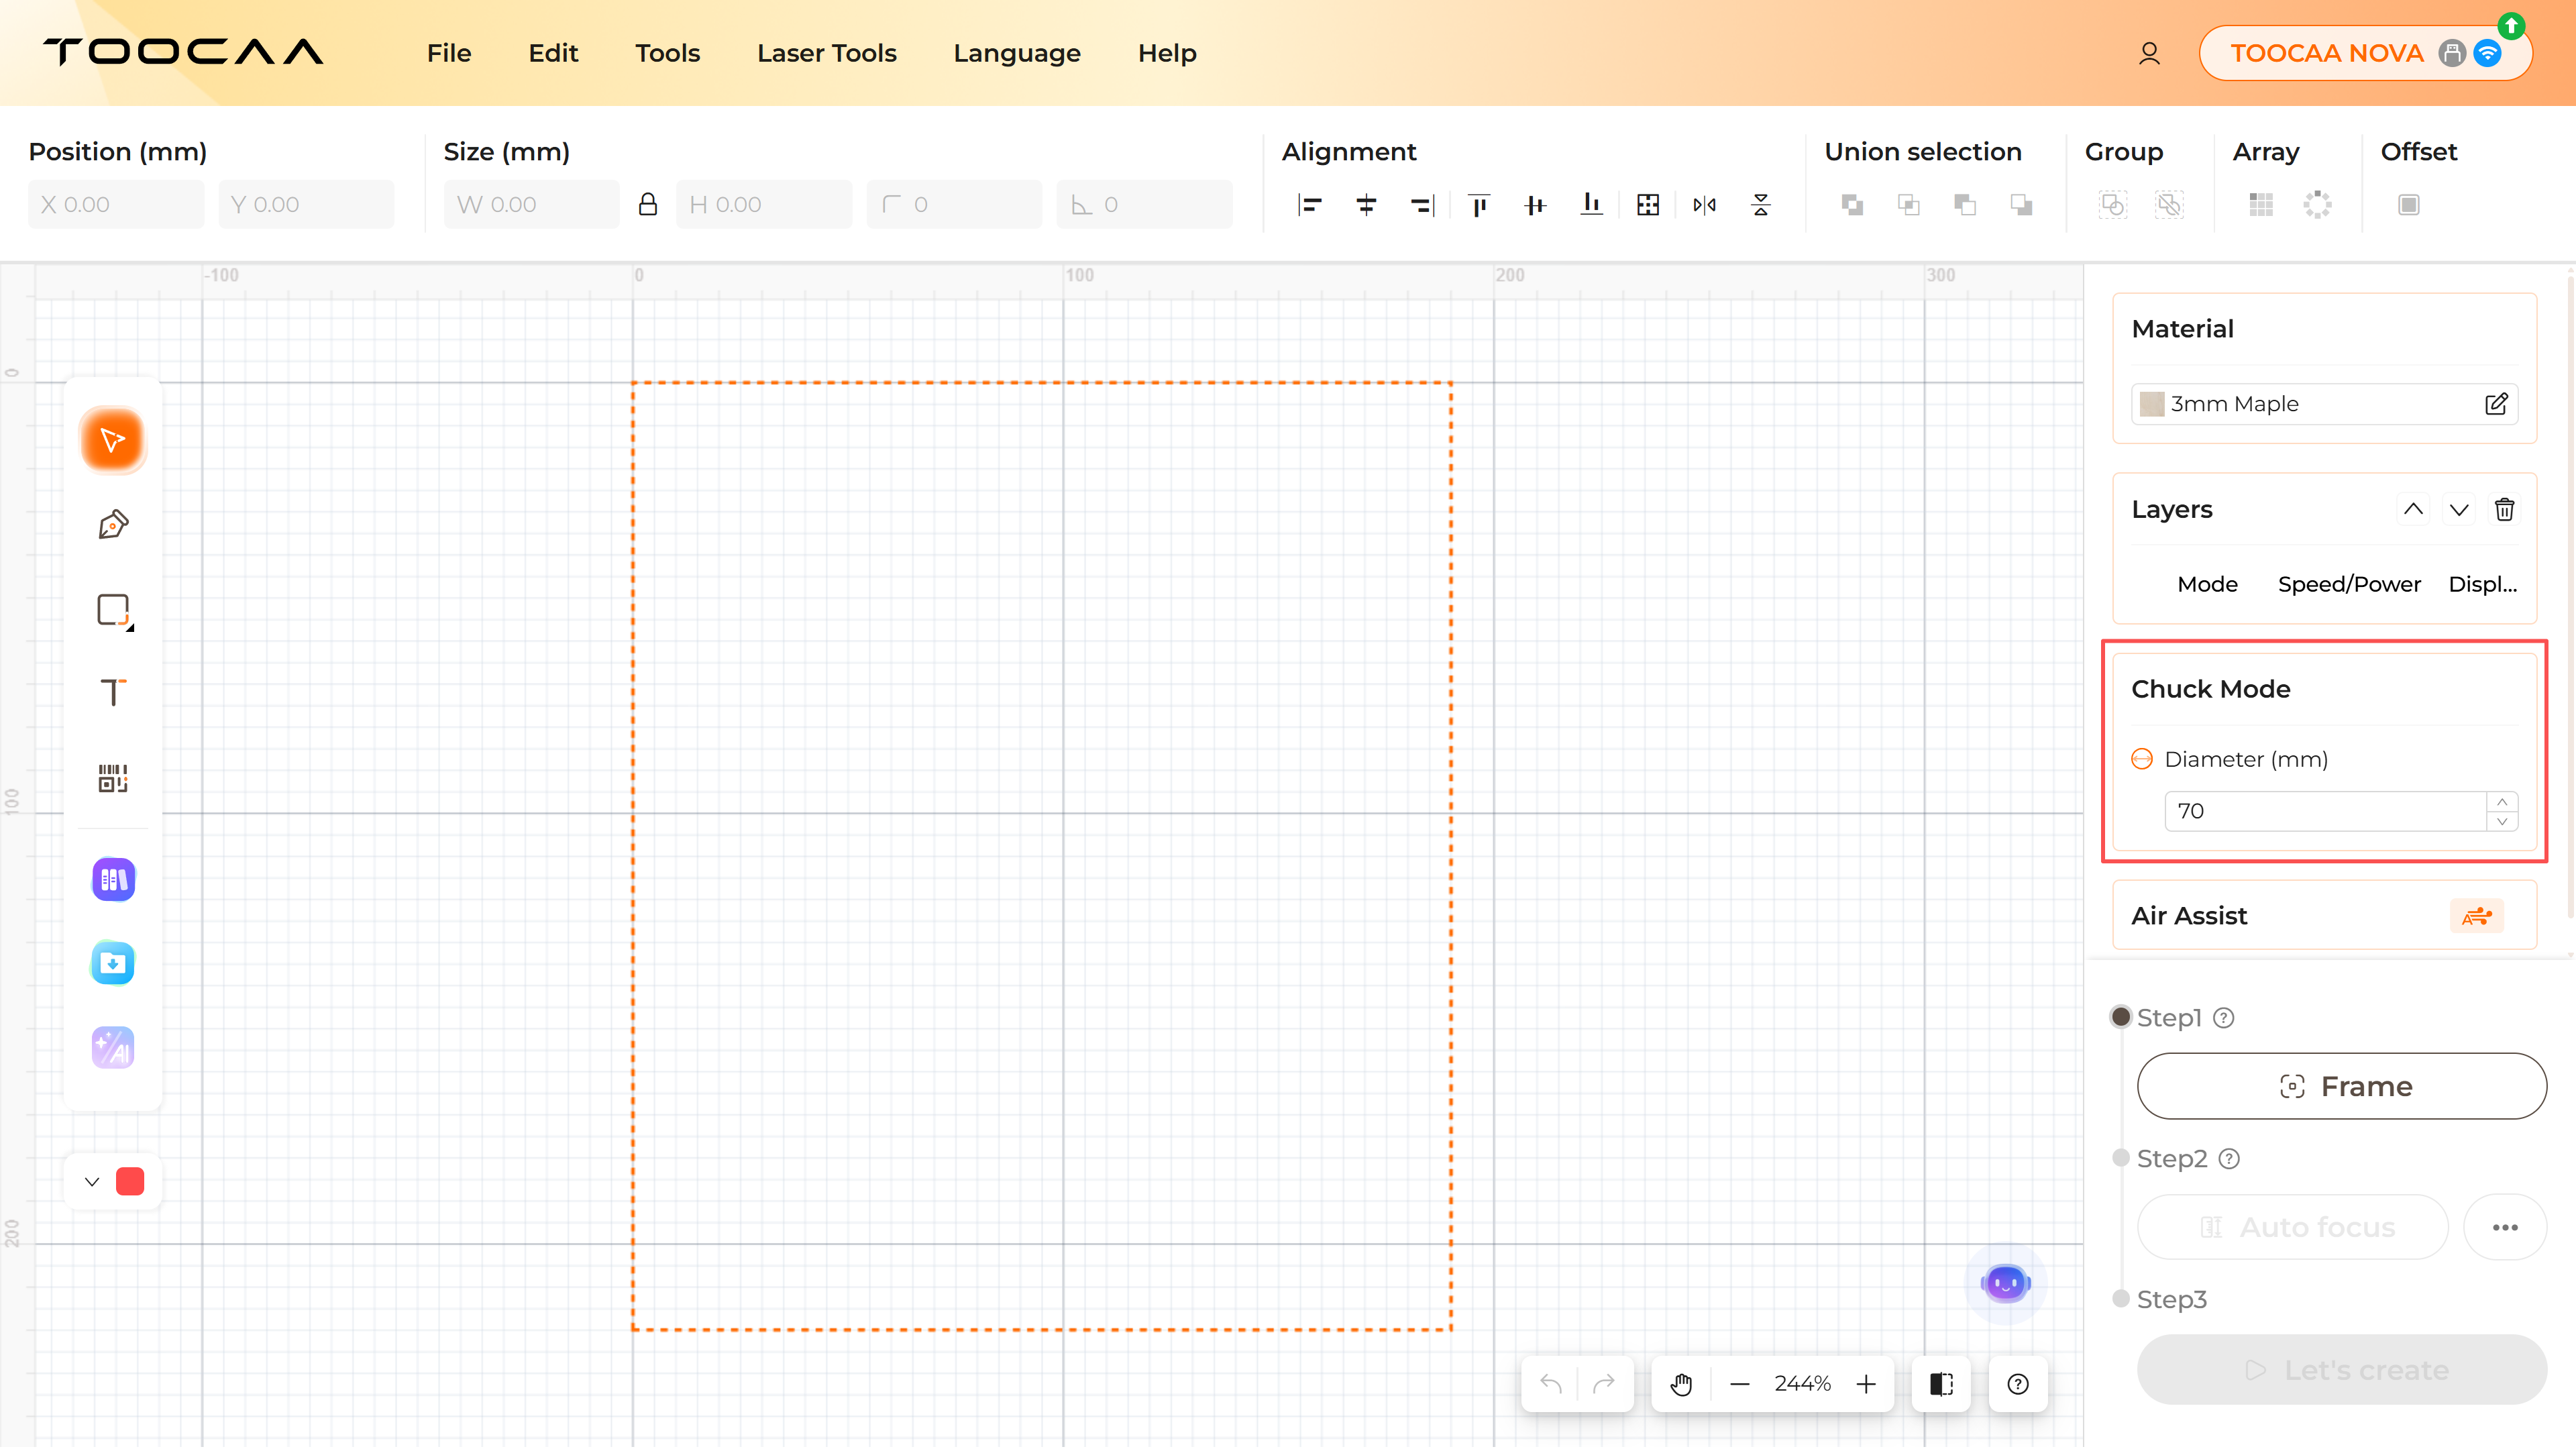
- Enter the diameter of the object at the actual processing location.
/>
-
After completing your design on the canvas, perform a Frame operation.
Ensure the processing area is positioned on the material to prevent the laser from cutting into the machine. -
Once framing is complete, select the focusing method based on material hardness:
- For hard materials, use Auto Focus.
- For soft materials, manually adjust the laser head to the appropriate height.
-
After focusing is complete, start processing.
¶ Frequently Asked Questions (FAQ)
¶ 1. The rotary attachment does not rotate or rotates irregularly
- Make sure the machine is correctly connected to the X/Z axes.
- Check whether the material diameter parameter entered in TOOCAA Studio is correct.
- If the connections and parameters are correct but the issue persists, please contact TOOCAA after-sales technical support:
support@elecfreaks.com
¶ 2. The expansion jaws / chuck pins cannot be inserted
Please adjust the tightness of the chuck knob appropriately and try inserting again.
¶ 3. How to use a vernier caliper?
If you are unsure how to read a vernier caliper, please refer to the following tutorial:
https://en.wikipedia.org/wiki/Vernier_scale