¶ Focus Module Maintenance and Replacement Guide
This guide applies to the Focus Module on TOOCAA NOVA. It covers removing the Focus Module, inspecting the focusing rod, lubricating the moving parts, and reinstalling the modules.
Inspect the focusing rod when a maintenance reminder appears or its movement becomes less smooth. A smooth, rust-free rod can be lubricated. Replace a rusty focusing rod before continuing; adding oil is not a substitute for replacement.
¶ Before Maintenance
- A tool that fits the laser module mounting screws; the supplied tool may be used.
- Liquid lubricating oil suitable for the Focus Module. Follow the quantity specified below; do not substitute grease.
- A clean, soft, lint-free cloth for removing visible surface dust and absorbing excess oil.
- A clean, flat work surface and a safe place to keep the screws and removed components.
- If replacement is needed, a focusing rod compatible with the TOOCAA NOVA Focus Module.
Safety: Stop processing, switch off the machine, and disconnect the power supply. Allow the laser module to cool completely. Keep the machine disconnected throughout removal, inspection, lubrication, replacement, and reinstallation. Apply oil only to the probe pin shown in the illustration. Keep oil away from the Laser Lens, optical openings, connectors, and electrical components.
¶ Procedure
¶ 1. Disconnect power and remove the laser module
- Make sure the processing job has stopped. Switch off the machine, disconnect the power supply, and open the top cover after the laser module has cooled completely.
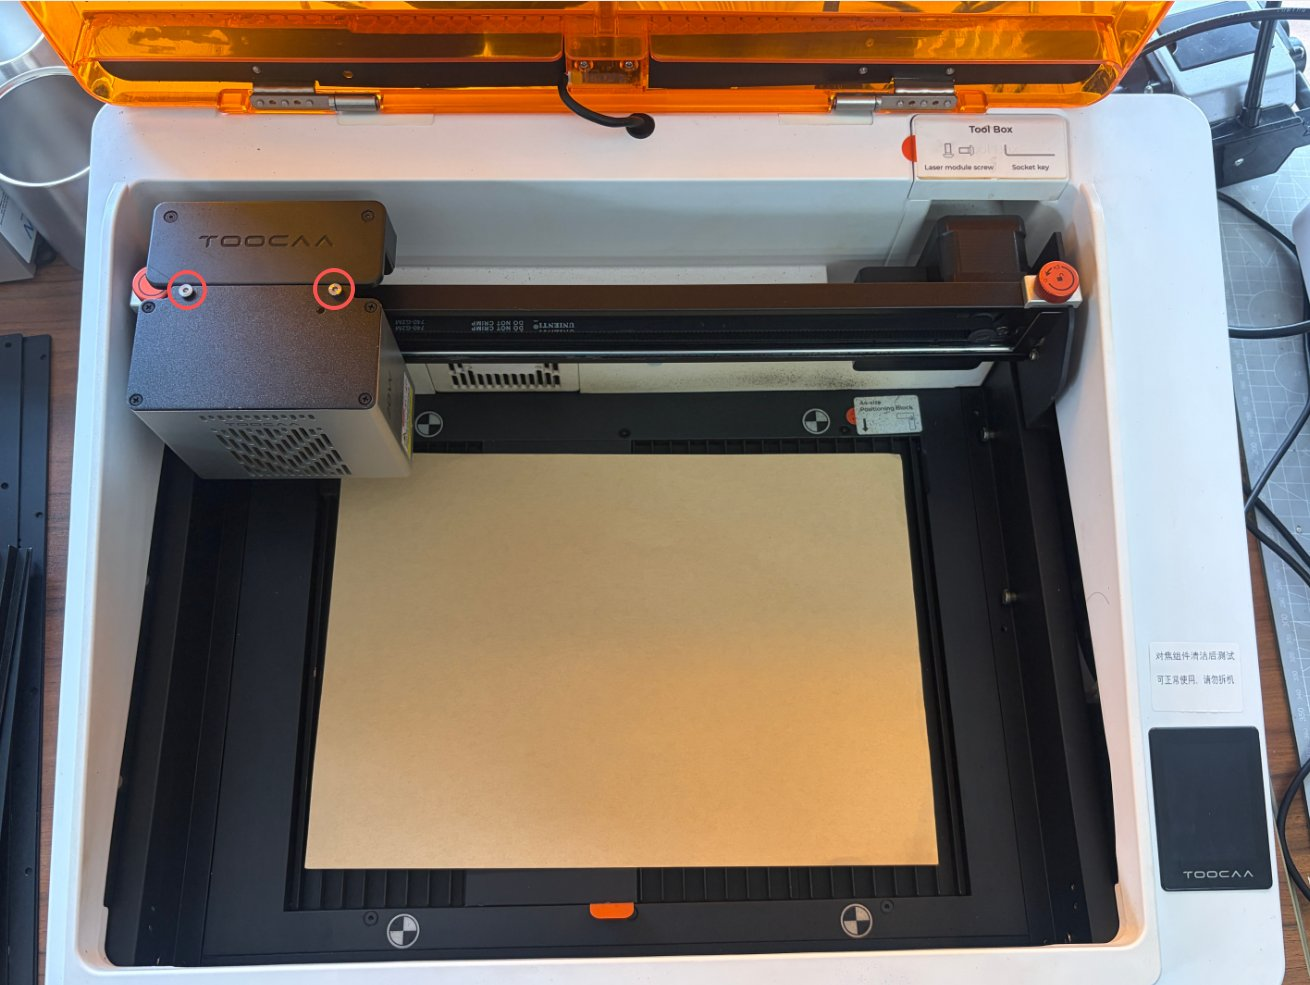
- Support the laser module with one hand. Use the supplied tool to remove the two mounting screws circled in Figure 1, and keep them safely. Continue supporting the module while removing the final screw.
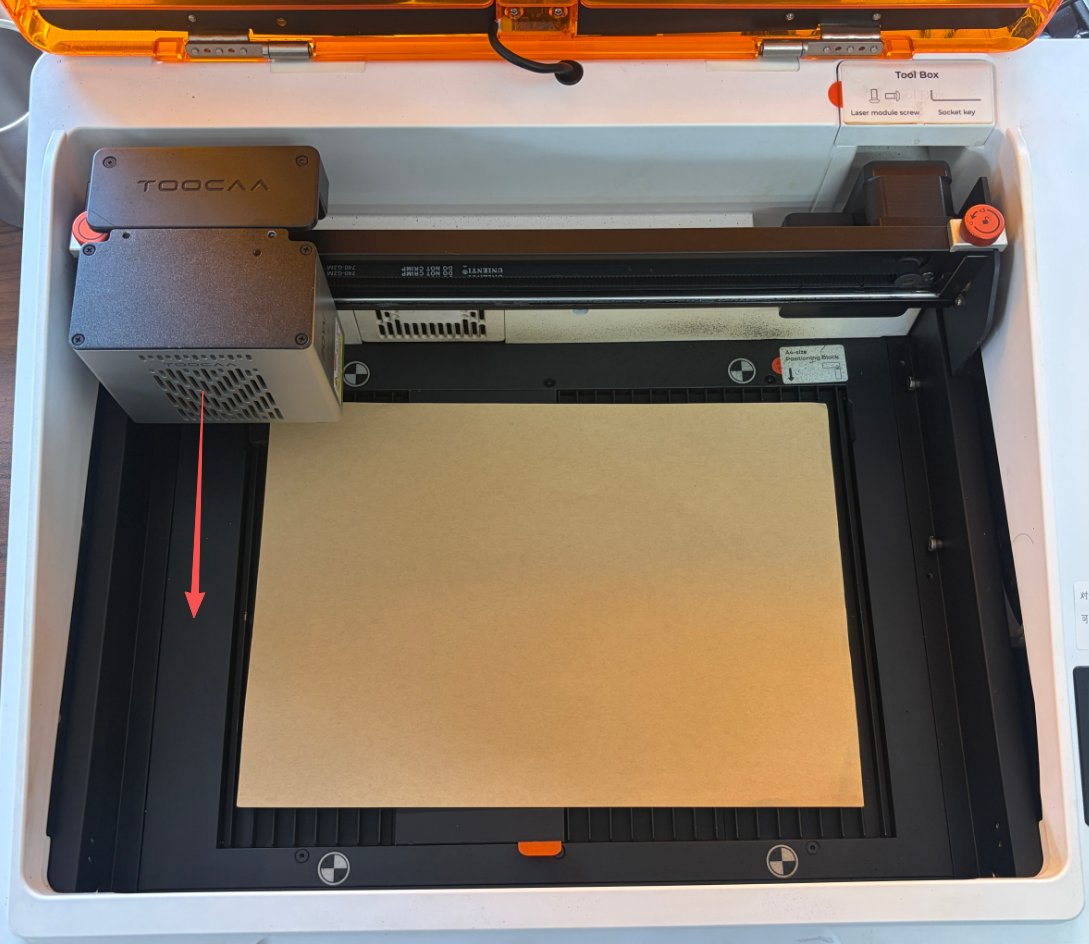
- Keep the module level and slide it steadily toward the front of the machine, following the arrow in Figure 2. Place it on a clean, flat work surface. If you feel resistance, check the screws and mounting position instead of pulling forcefully.
¶ 2. Remove the Focus Module and inspect the focusing rod
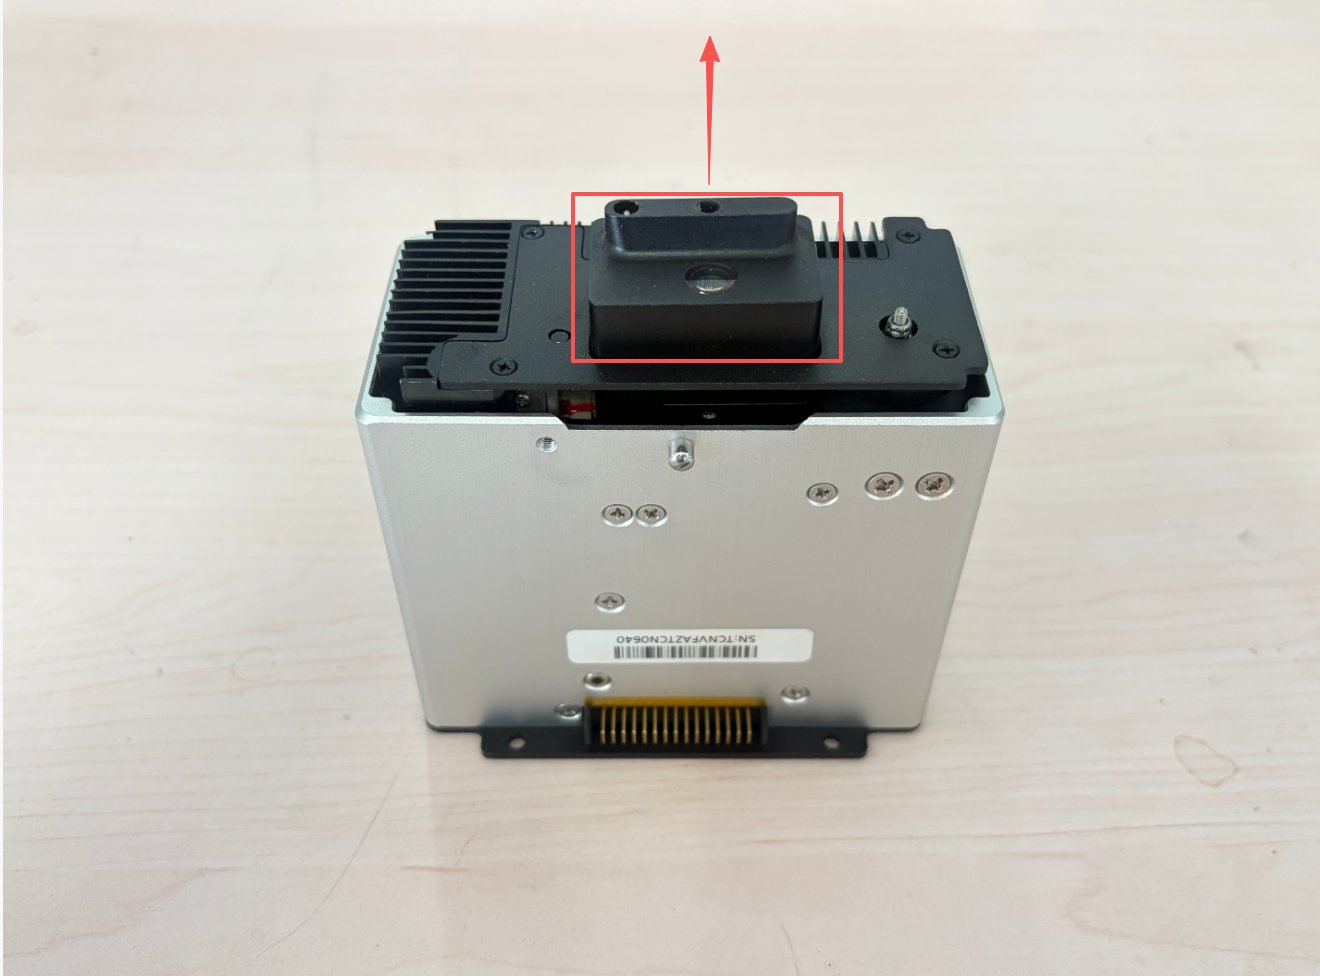
- Position the laser module as shown in Figure 3. Hold the body of the Focus Module and lift it vertically in the direction of the arrow. Do not pull or bend the focusing rod.
- Inspect the focusing rod and its probe pin for rust, damage, or obvious sticking. Gently wipe visible loose surface dust with a clean cloth without pushing it into the moving parts.
| Inspection result | Action |
|---|---|
| The rod is smooth, rust-free, and moves normally | Continue to Step 3 to extend the probe pin, then lubricate it in Steps 4 and 5. |
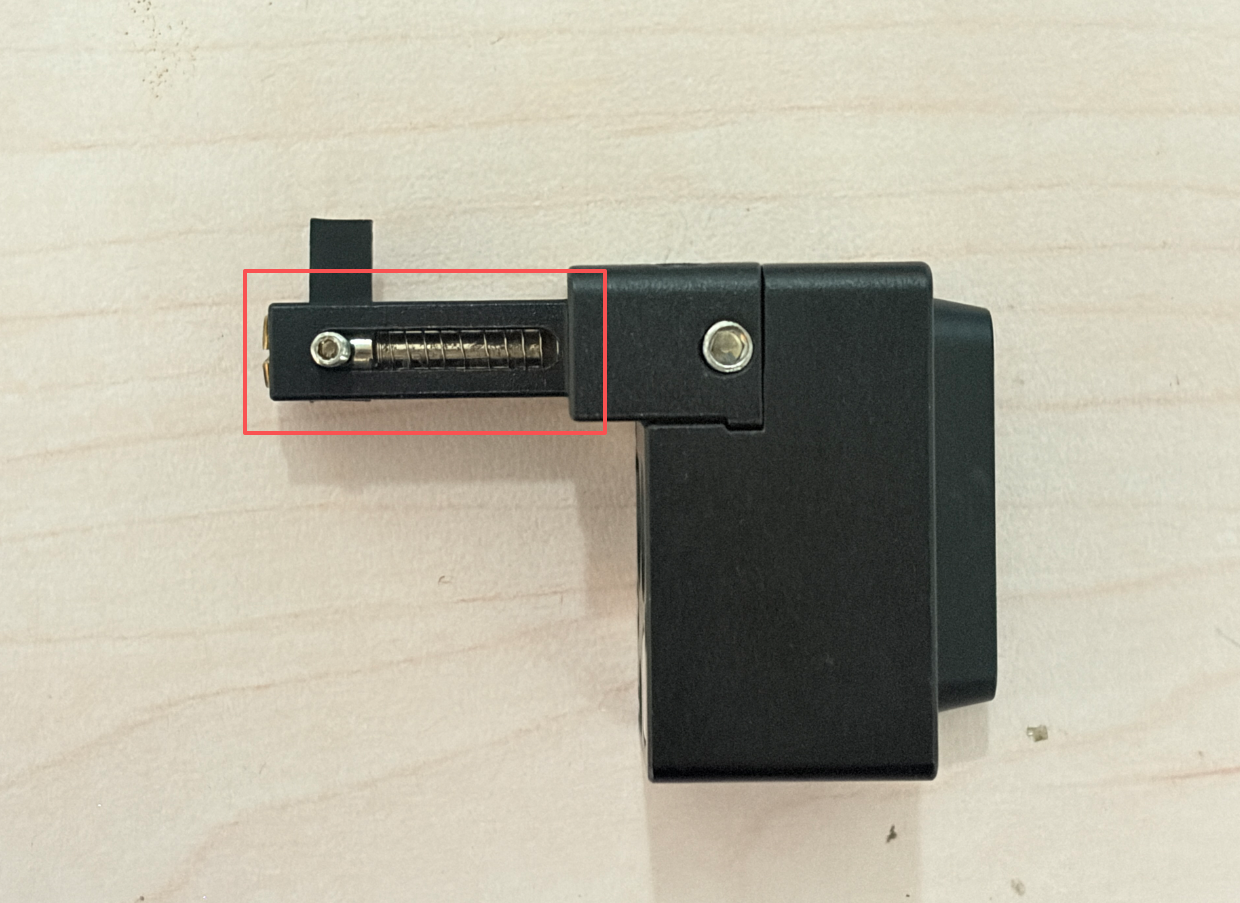
| Rust is present as shown in Figure 4, or the rod is damaged or clearly sticking | Stop using the affected rod and replace it with a compatible focusing rod. Check its installation and movement before continuing with maintenance and reinstallation. |
Replacement parts: Visit the TOOCAA official replacement-parts page and confirm compatibility with the TOOCAA NOVA Focus Module. If the matching part is not listed, contact TOOCAA Support. Follow the instructions supplied with the replacement part when removing or installing the focusing rod itself. Moving the lever in the next step does not mean removing the rod.
¶ 3. Move the lever to extend the probe pin
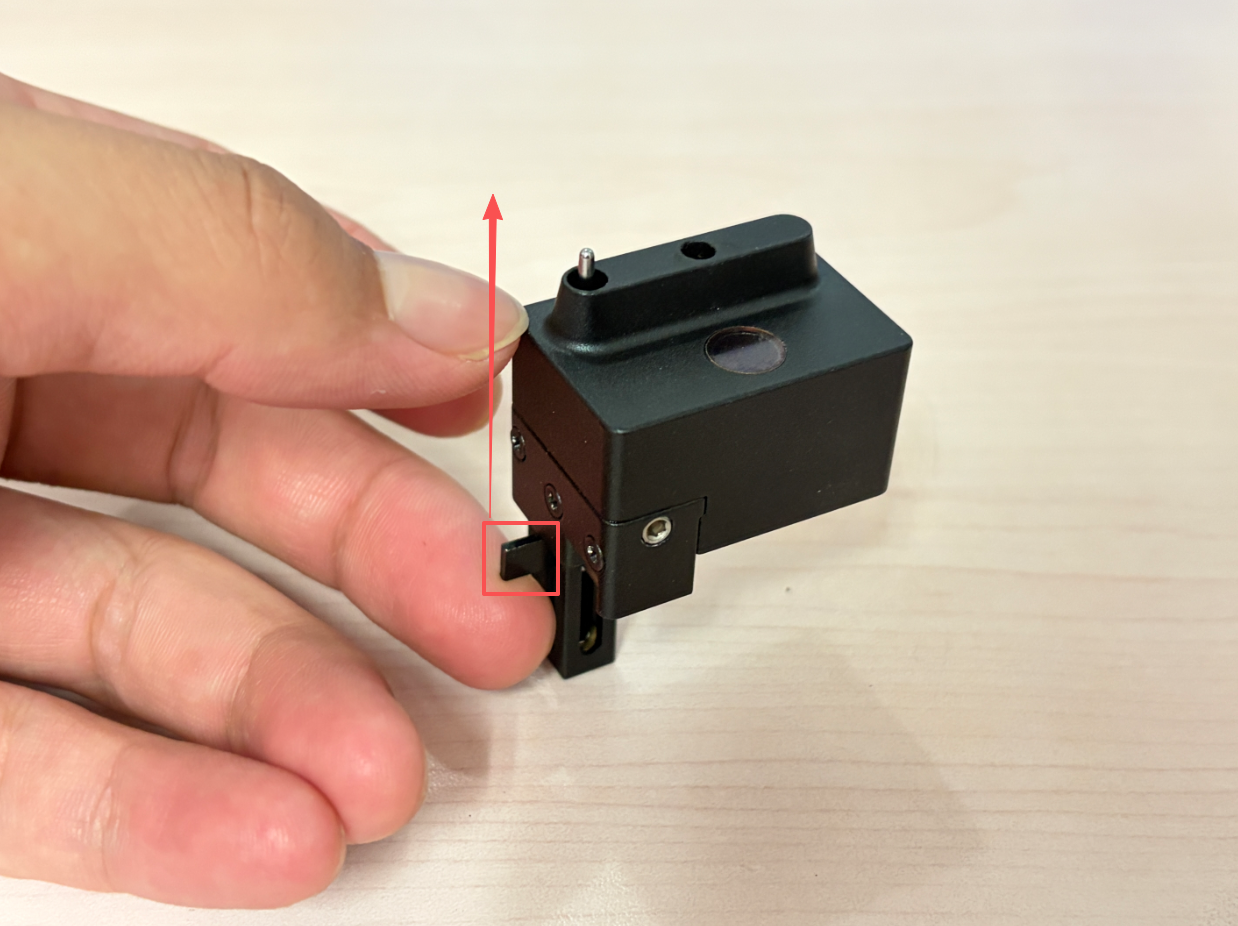
- Hold the removed Focus Module securely and locate the side lever marked in Figure 5.
- Gently move the lever in the direction of the arrow so that the metal probe pin extends through the guide opening at the top.
- Only move the lever; do not pull out the entire focusing rod. If you feel significant resistance, stop and inspect the part instead of forcing it.
¶ 4. Apply two drops of liquid lubricating oil
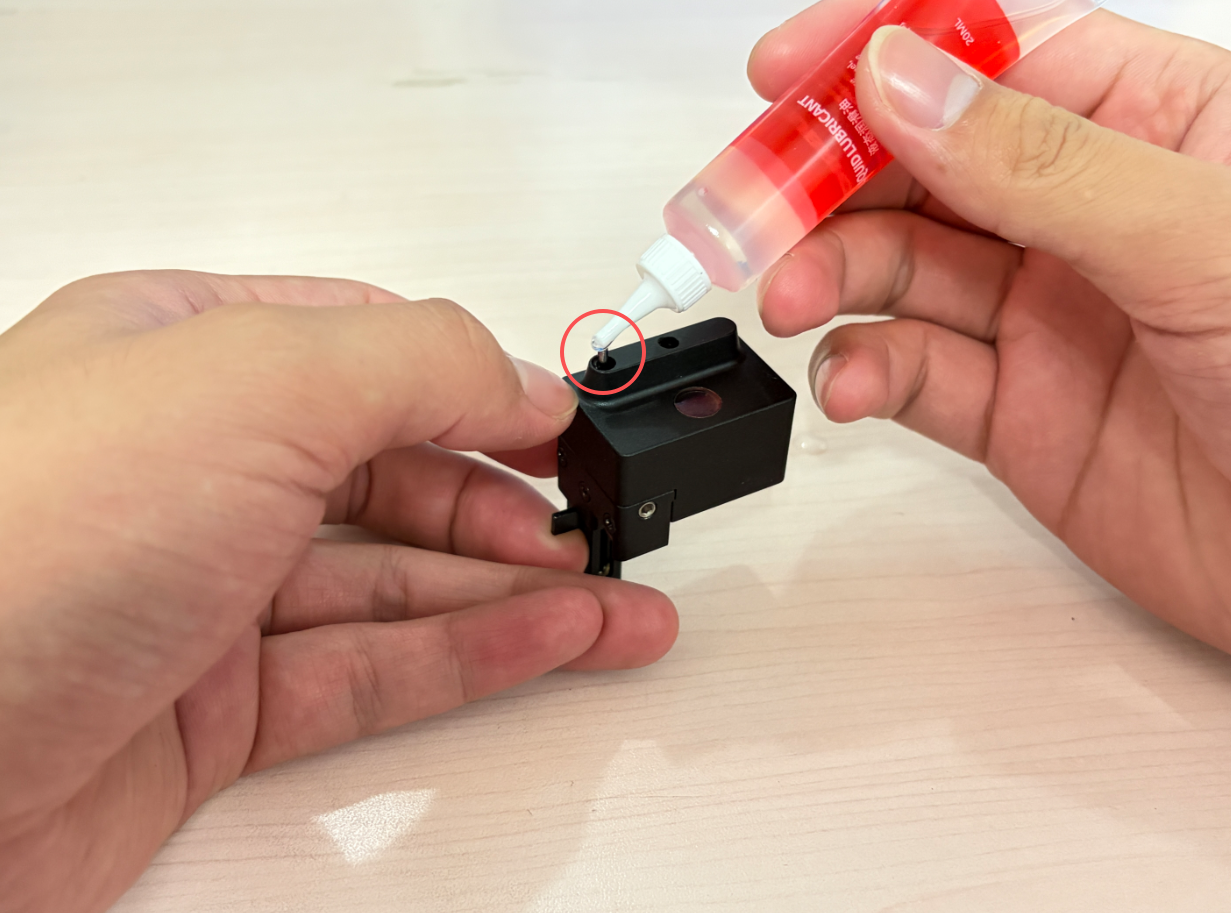
- Hold the Focus Module in the orientation shown in Figure 6, with the probe pin facing upward.
- Position the oil nozzle over the probe pin circled in red and apply two drops of liquid lubricating oil. Allow the oil to run along the pin toward its guide.
- Do not spray or flood the module with oil. Absorb any overflow with a clean cloth, keeping oil away from optical surfaces and connectors.
¶ 5. Wait one minute for the oil to spread
- Keep the module in the orientation shown in Figure 6 and wait approximately one minute, allowing the oil to flow down the pin and lubricate the moving parts.
- Gently move the lever to check that the focusing rod moves smoothly. Do not pull or bend the rod.
- Absorb visible excess oil from the outer surfaces while leaving the moving parts lubricated. If the rod still sticks or cannot move normally, stop and address the problem before reinstallation.
¶ 6. Reinstall the Focus Module on the laser module
- Check that the mounting area is free of debris and excess oil.
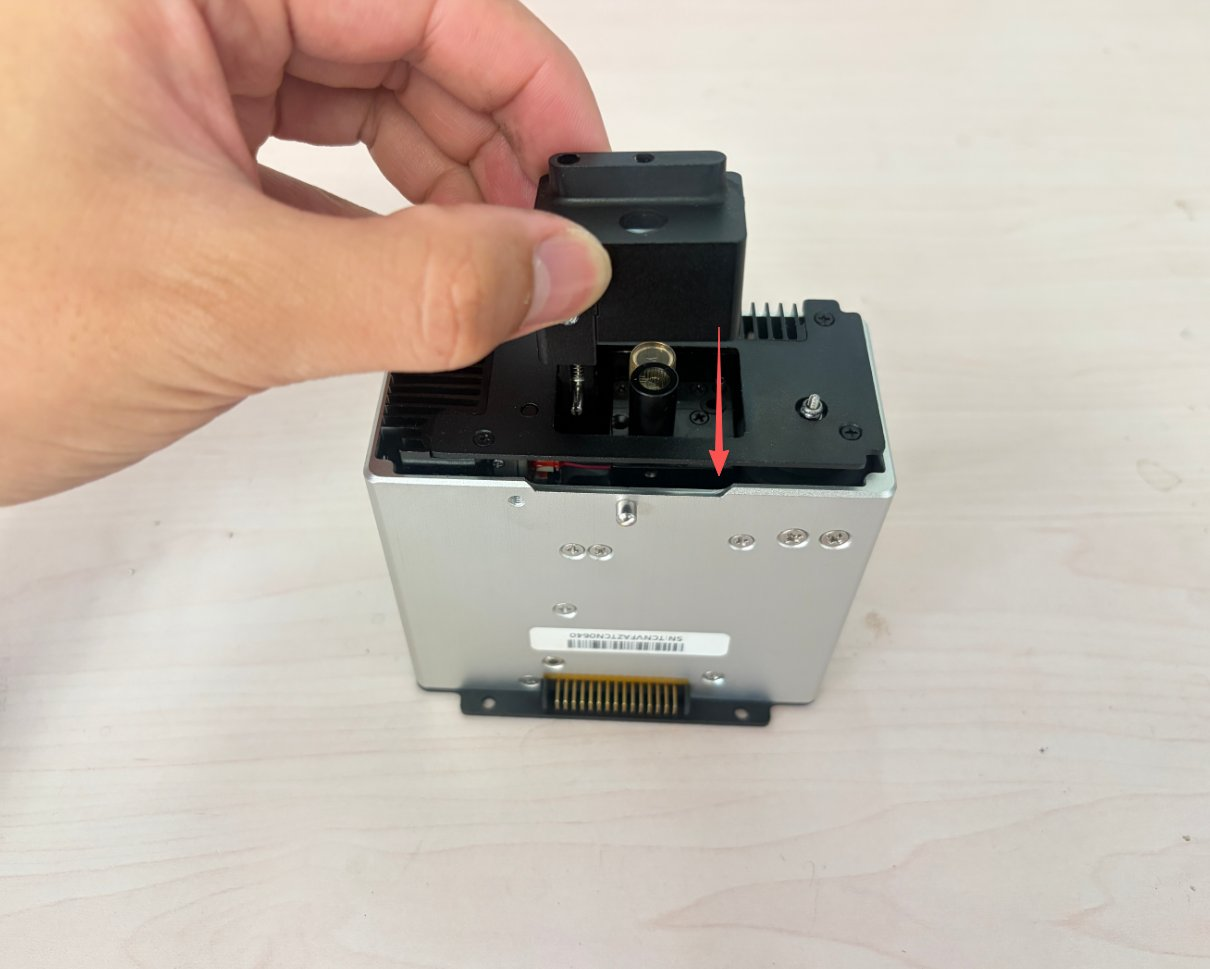
- Hold the Focus Module body, align it with its original mounting position, and lower it vertically in the arrow direction shown in Figure 7. Avoid pressing or bending the focusing rod.
- Make sure the Focus Module is fully seated, level, and secure, with no obstruction.
¶ 7. Reinstall and secure the laser module
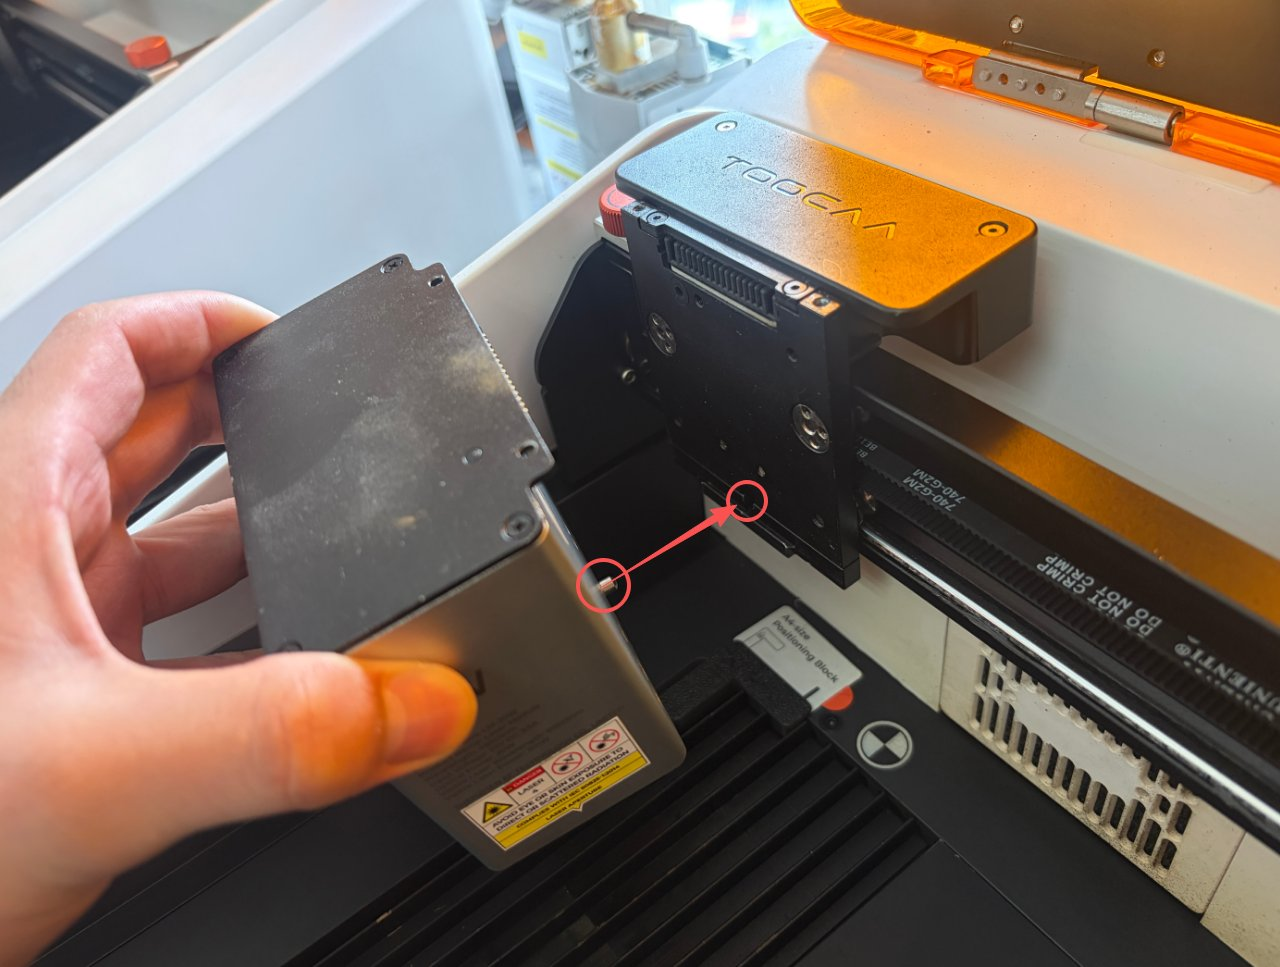
- Support the laser module and align it with the positioning feature marked in Figure 8 and its original mounting position. Slide it steadily into place.
- Make sure the module is fully seated, then reinstall and tighten the two mounting screws removed in Step 1.
- If you feel resistance, withdraw the module and realign it. Do not use the screws to pull a misaligned module into place.
¶ Inspection and Troubleshooting
If the focusing rod is rusty, bent, damaged, or still sticks after lubrication, stop using it and inspect or replace the affected part with a compatible one. If the reinstalled modules are not recognized, autofocus behaves abnormally, or unusual noises occur, stop processing, switch off the machine, disconnect power, and check the installation. Contact TOOCAA Support if the issue persists.
¶ After Maintenance
- The focusing rod is free of rust and visible damage, moves smoothly, and has no excessive oil on its outer surfaces.
- The Focus Module is fully seated and the two laser module mounting screws are tight.
- The Laser Lens, optical openings, connectors, and surrounding areas are free of lubricating oil.
- Tools, wiping materials, replaced parts, and debris have been removed from the machine.
After these checks, close the top cover and reconnect power. Follow the normal operating procedure to check module recognition and autofocus before resuming processing.
After actually completing maintenance or replacement, reset the maintenance timer for the Focus Module on the maintenance page. Do not reset it before maintenance is complete.
Back to the TOOCAA NOVA Maintenance Guide · Back to the TOOCAA NOVA User Guide