¶ Built-in Machine Filter Cleaning Guide
This guide applies to the Built-in Machine Filter on TOOCAA NOVA. It explains how to clean the rear interior surfaces of the machine, remove and rinse the Built-in Machine Filter with clean water, and dry and reinstall it.
Follow this procedure when a maintenance reminder appears or dust and smoke residue accumulate on or around the Built-in Machine Filter. In this guide, Built-in Machine Filter Housing refers to the removable white grille component at the rear of the machine that holds the Built-in Machine Filter. Its location is shown in Step 3.
¶ Before Maintenance
- Clean alcohol wipes compatible with the surfaces being cleaned, for the rear interior surfaces of the machine. Wipes should be lightly moistened and not dripping.
- Clean water and a suitable container or washing area outside the machine for cleaning the Built-in Machine Filter.
- Clean paper towels for gently blotting water from the Built-in Machine Filter, plus separate clean paper towels or a soft cloth for drying the housing.
- A clean, ventilated area for air-drying the Built-in Machine Filter and setting down the removed housing.
Safety: Stop processing, switch off the machine and disconnect the power supply. Allow the laser module to cool completely before handling it. Keep the machine disconnected from power throughout cleaning, removal, washing and reinstallation. Rinse only the removed Built-in Machine Filter separately with clean water. Do not rinse the inside of the machine or allow water or alcohol to enter electrical parts, connectors or the air duct. Reconnect power only after the Built-in Machine Filter, housing and all other cleaned areas are completely dry and correctly reinstalled.
¶ Maintenance Procedure
¶ 1. Power Off and Move the Gantry along the Y Axis
- Make sure processing has stopped. Switch off the machine and disconnect the power supply. Once the laser module has cooled completely, open the top cover.
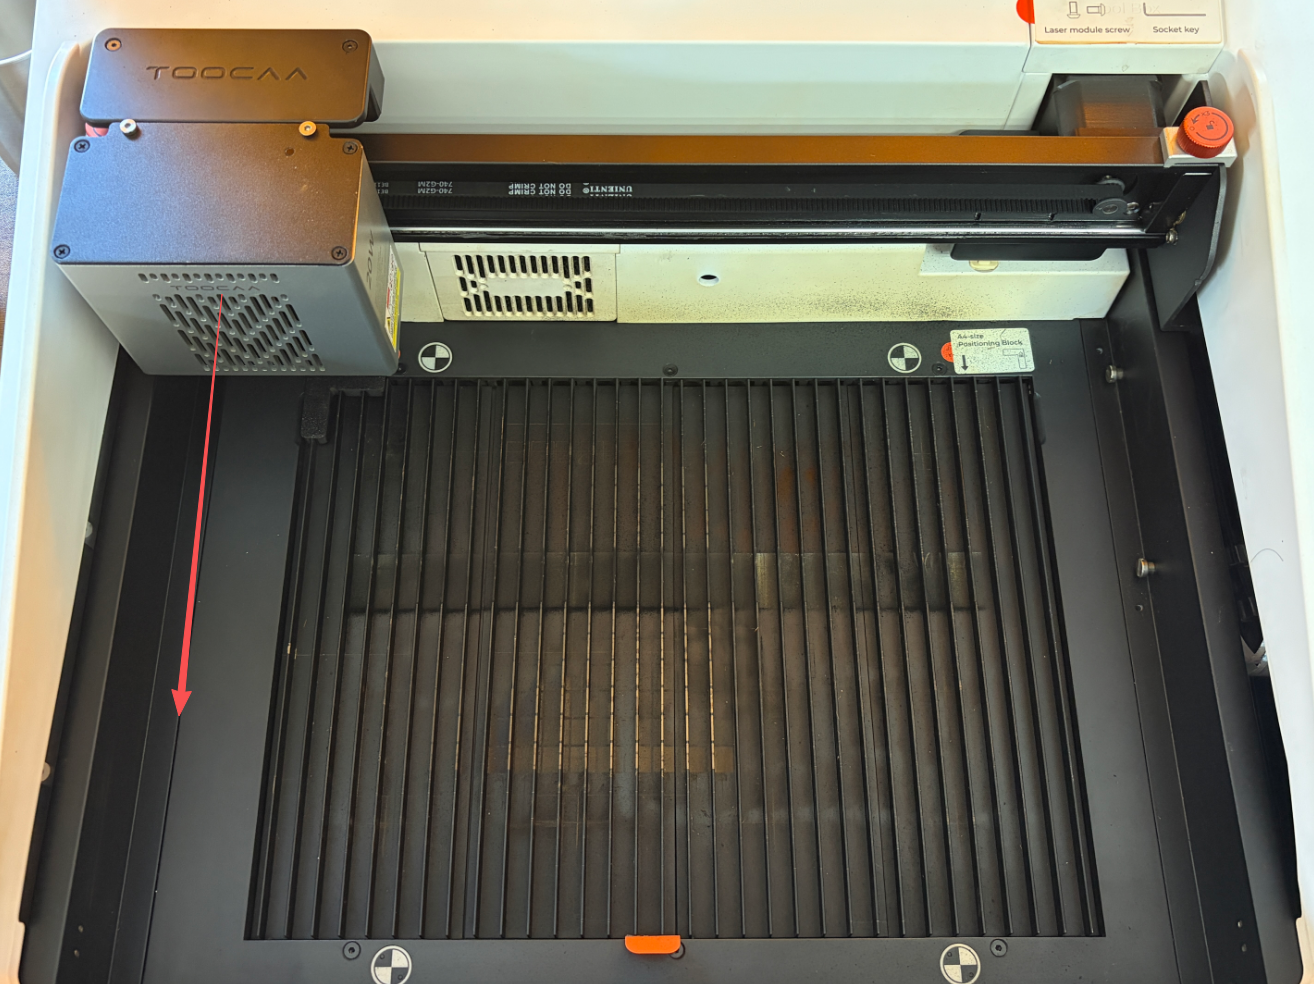
- Hold both sides of the gantry and slowly move it along the Y axis toward the lower area indicated by the arrow, at the front of the machine. This provides access to the rear area for cleaning and filter removal.
- Do not move the gantry by pulling on the laser module, belts or cables. If you feel significant resistance, stop and check for obstructions. Do not force it.
¶ 2. Wipe the Rear Interior Surfaces with Alcohol Wipes
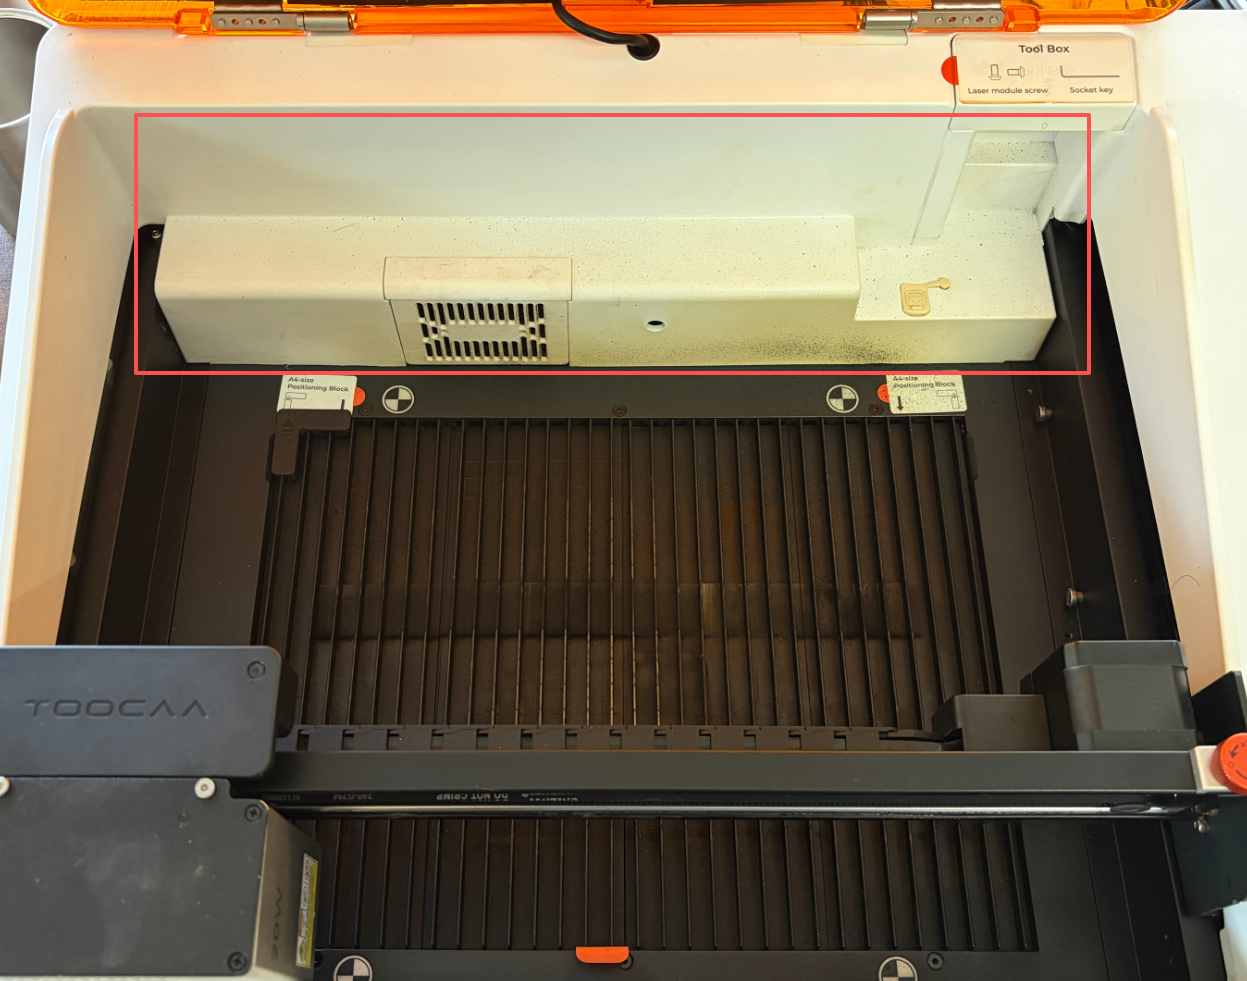
- Inspect the rear interior surfaces marked by the red rectangle and the outside of the Built-in Machine Filter Housing for dust and smoke residue.
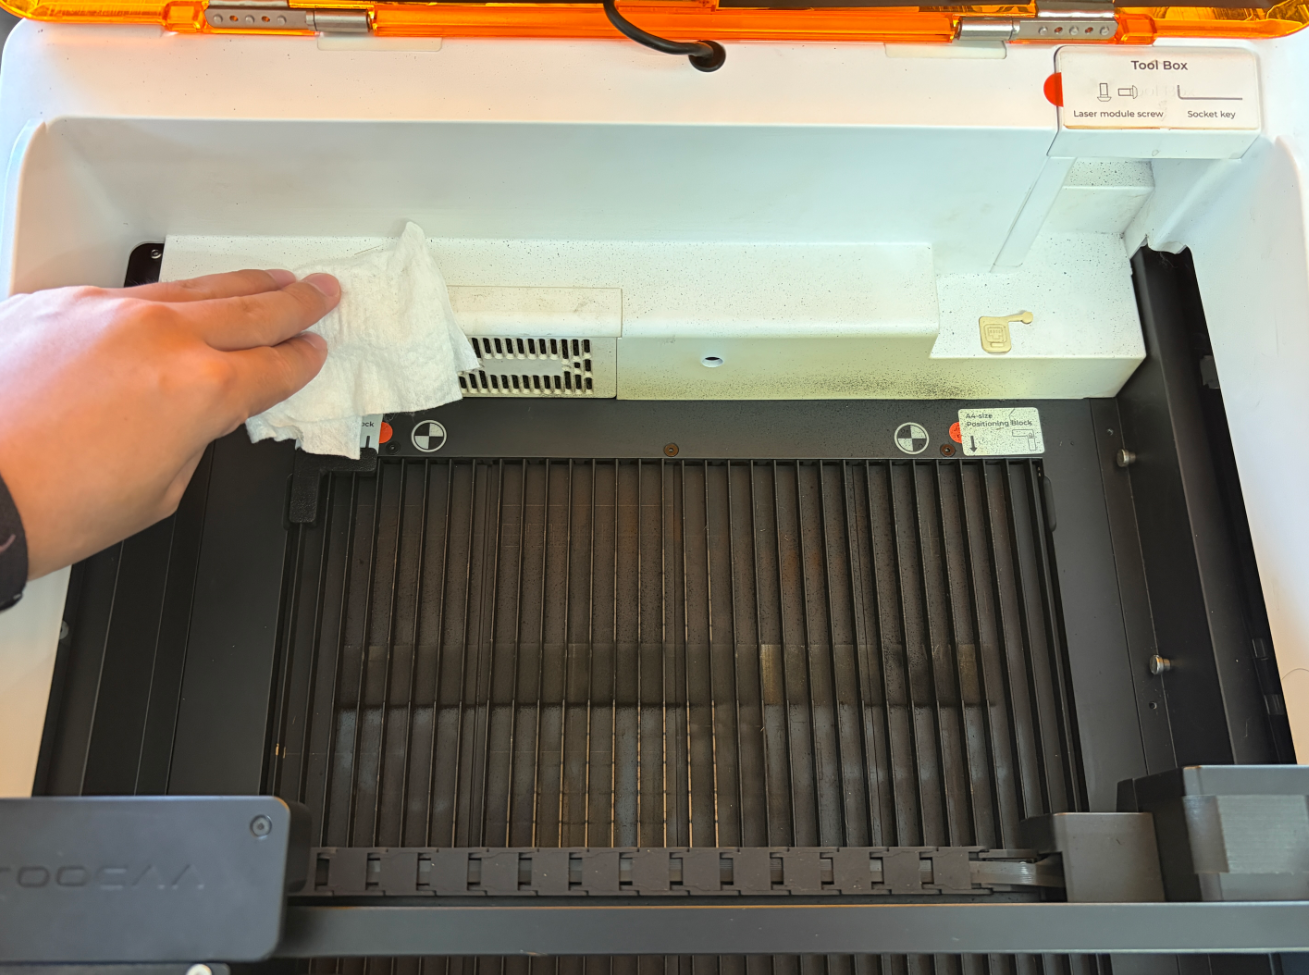
- Gently wipe these surfaces with a clean alcohol wipe that is lightly moistened and not dripping. Move to a clean part of the wipe or replace it when dirty.
- Do not spray or drip alcohol directly into the machine, or squeeze liquid into the grille, connectors or gaps. Allow the alcohol to evaporate after wiping.
¶ 3. Lift Out the Built-in Machine Filter Housing
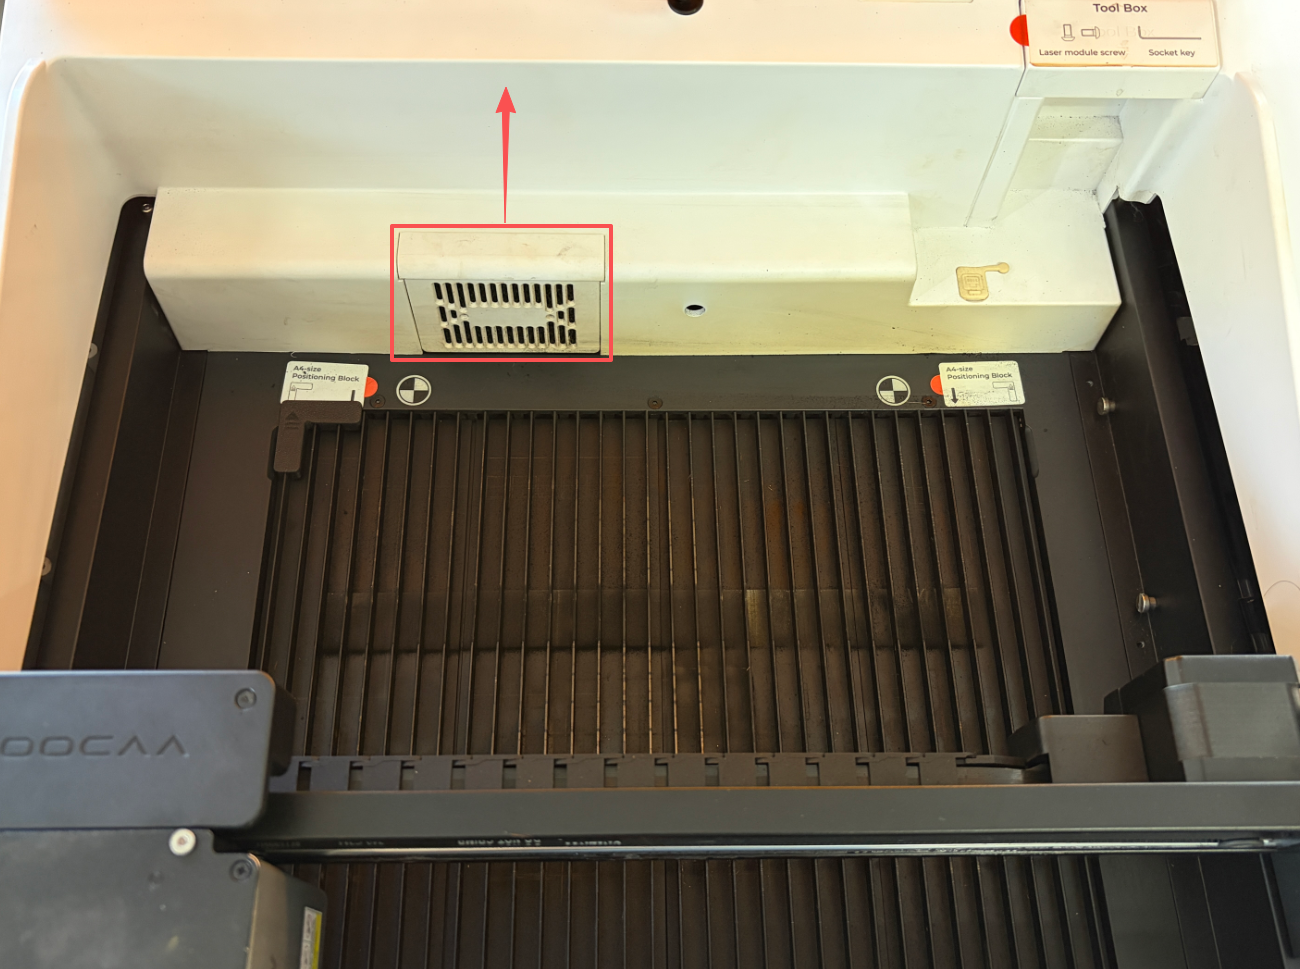
- Locate the Built-in Machine Filter Housing marked by the red rectangle in the image below.
- Hold the housing securely and steadily lift it straight upward in the arrow direction. If you feel significant resistance, check the mounting area and surrounding parts for obstructions. Do not pry or twist it forcefully.
- Place the housing on a clean work surface so you can remove the Built-in Machine Filter. Keep tools and other objects out of the opening left in the machine.
¶ 4. Remove the Built-in Machine Filter and Rinse It with Clean Water
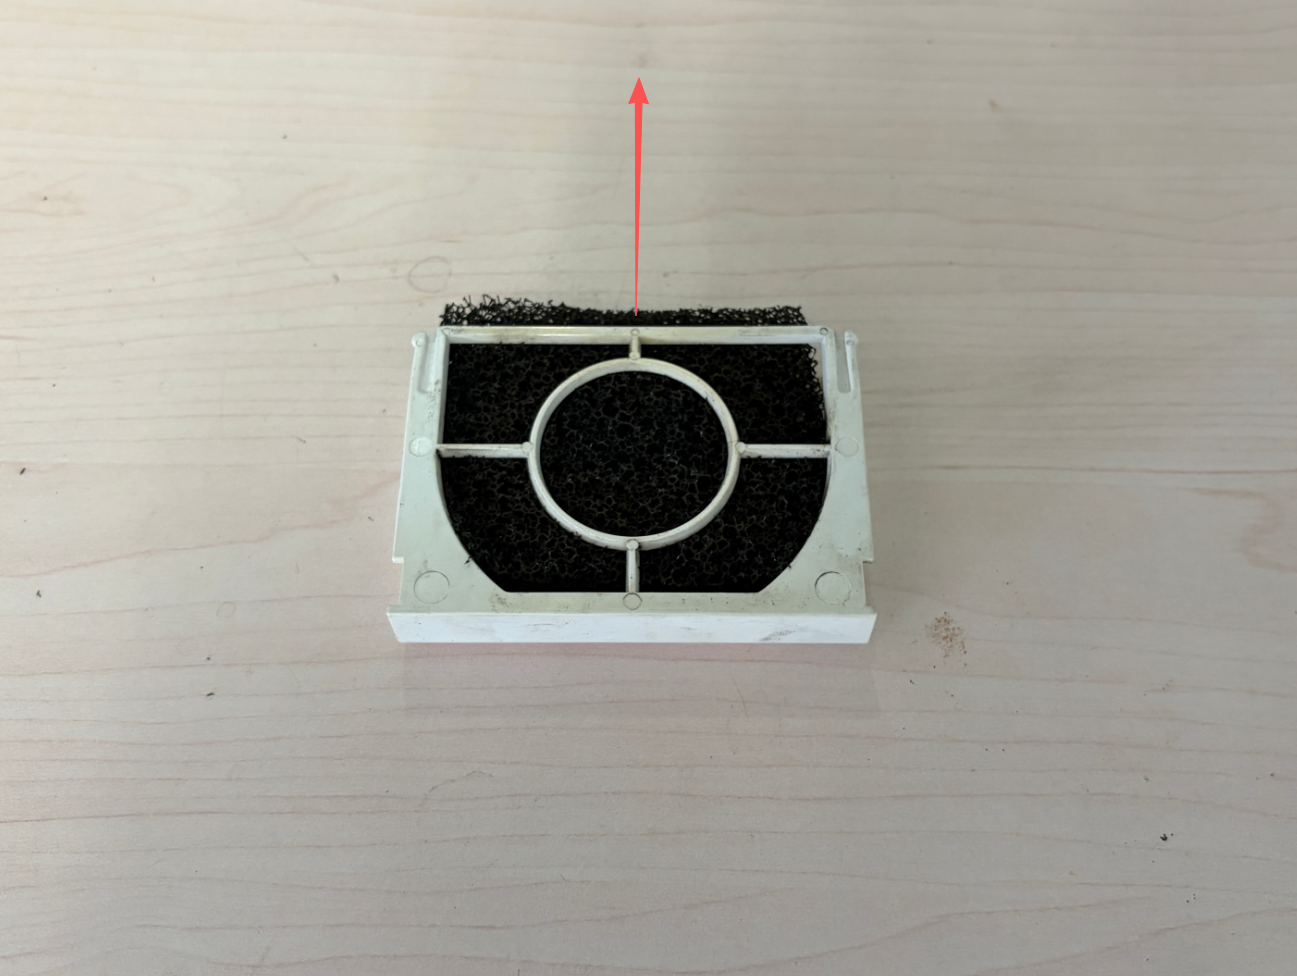
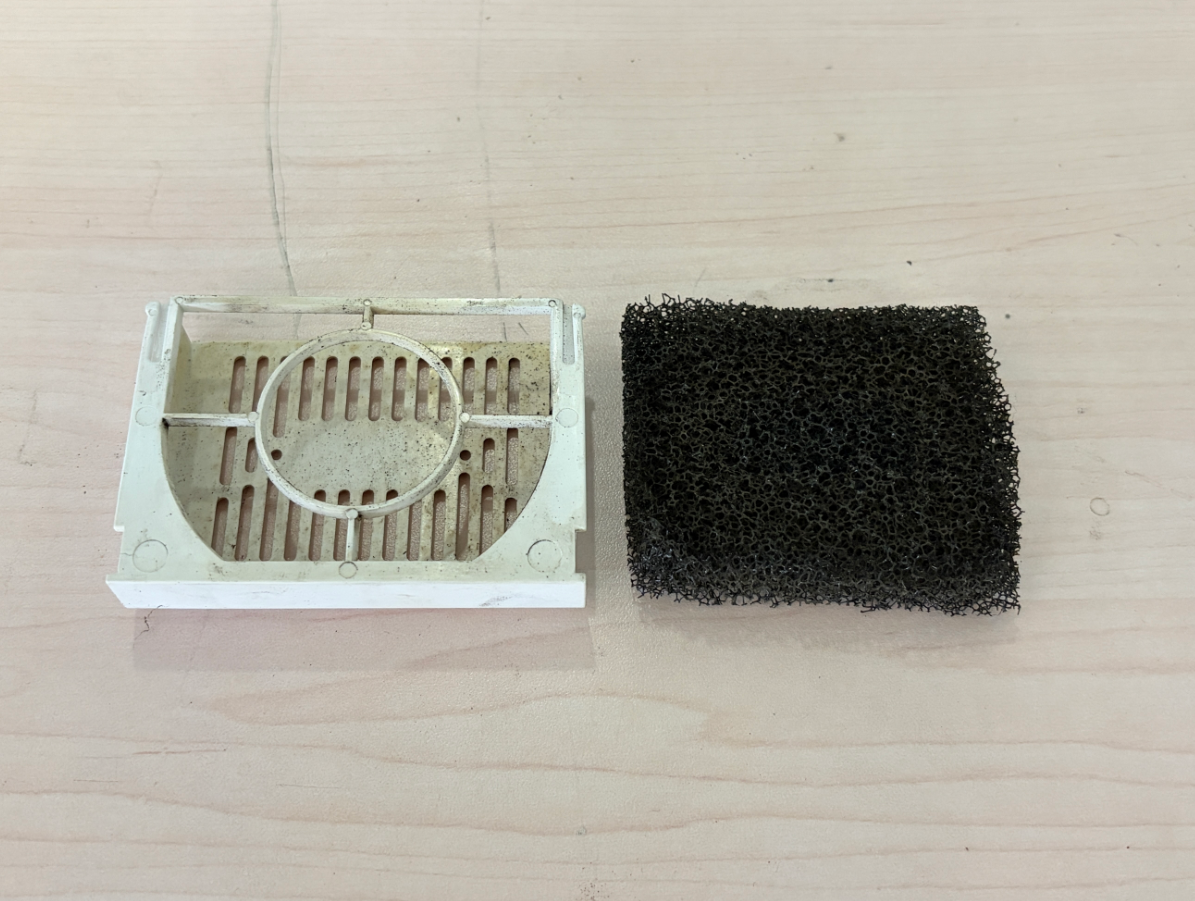
- Gently pull the Built-in Machine Filter out of its housing in the arrow direction shown below until the filter is completely separated from the housing.
- Outside the machine, gently rinse the Built-in Machine Filter with clean water to remove accumulated dust and dirt.
- Do not wash it inside the machine or immerse the machine or any electrical parts in water. Avoid pulling or wringing the Built-in Machine Filter forcefully, as this may tear or deform it.
¶ 5. Dry Completely and Reinstall the Built-in Machine Filter
- After rinsing, gently blot excess surface water from the Built-in Machine Filter with clean paper towels. Leave it in a clean, ventilated area to air-dry fully. Wipe the housing dry with separate clean paper towels or a soft cloth.
- Reinstall only when the Built-in Machine Filter is dry throughout and the housing is completely dry. Removing surface water alone does not mean that the filter is fully dry. Check for and remove paper fragments, fibers and other debris before reinstallation.
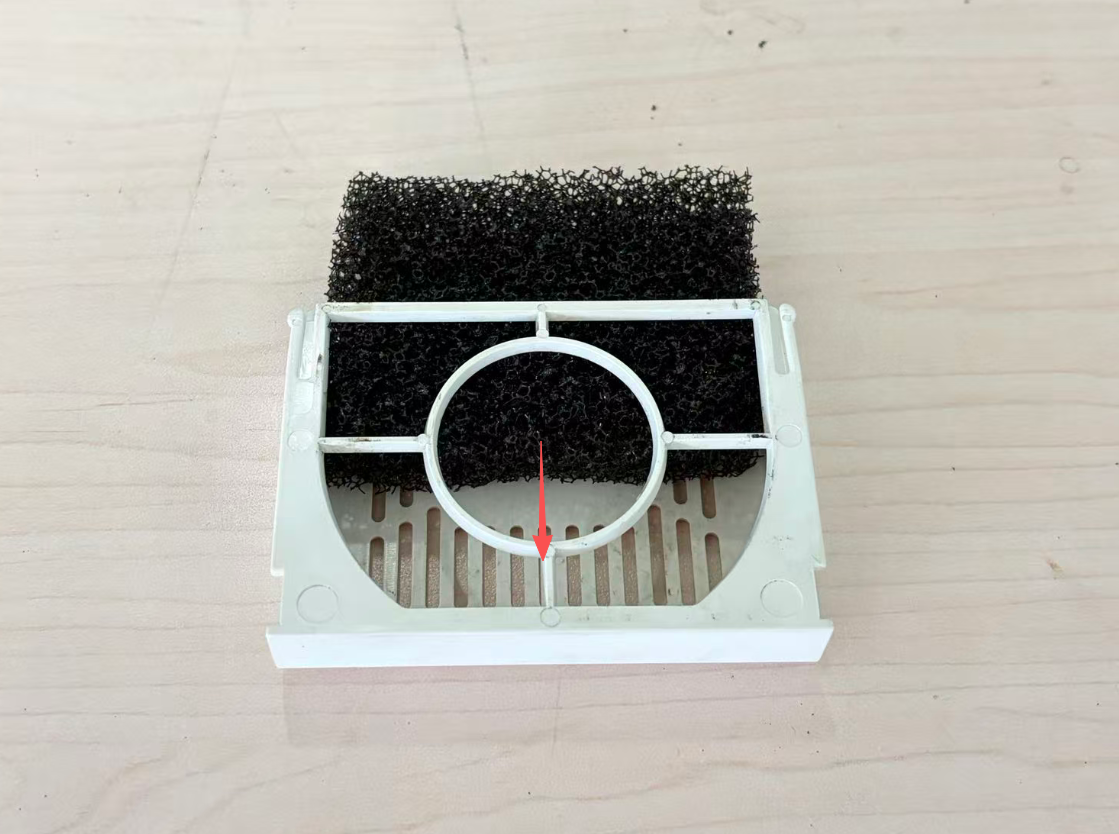
- As shown in Figure 7, place the dry Built-in Machine Filter flat in the housing. Make sure it is correctly positioned, with no curled edges, folds or noticeable deformation.
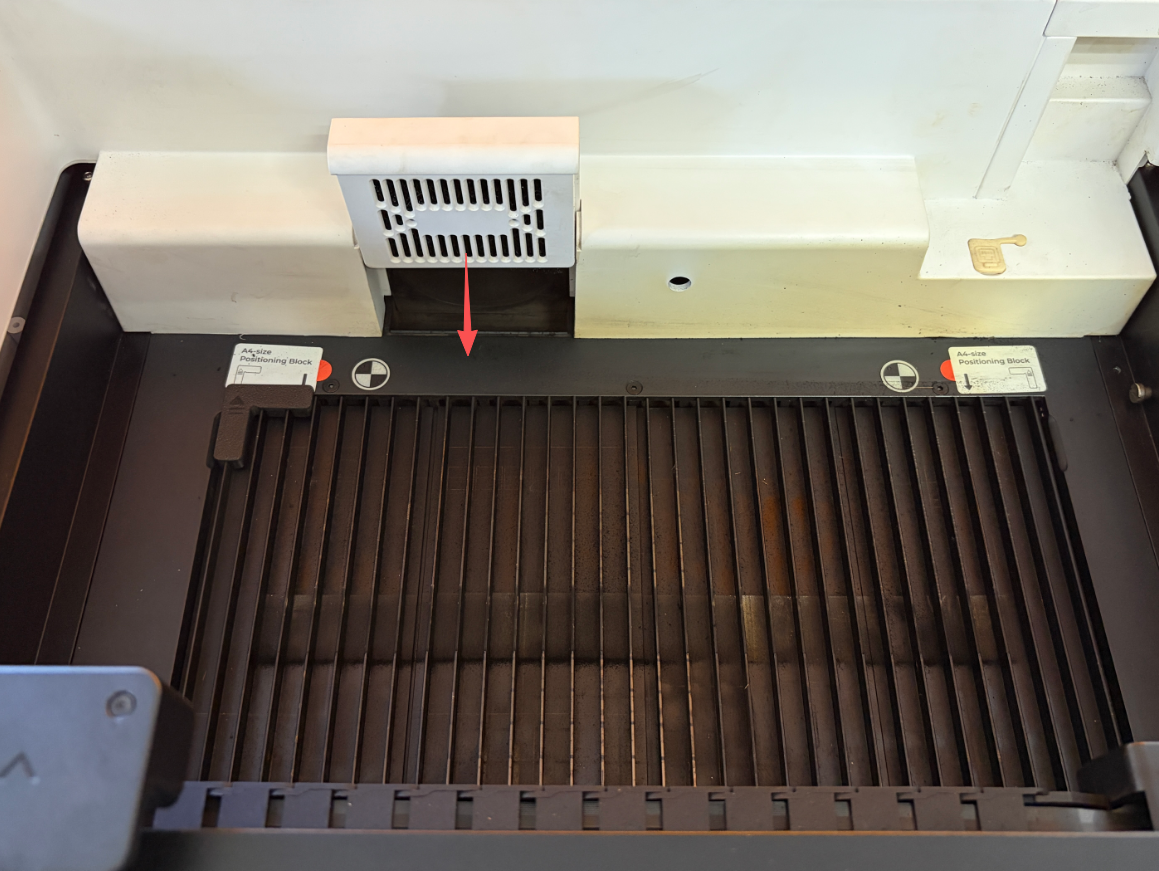
- As shown in Figure 8, align the housing containing the Built-in Machine Filter with its original mounting position at the rear of the machine. Slide it steadily downward in the arrow direction until it is correctly seated and secure.
- Make sure all other cleaned areas are also dry. Remove paper towels, used alcohol wipes and any other items left inside the machine. Complete the checks below before reconnecting power.
¶ Inspection and Troubleshooting
If the Built-in Machine Filter is torn, noticeably deformed or still severely clogged after washing, stop using it and inspect the issue. Replace it with a compatible Built-in Machine Filter if necessary. If exhaust airflow remains poor or unusual noise occurs after correct reinstallation, stop processing, switch off the machine and disconnect power. Check the mounting position and air duct for obstructions. Contact TOOCAA Support if the issue cannot be resolved.
¶ After Maintenance
- The Built-in Machine Filter, housing and cleaned rear area are completely dry, with no residual moisture.
- The Built-in Machine Filter lies flat in the housing, and the housing is correctly installed in the machine, with no looseness or trapped debris.
- All paper towels, used alcohol wipes, paper fragments and other items left inside the machine have been removed.
After completing these checks, close the top cover and reconnect power. Follow the normal operating procedure to check homing and exhaust airflow. Resume processing only after confirming that everything operates normally.
Once cleaning, drying and reinstallation are complete, you may reset the Built-in Machine Filter maintenance timer on the maintenance page. Do not reset it before maintenance has been completed.