TOOCAA Laser Module Installation / Removal Tutorial
TOOCAA Laser Module Installation Tutorial
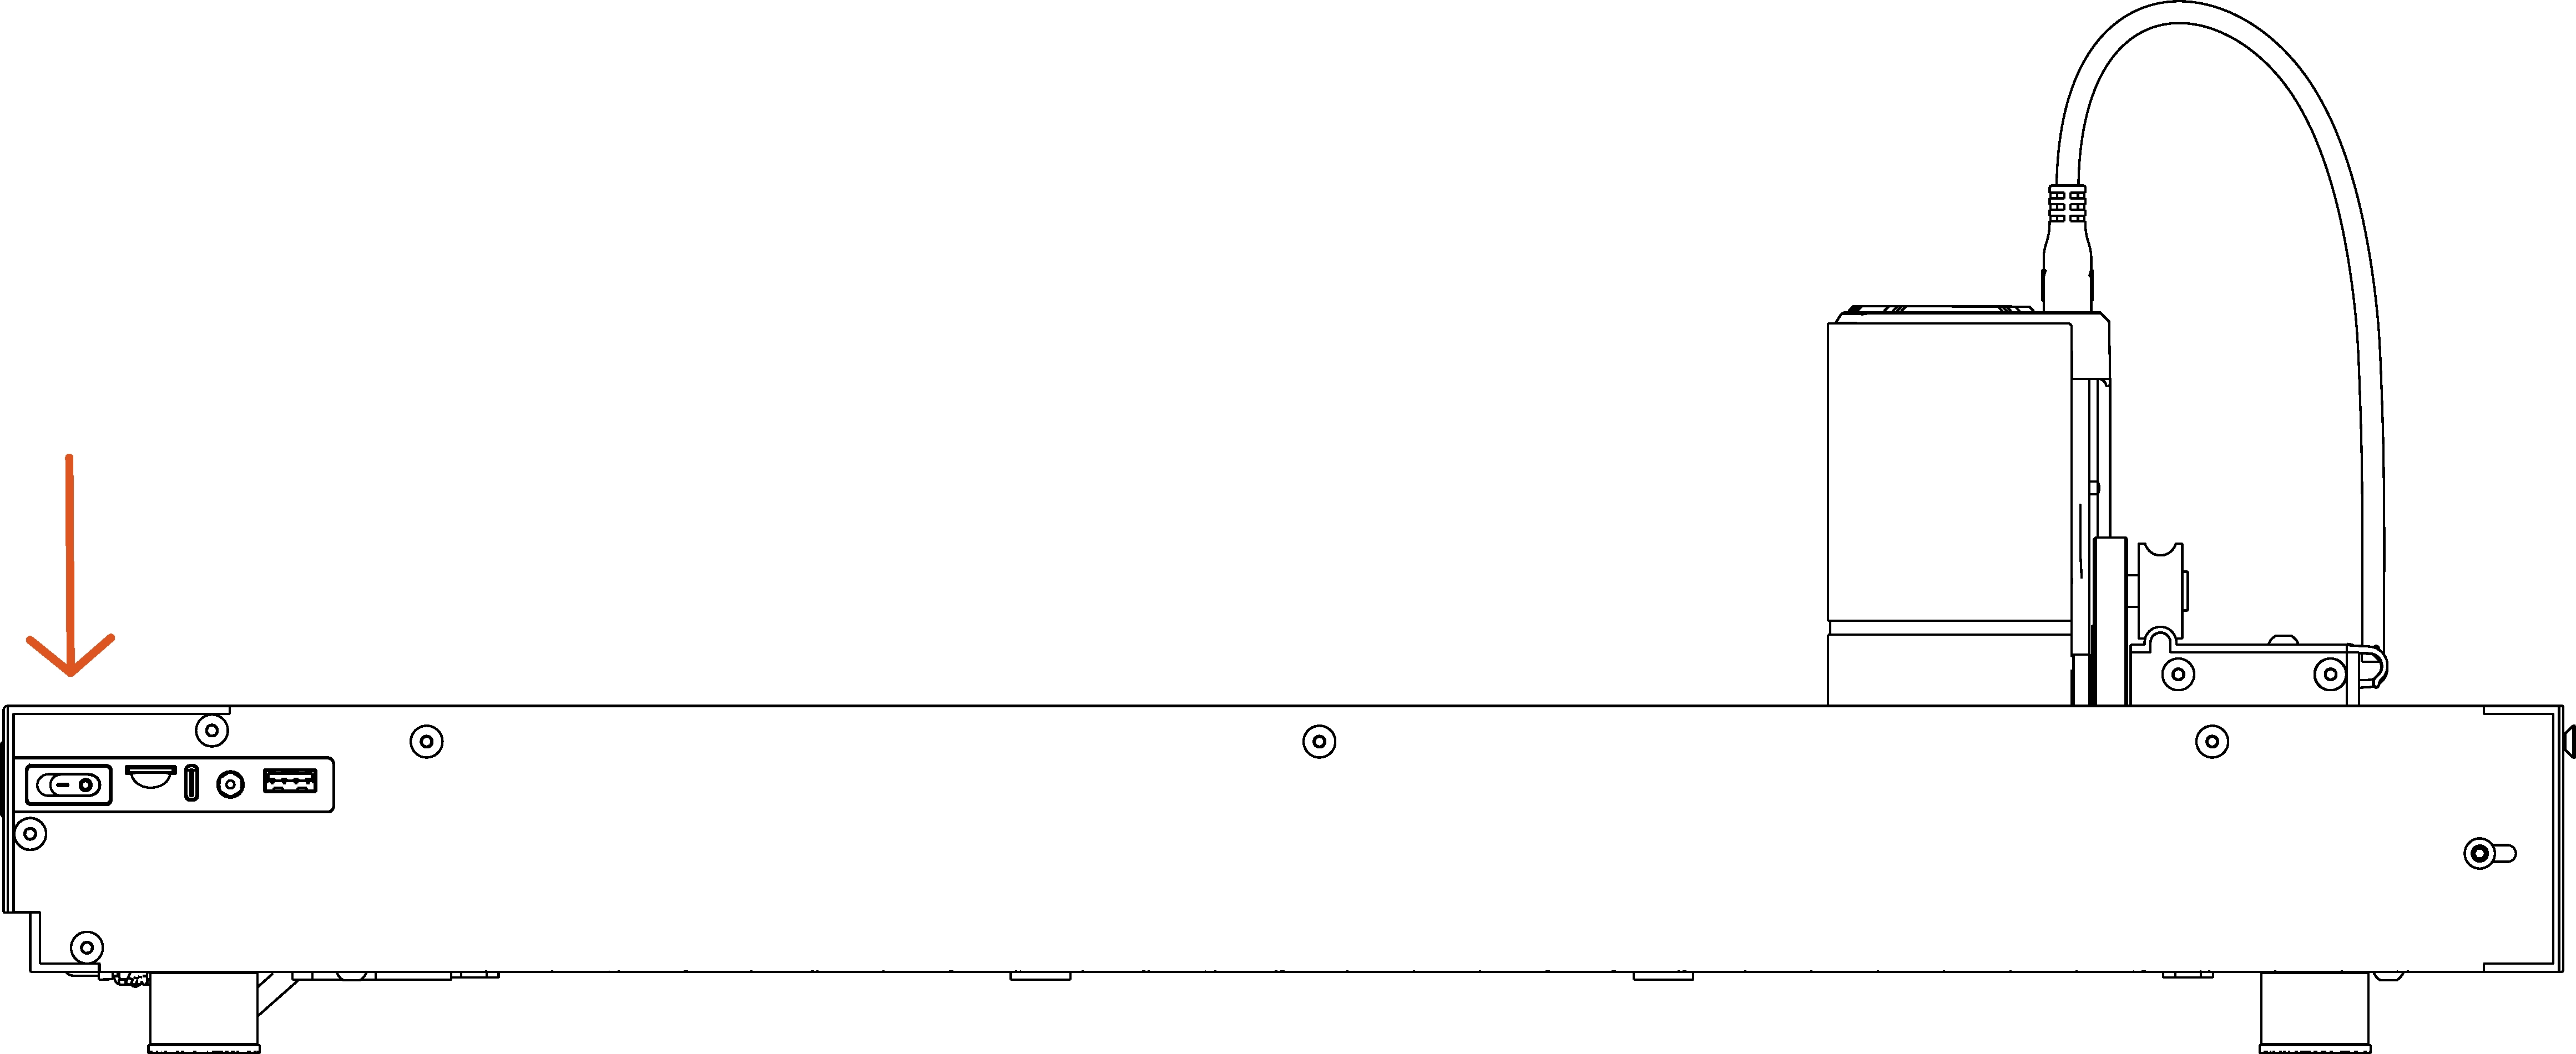
Step 1 Turn off the machine power.
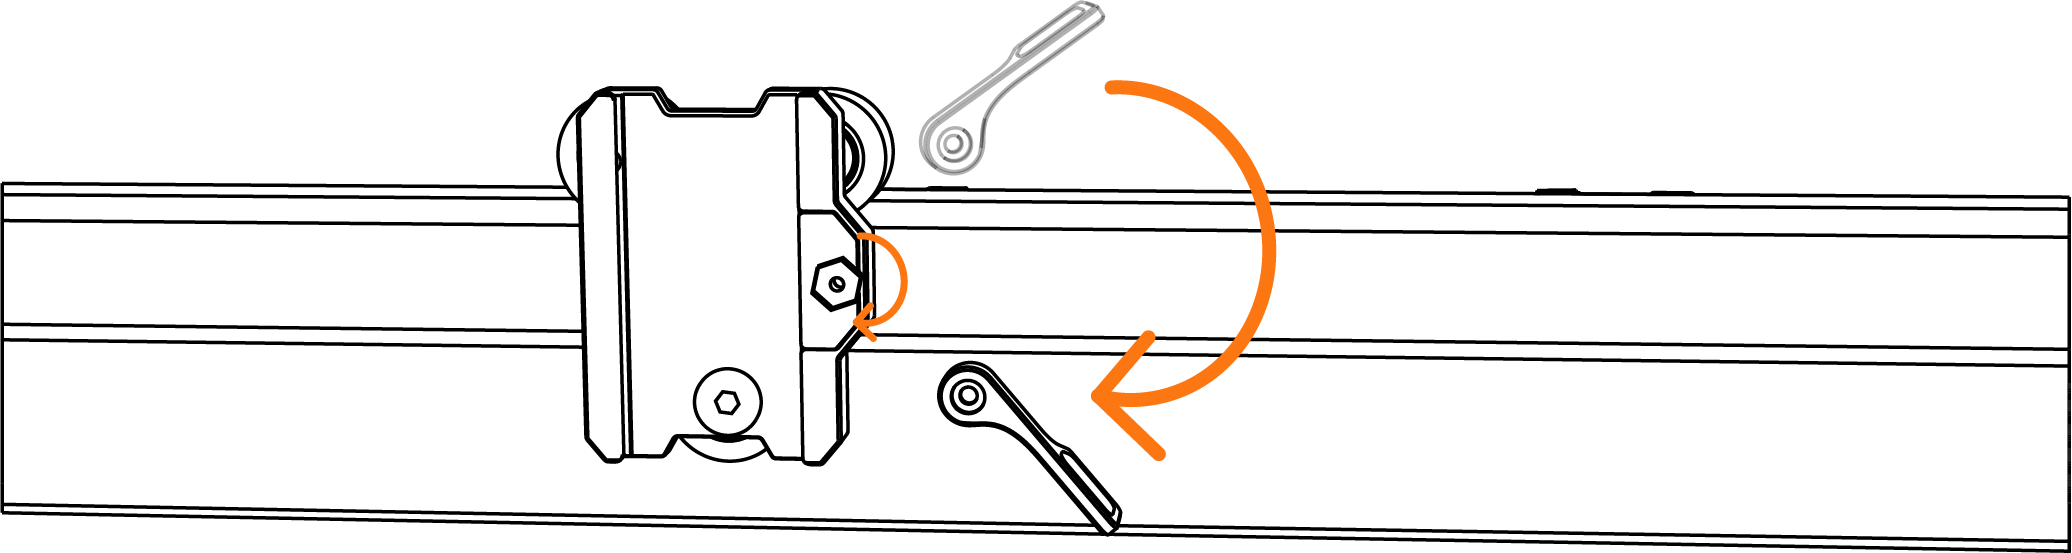
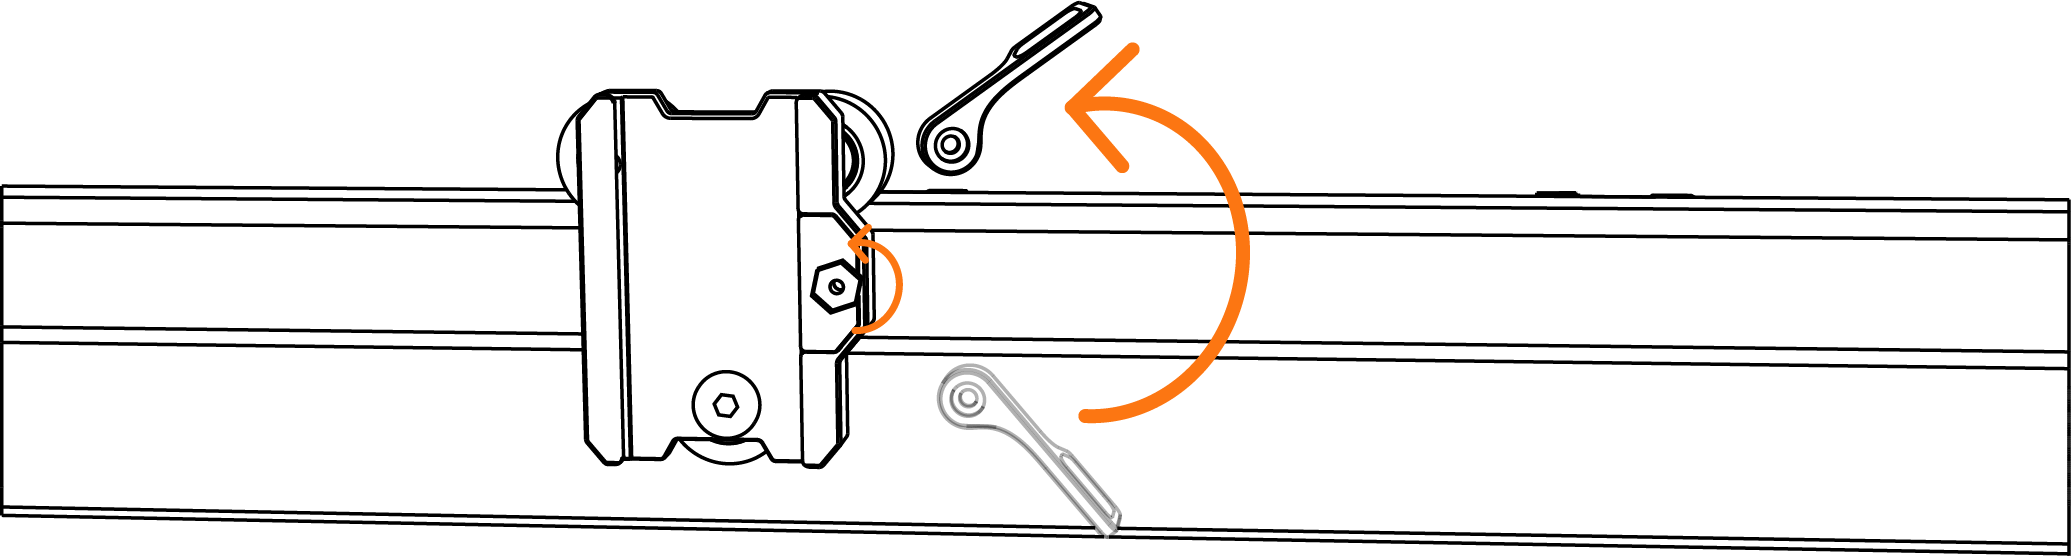
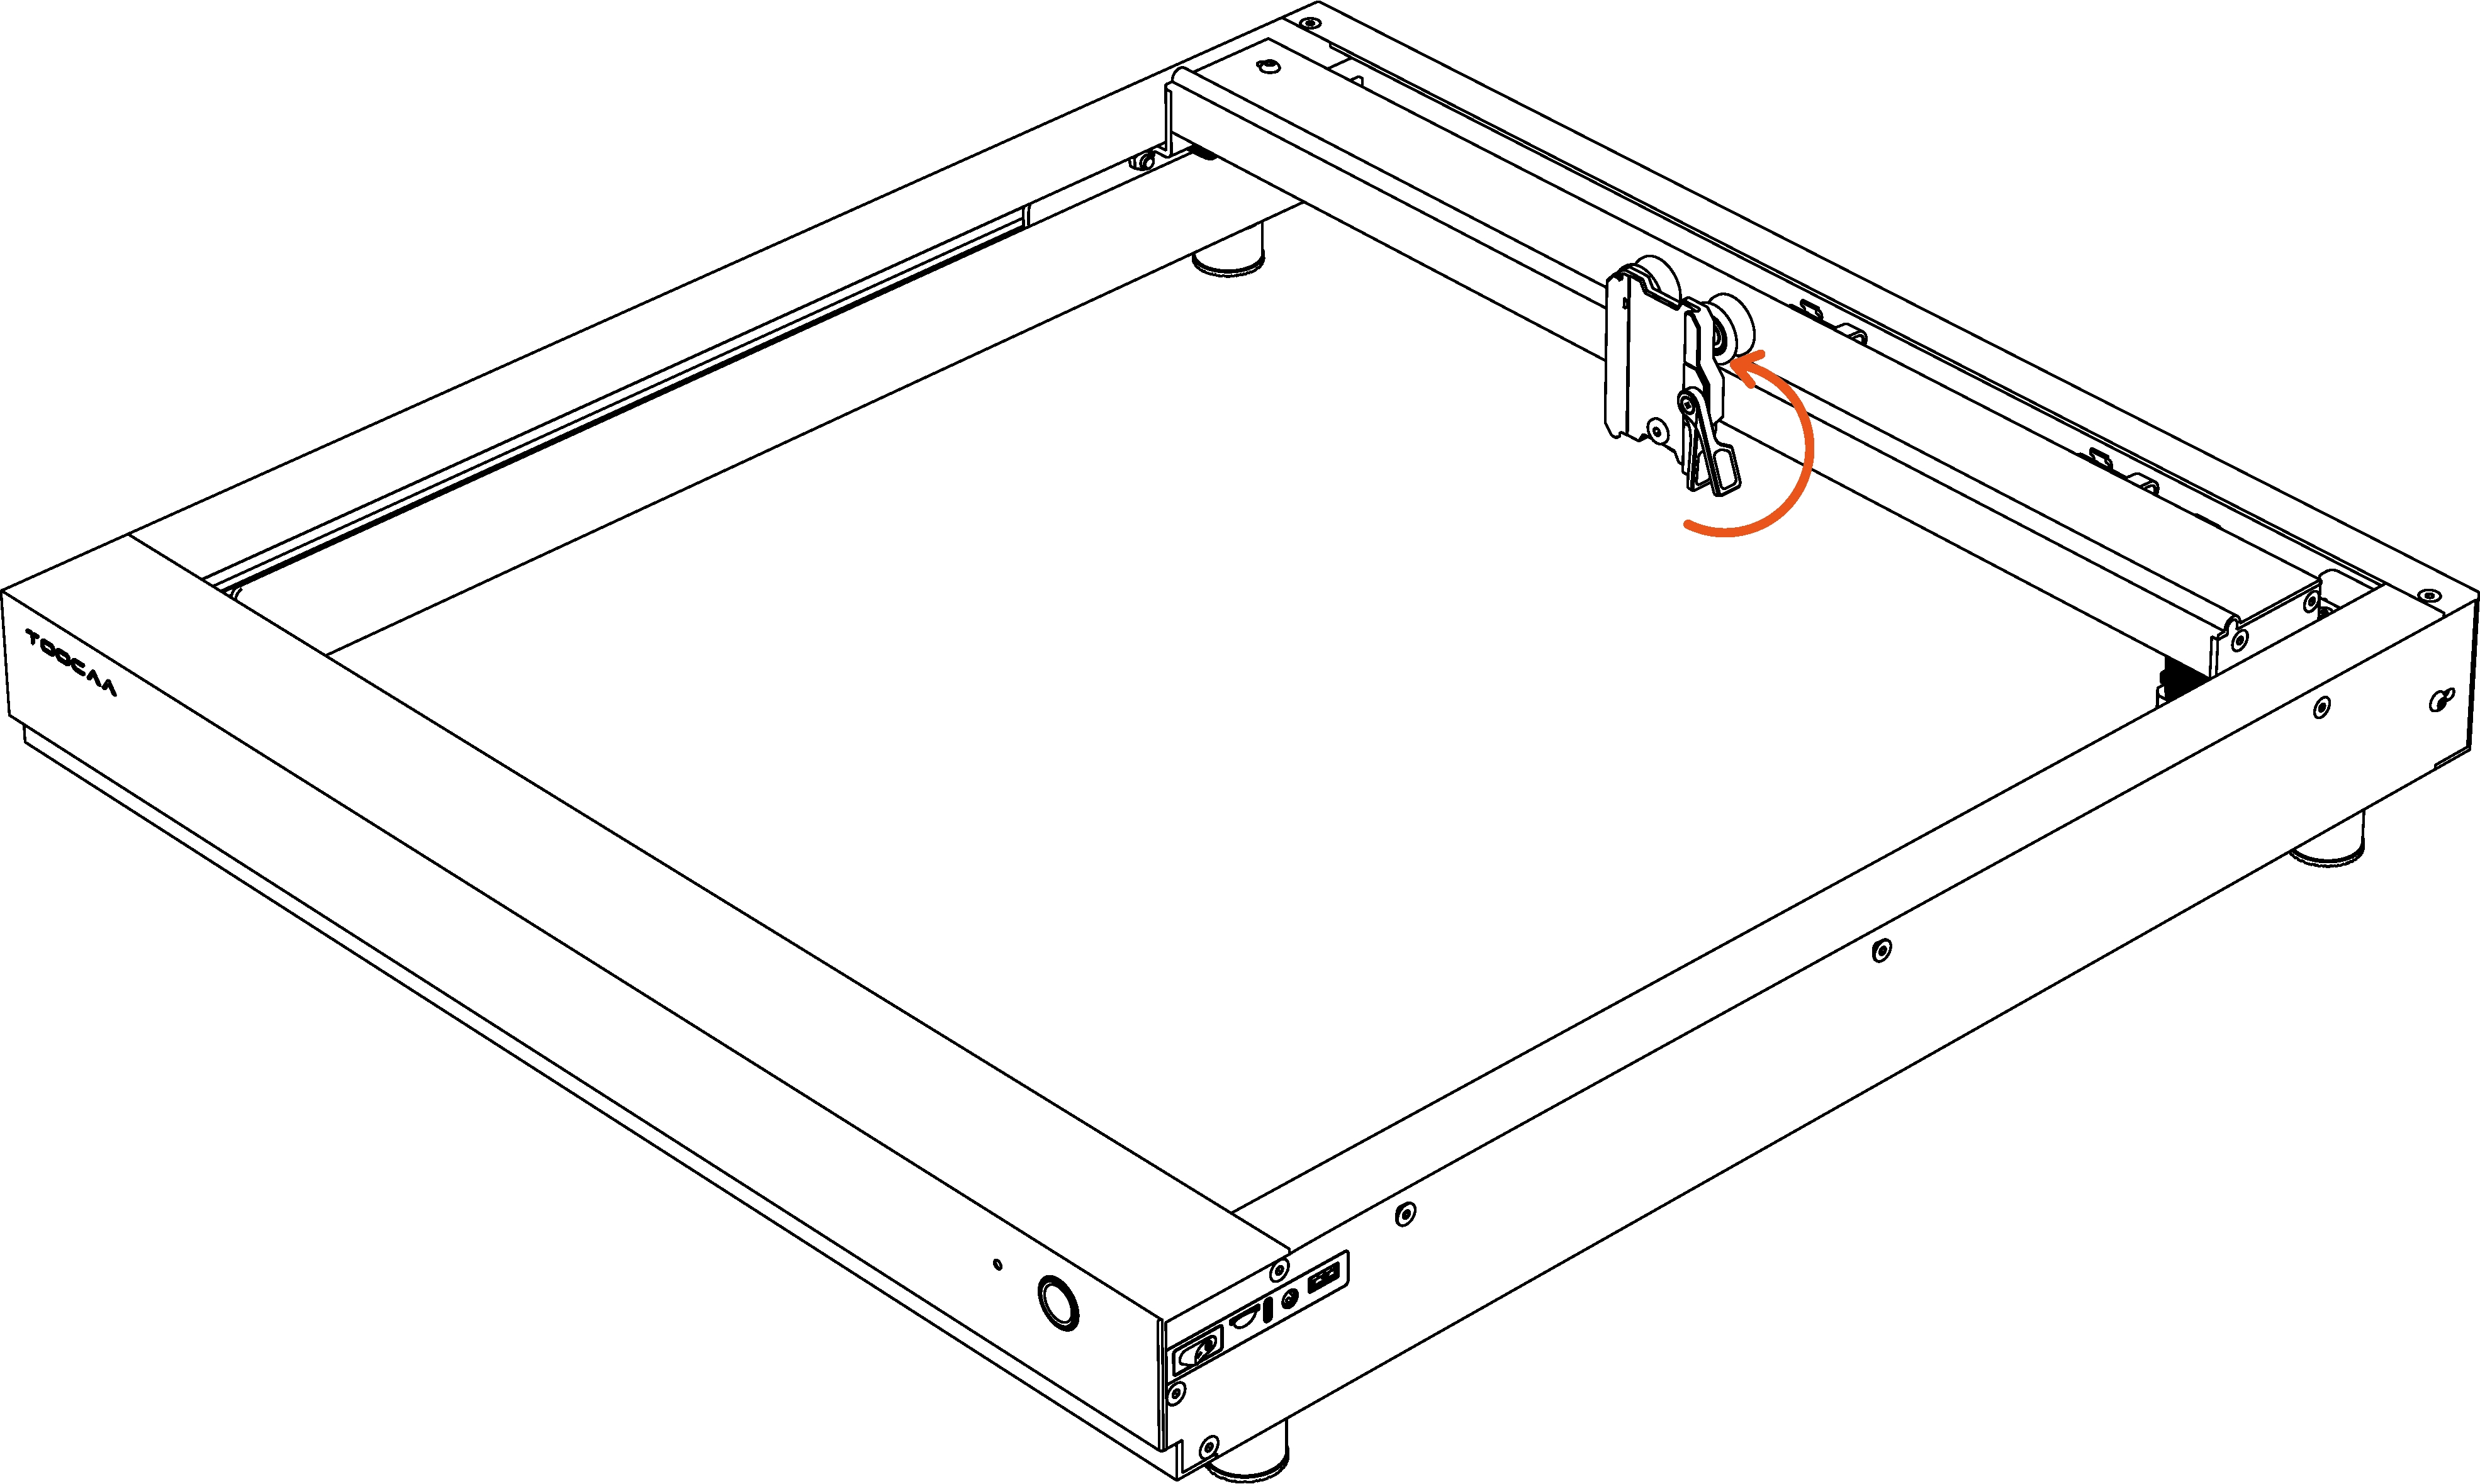
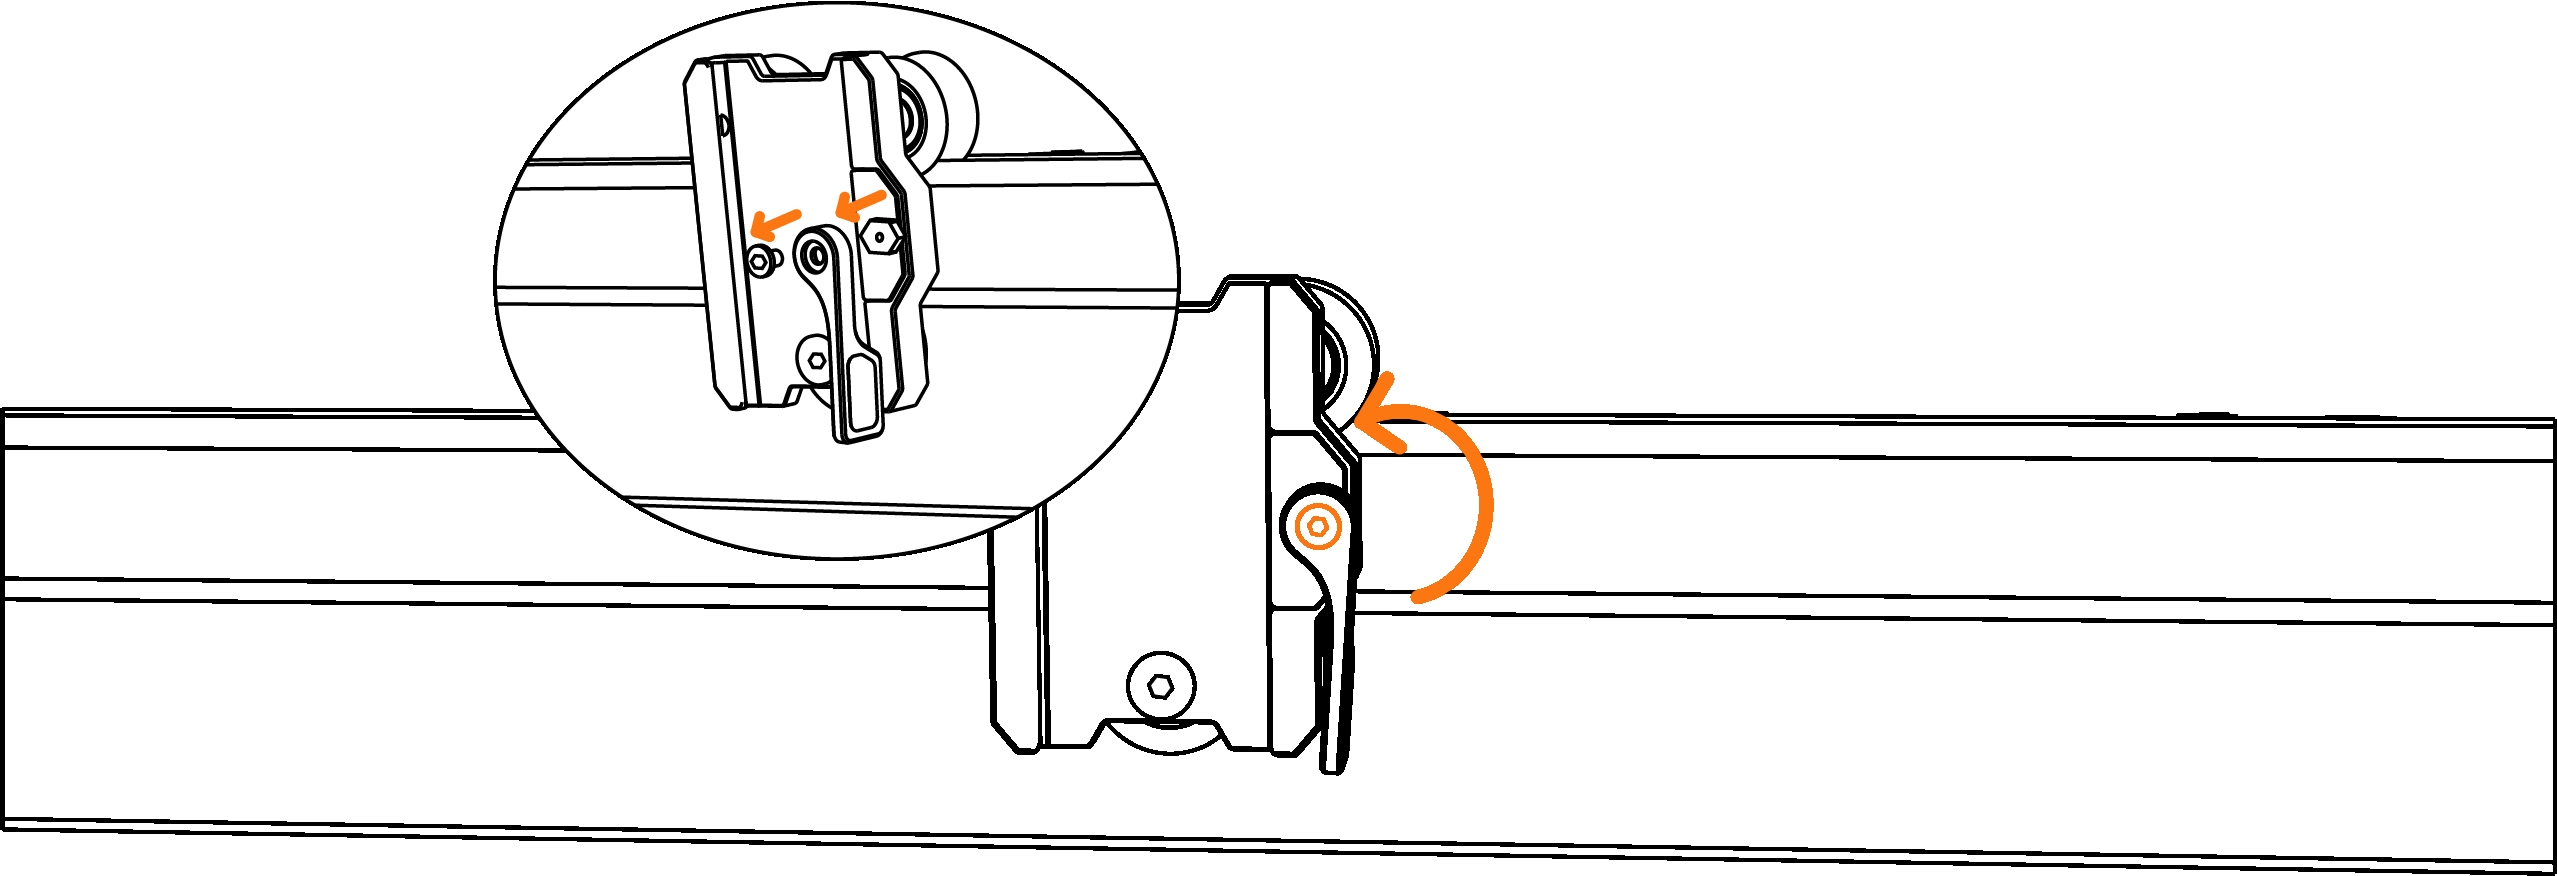
Step 2 Pull the tool lock arm upward to open the X-axis motion assembly.
Step 3 Move the laser module down along the carriage.
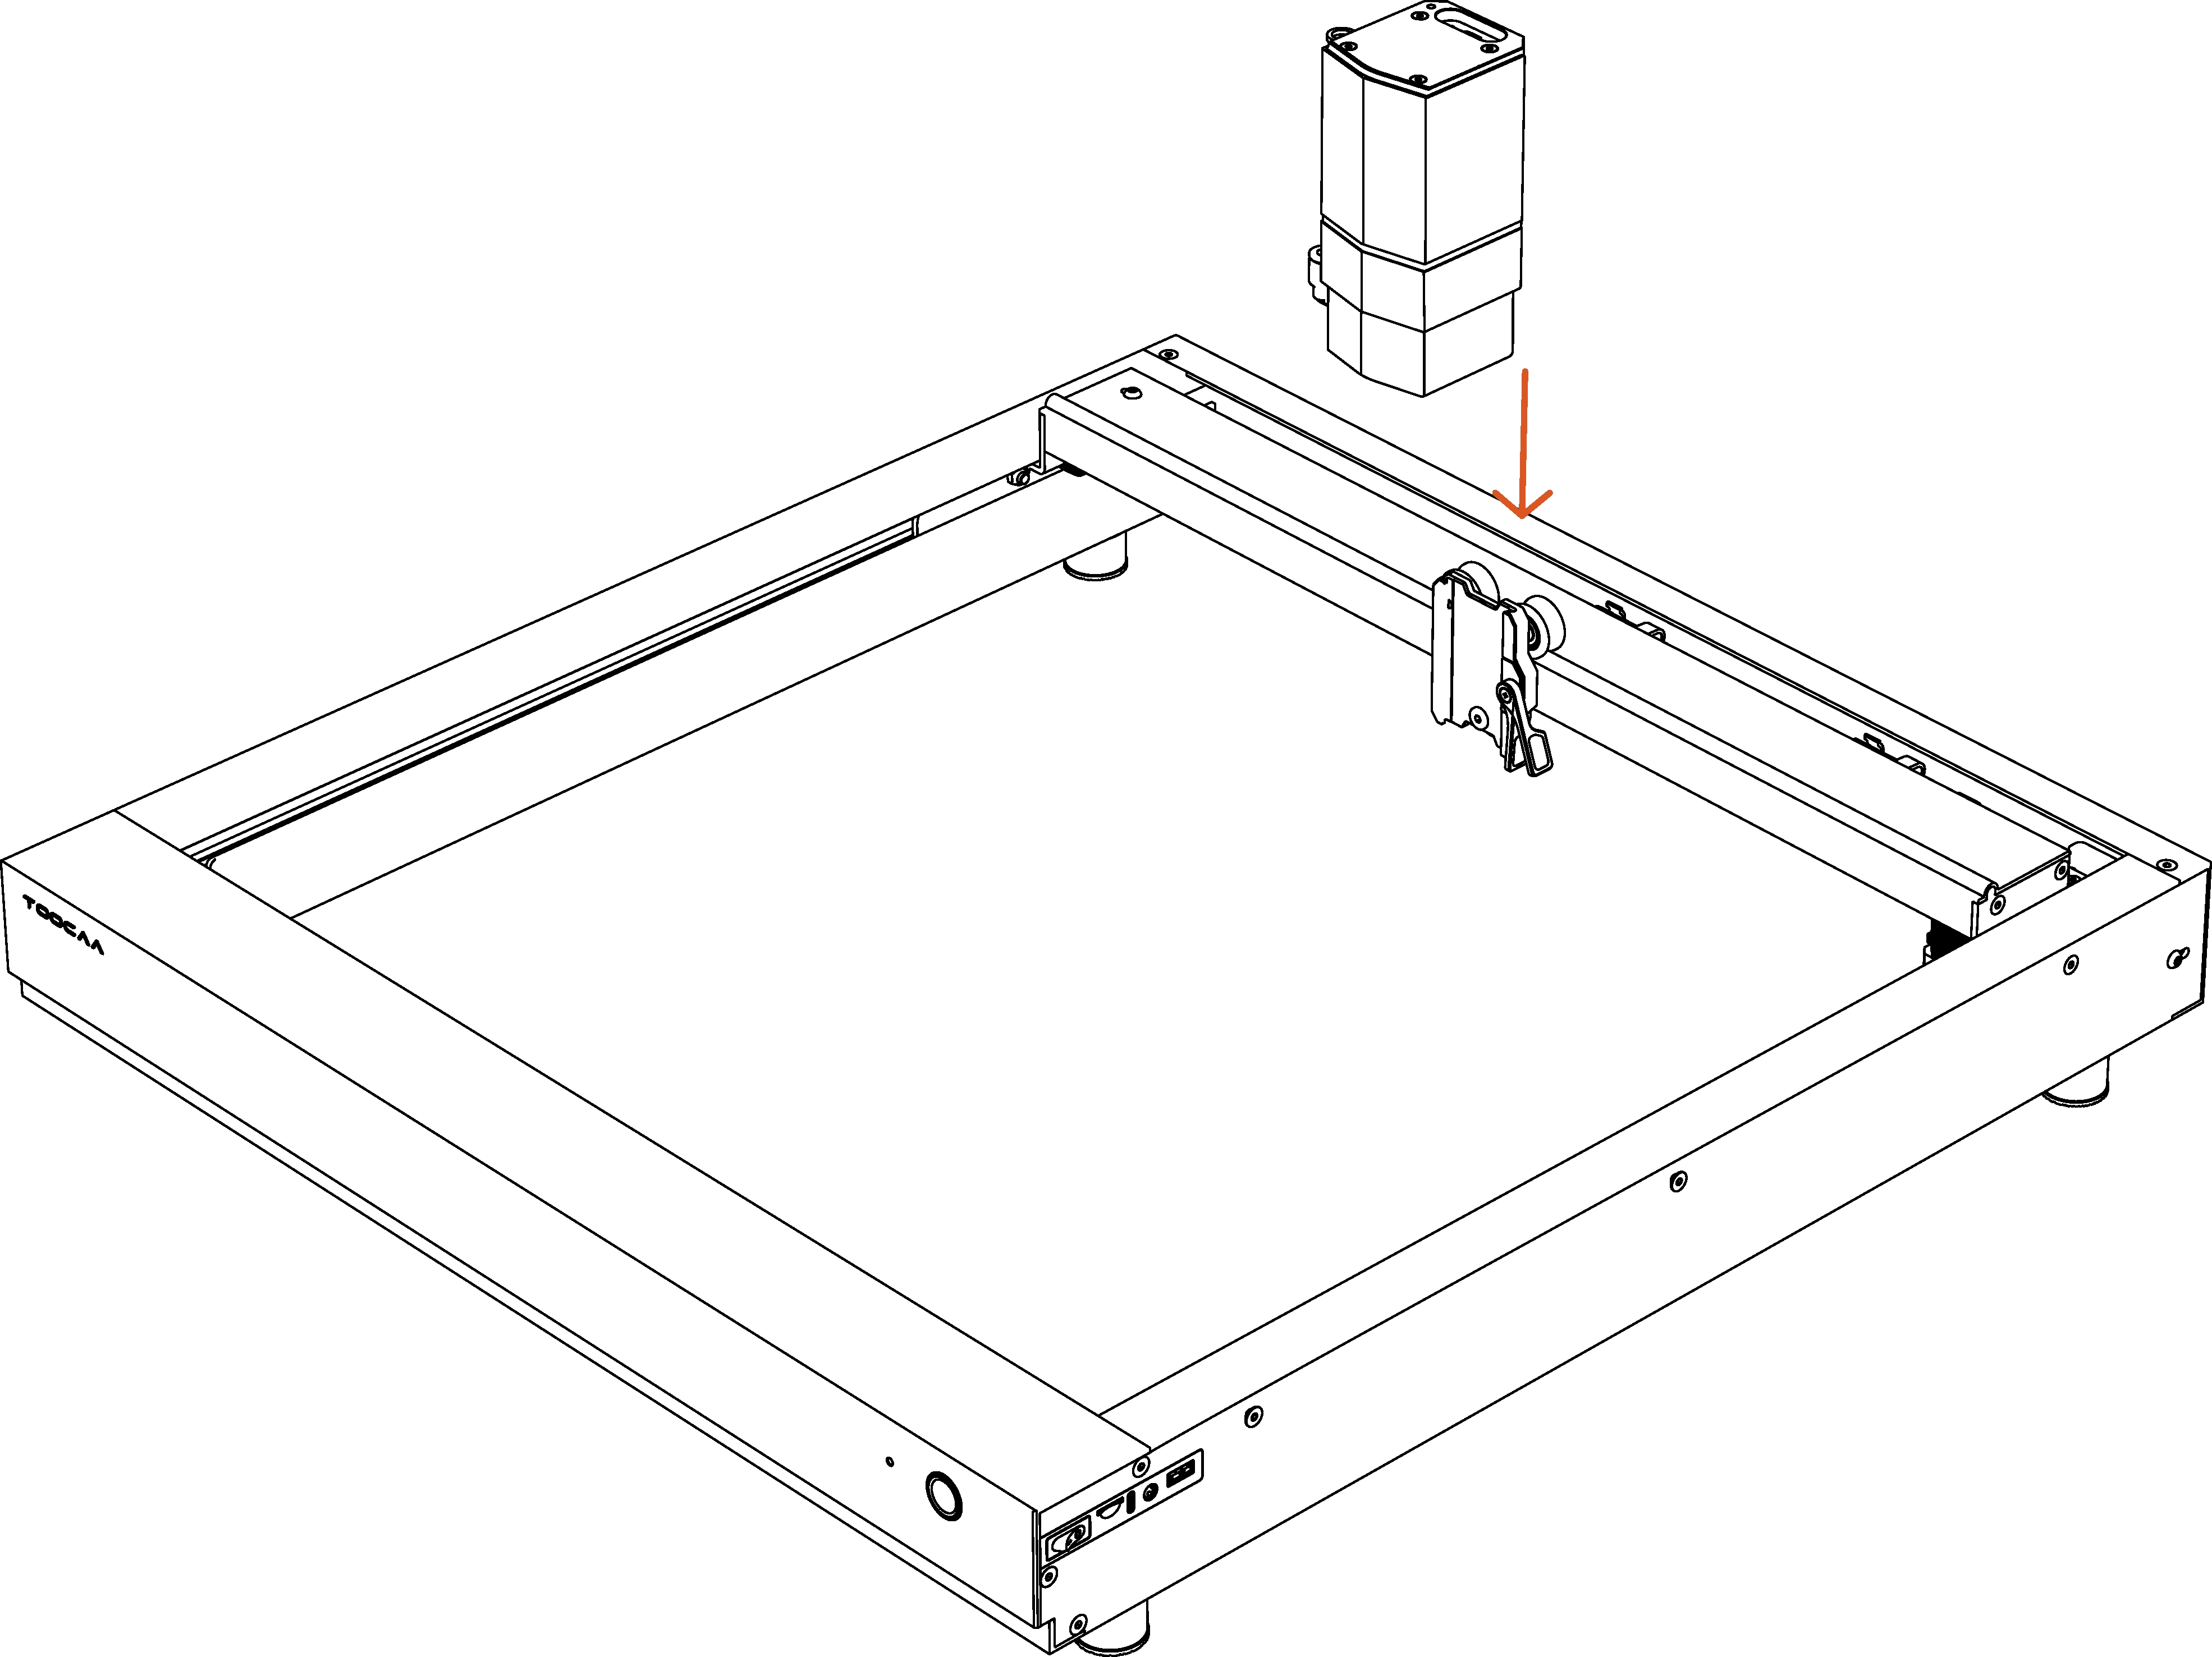
Step 4 Press the tool lock arm down to secure the laser module.

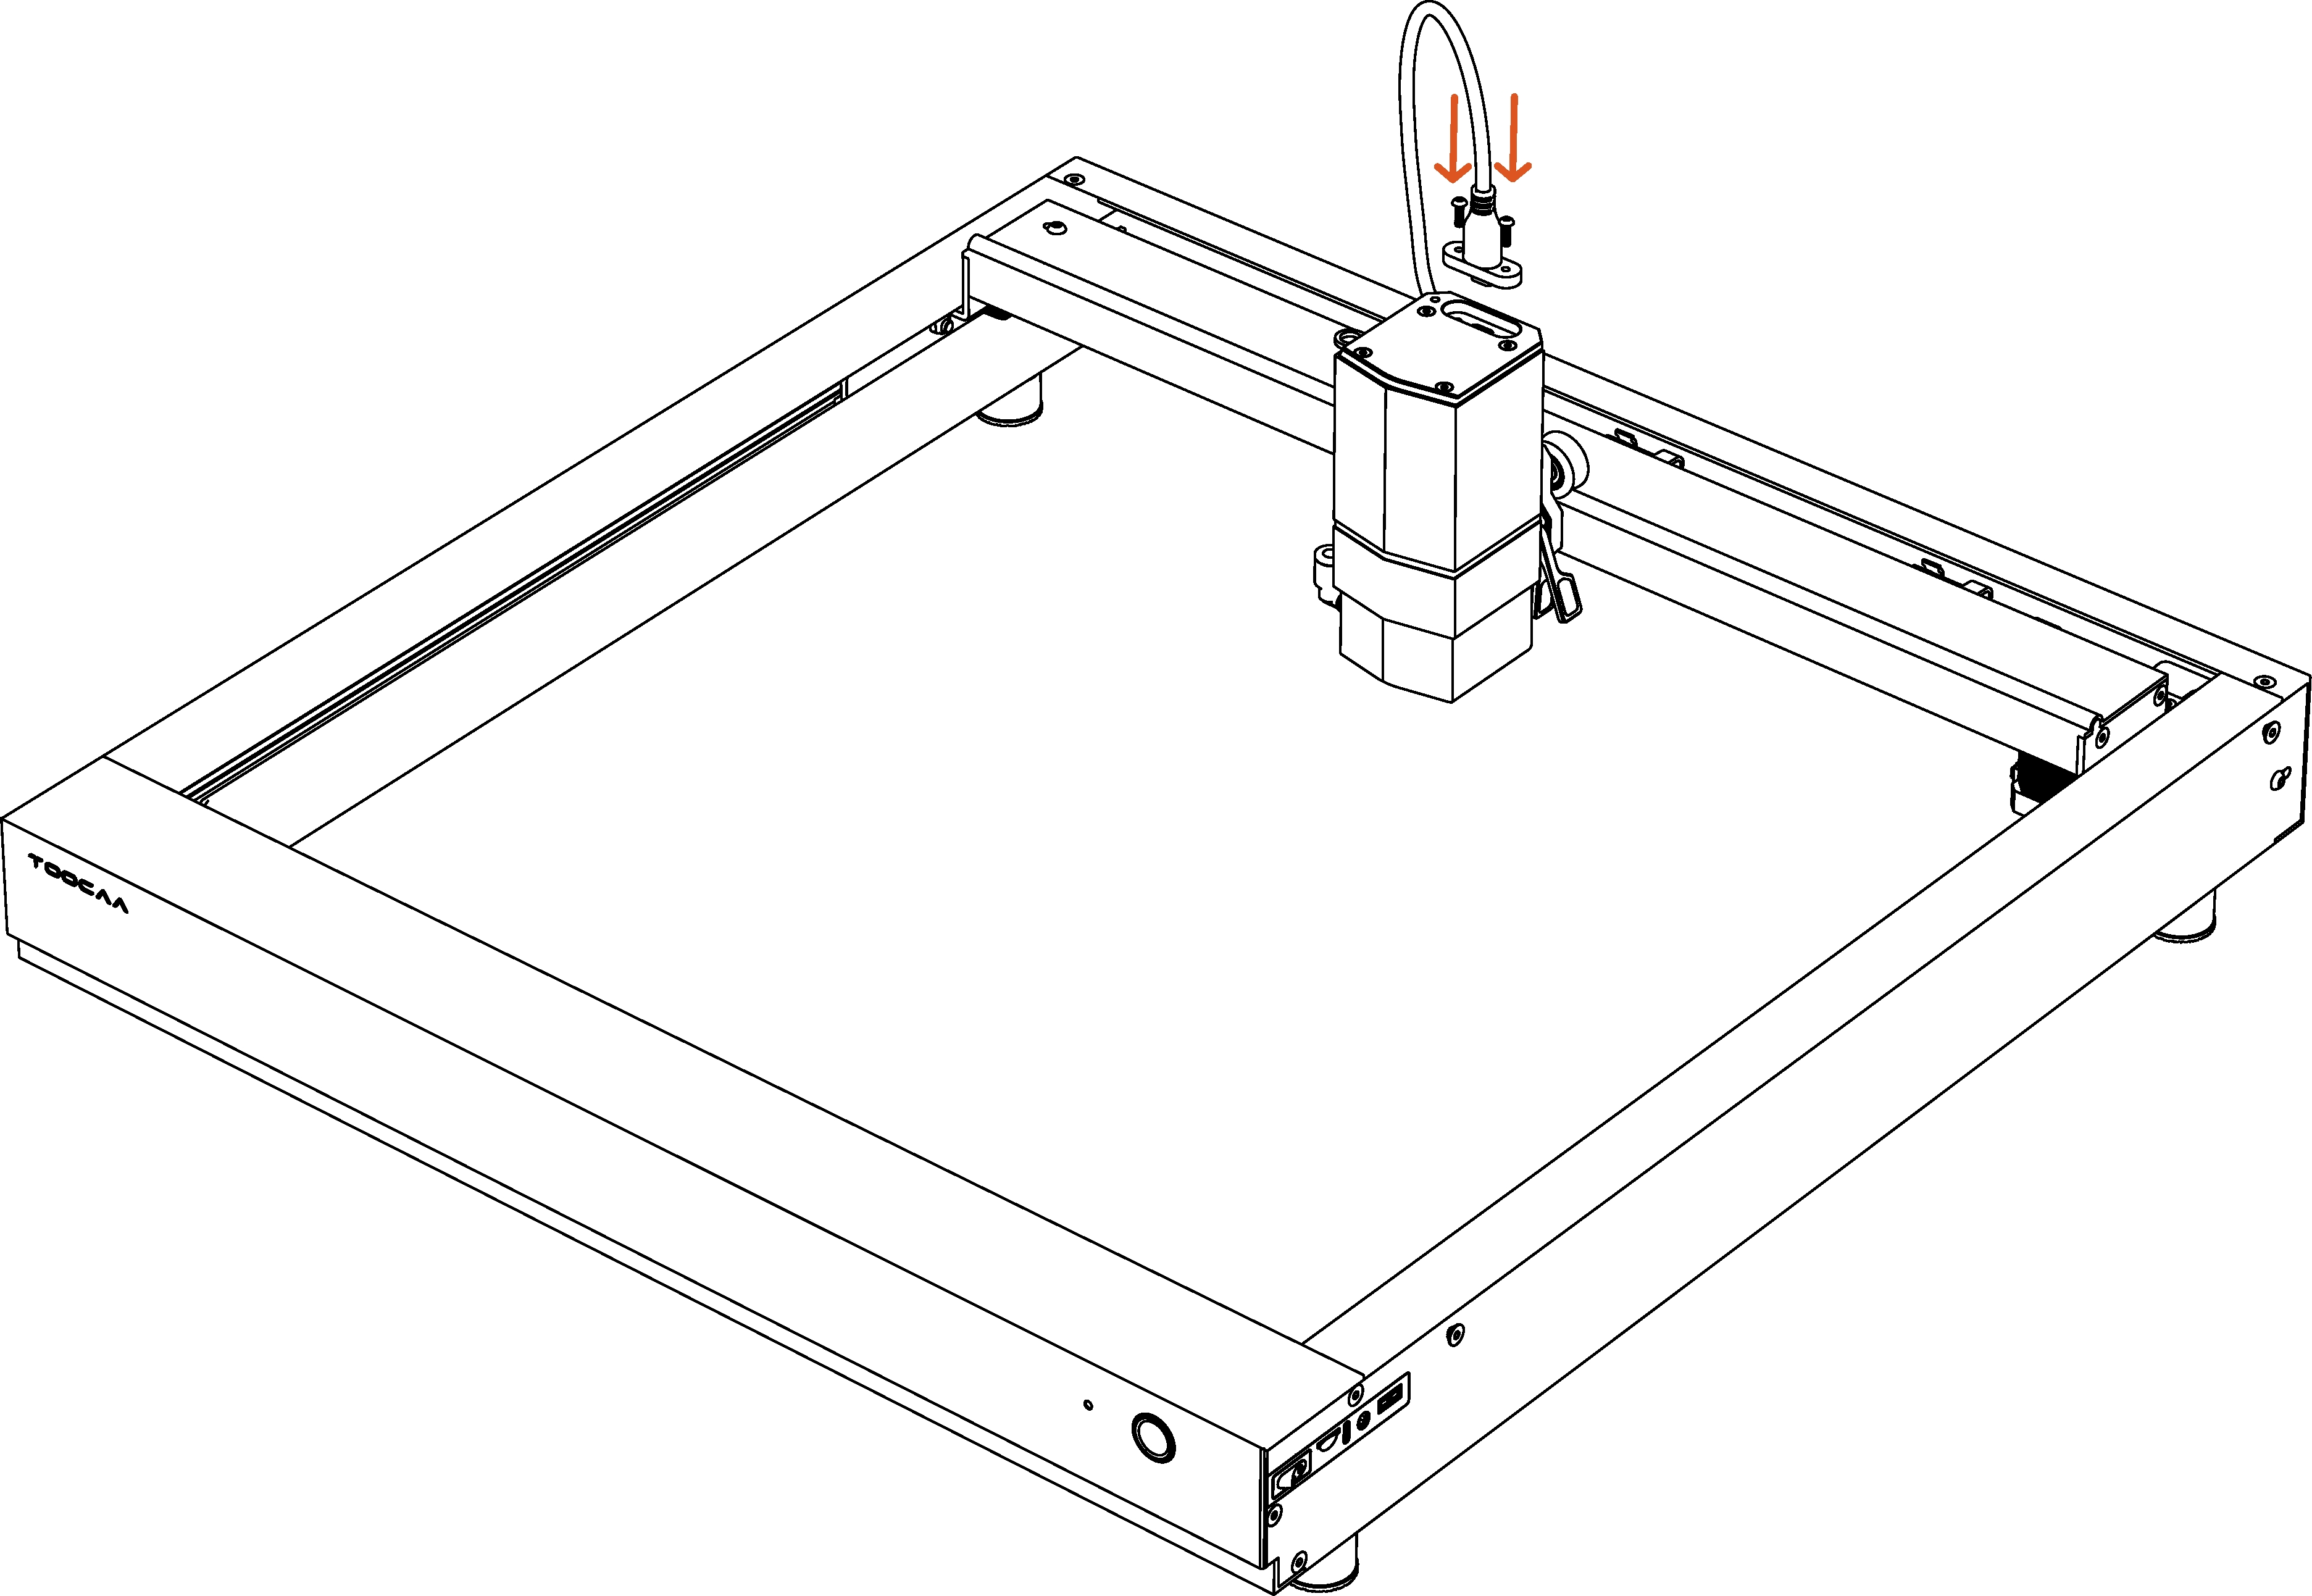
Step 5 Connect the USB signal cable and tighten the screws.
TOOCAA Laser Module Removal Tutorial
Step 1 Turn off the machine power.

Step 2 Remove the USB signal cable after unscrewing the screws.

Step 3 Pull the tool lock arm upward to open the X-axis motion assembly.
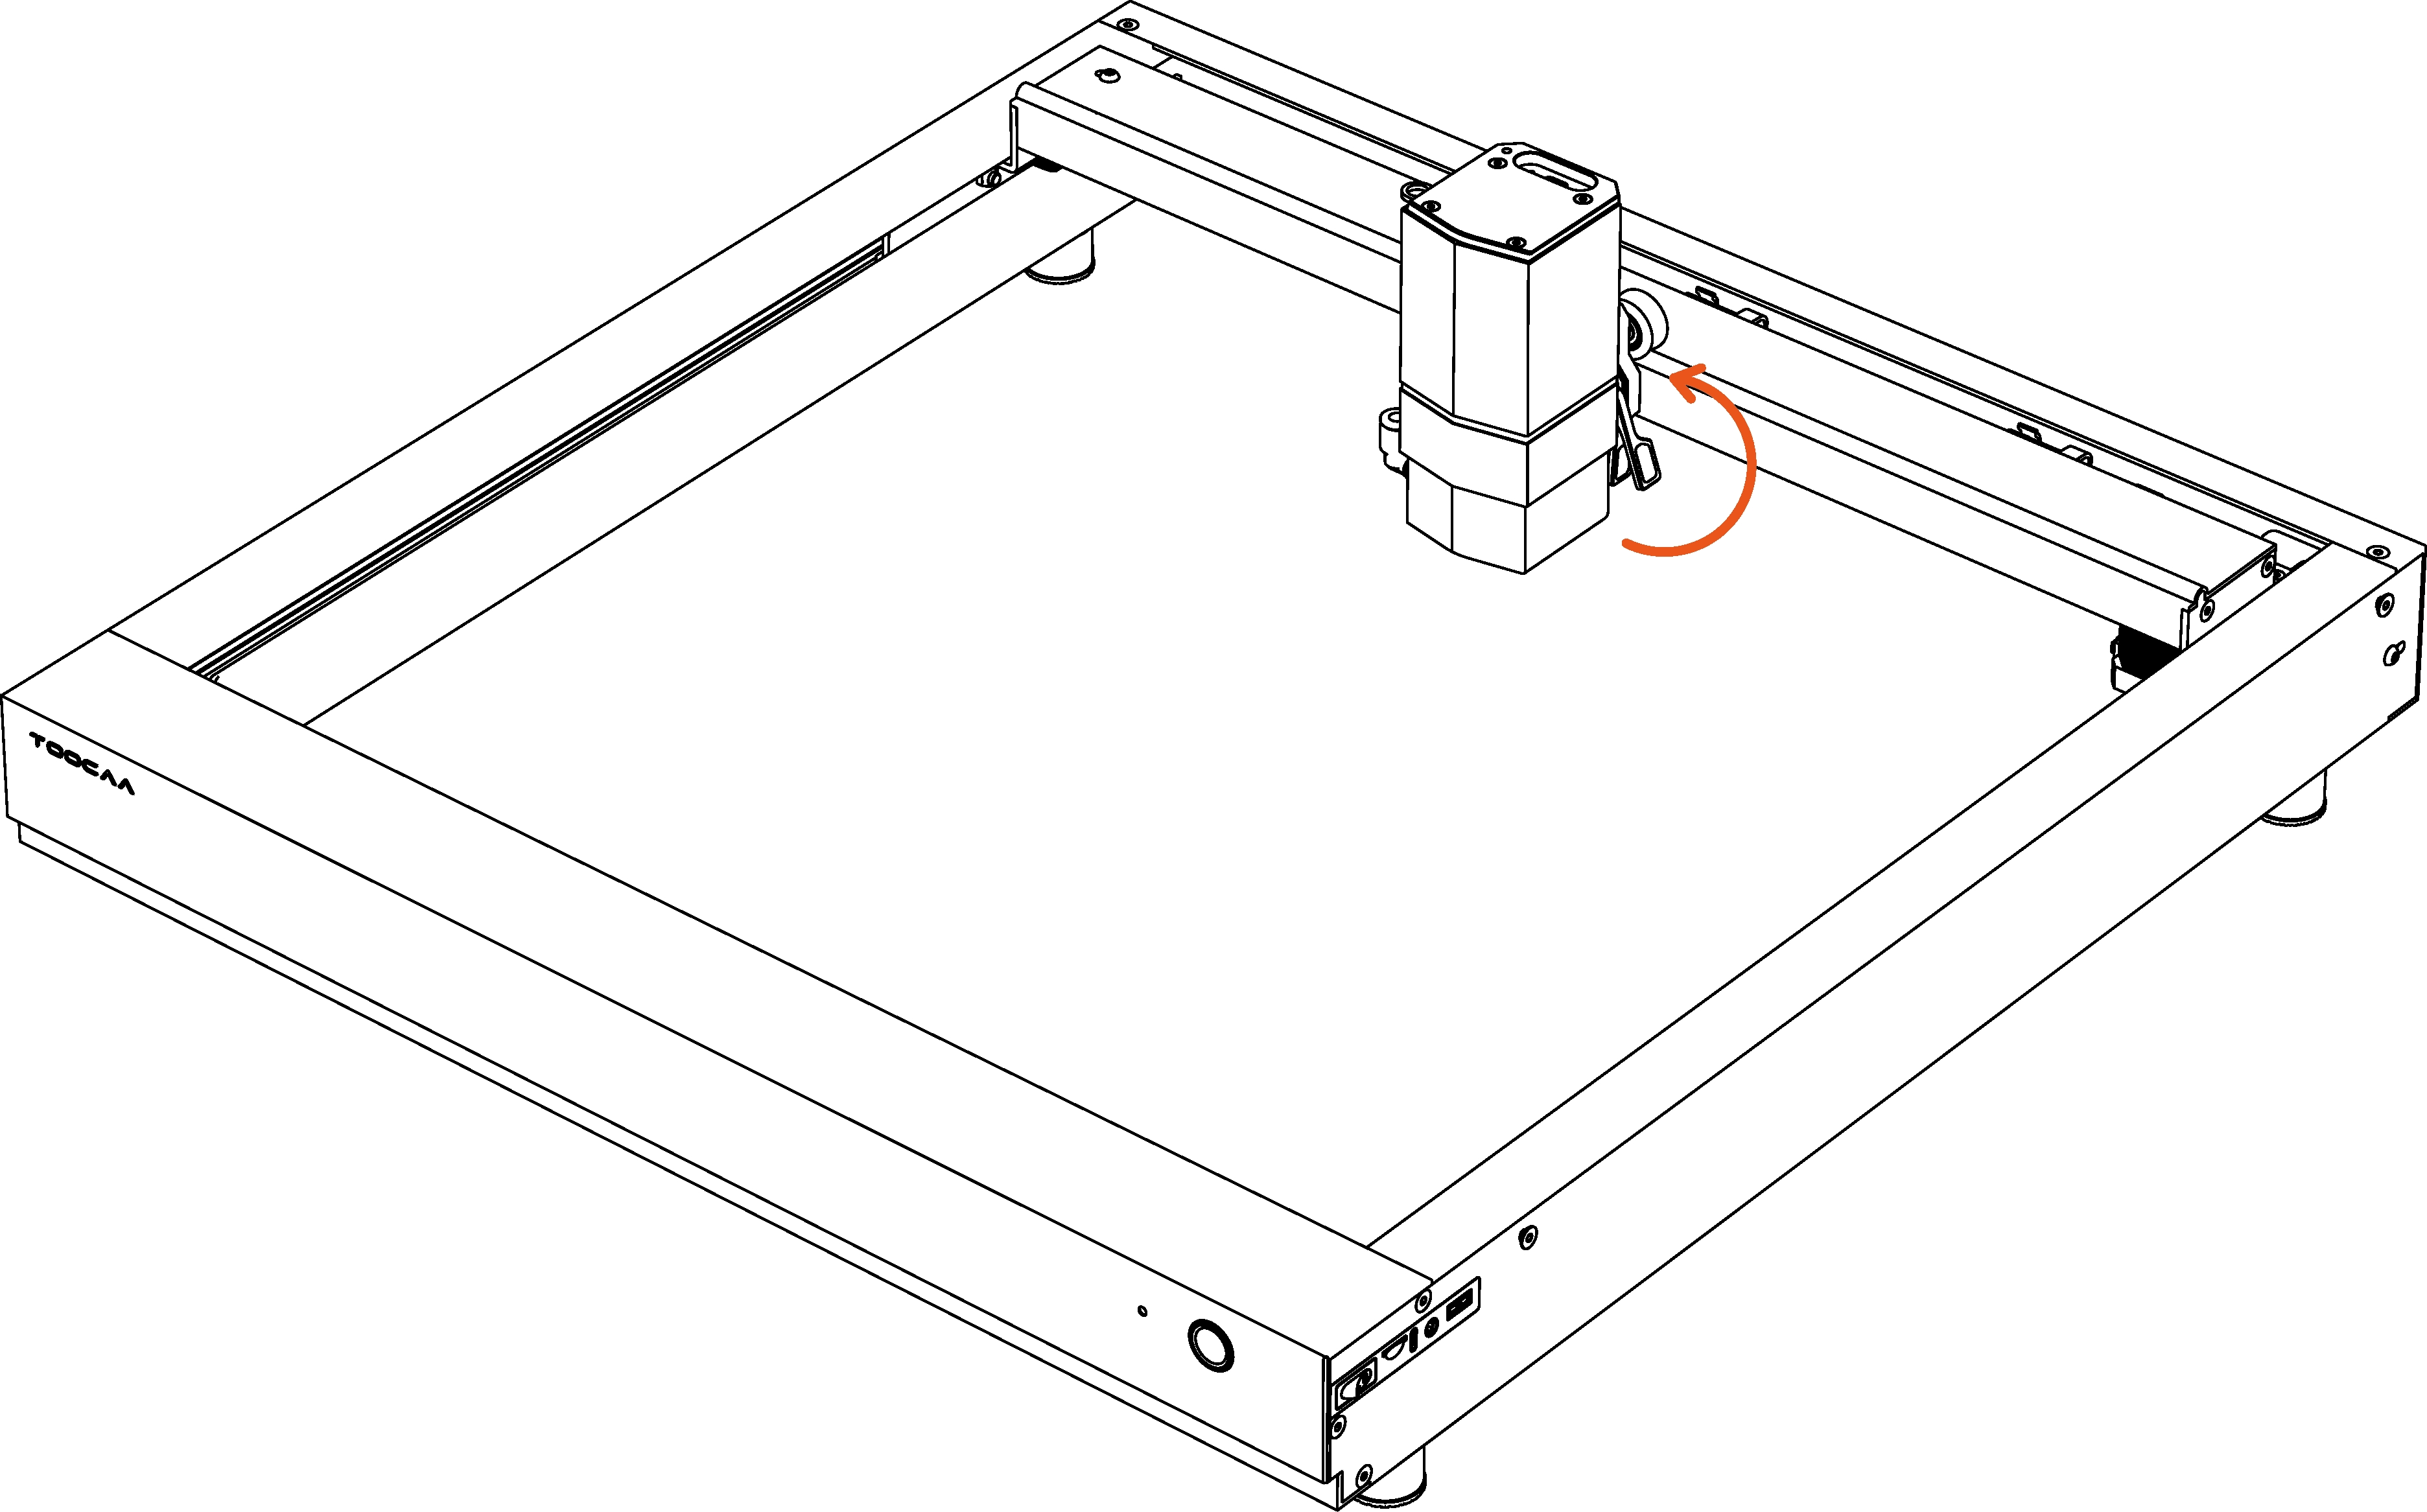
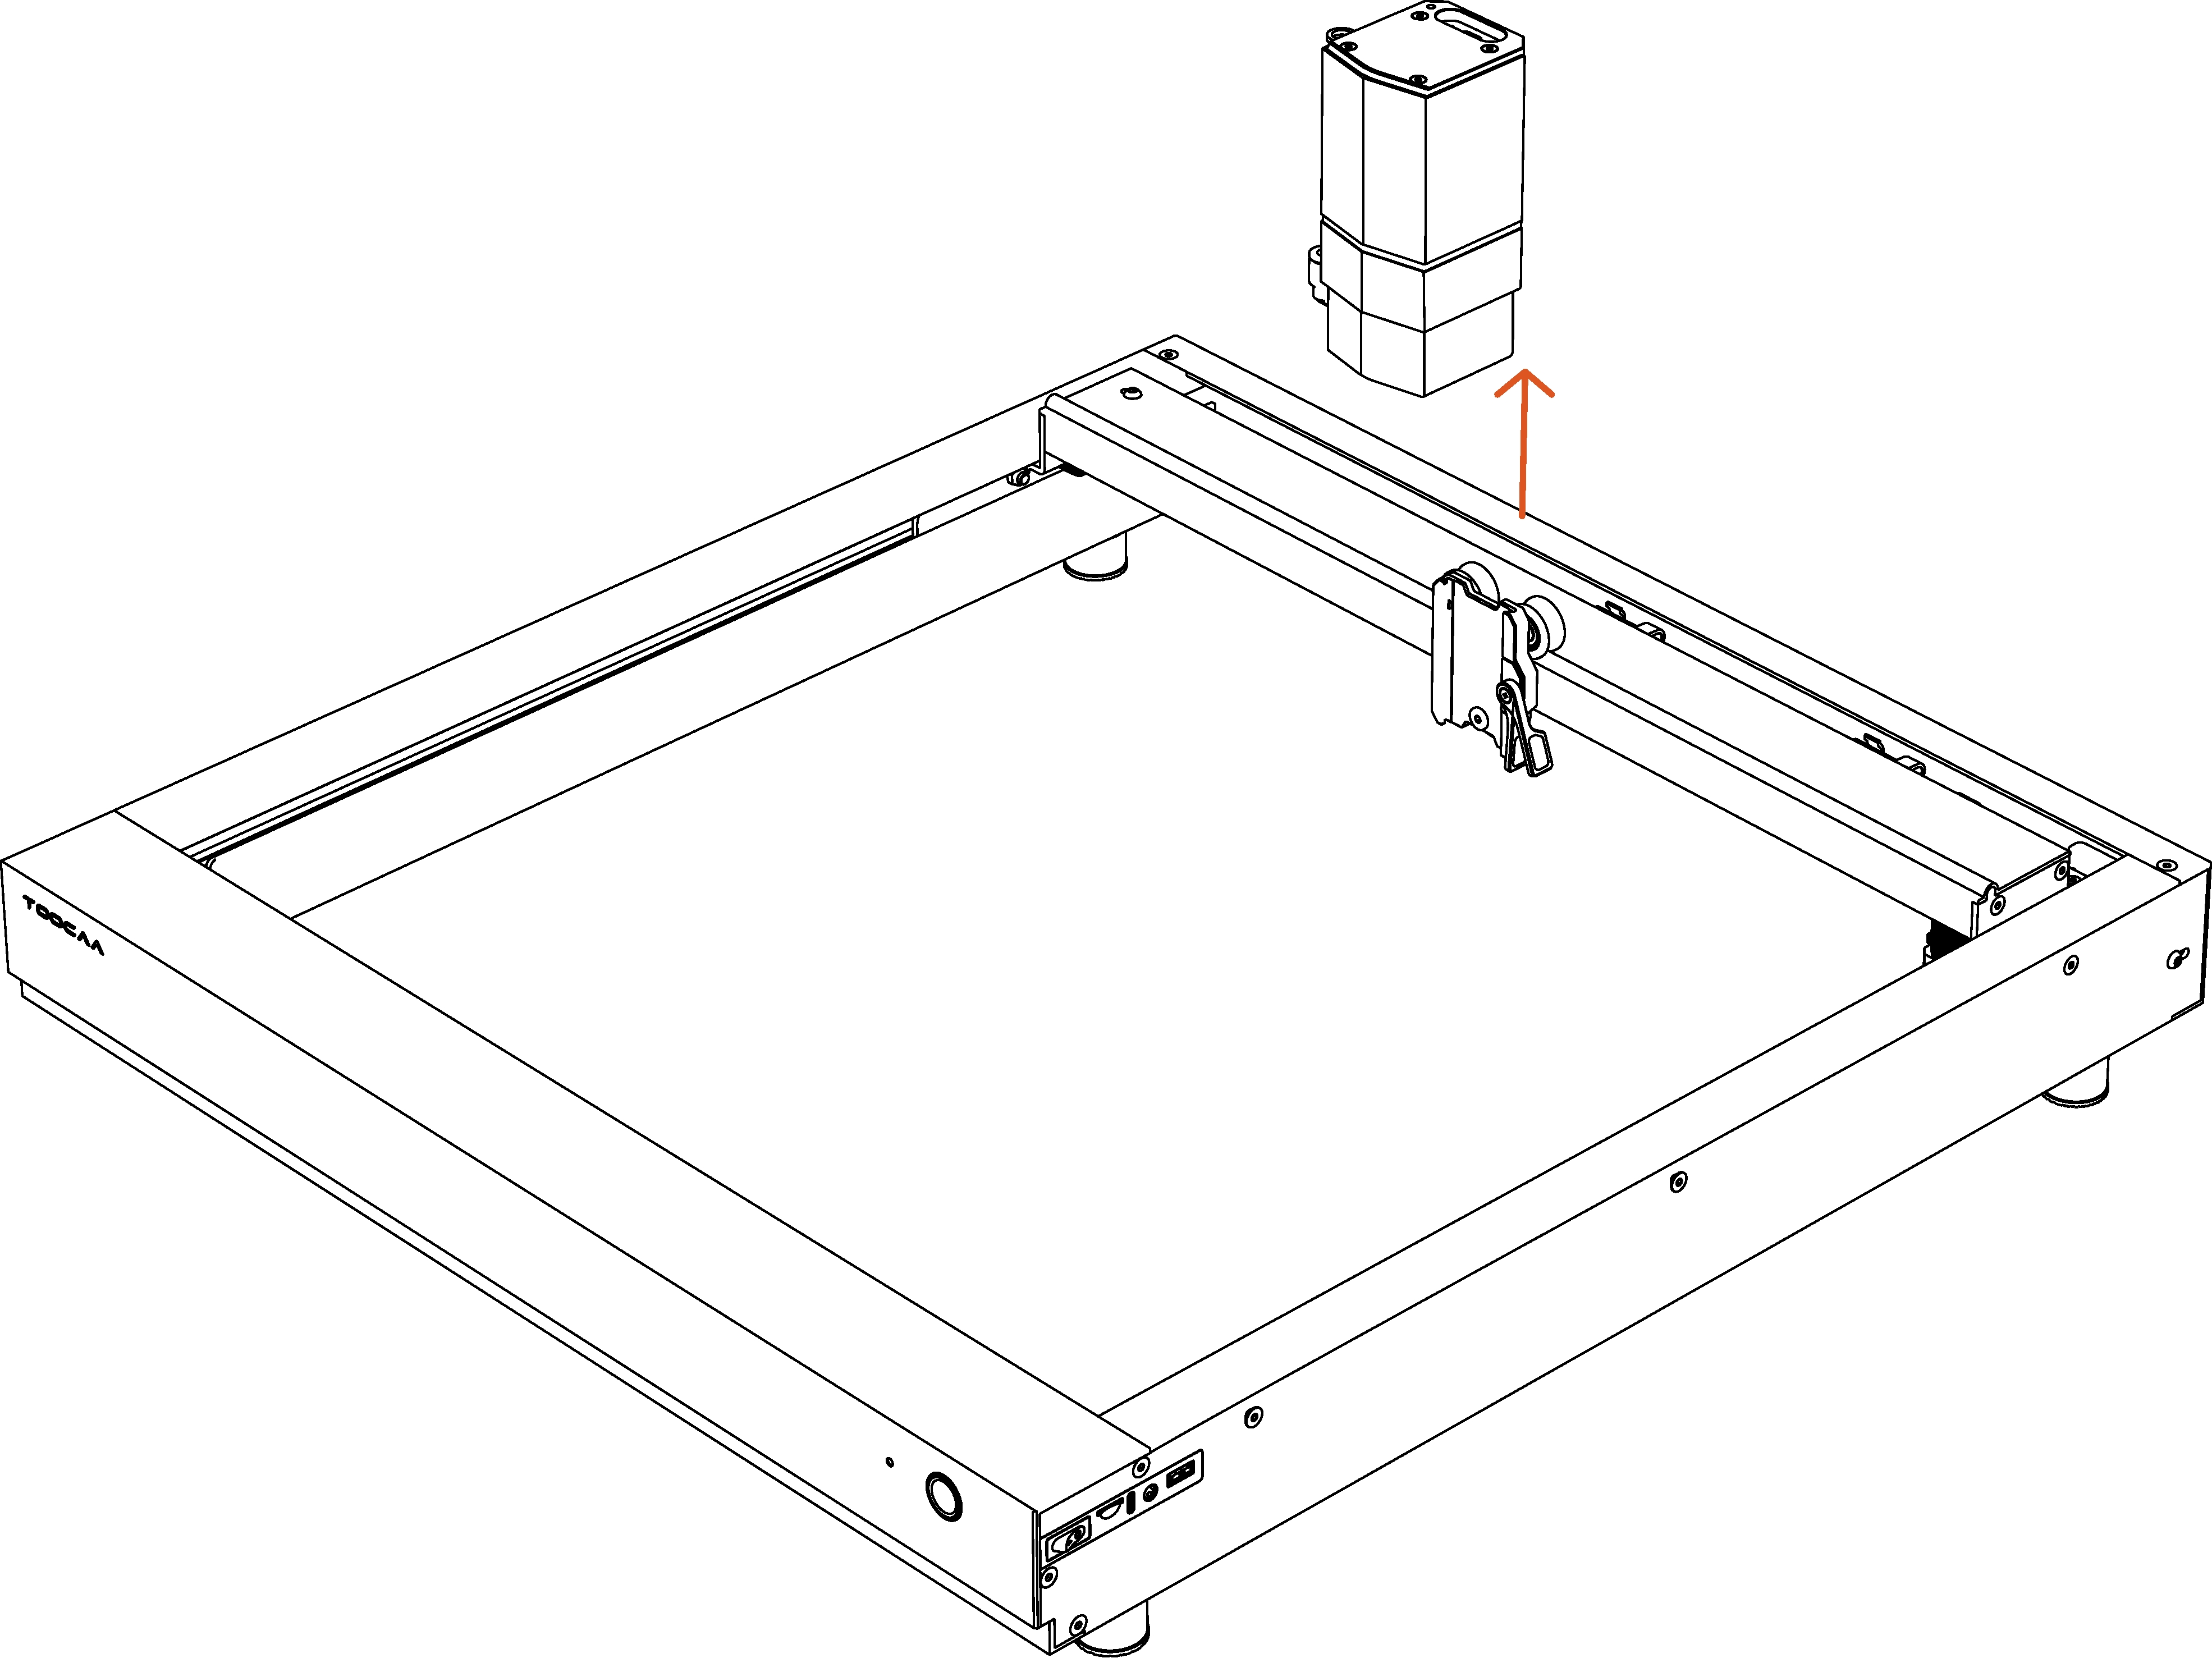
Step 4 Slide the laser module upward along the carriage to remove it.
FAQ
1.The laser module cannot be effectively fixed / the laser module is easy to slip
Solution steps:
1.Take out the laser module.

2.Remove the outer screw and the tool lock arm.
3.Adjust the tightness of the screw inside the tool carriage.
 TIPS:Clockwise adjustment is for tightening, and counterclockwise adjustment is for loosening. Please adjust according to the actual situation.